salad dressing

Why make dressing at home?
  • It only takes a few minutes & it’s easy.
  • It costs less We already have all the ingredients on hand. We use ingredients from the pantry.
  • We use higher quality ingredients  and better support our health.
  • We can use local Saskatchewan products and support our producers and farmers.

Win-win situation

  • For ourselves & our family
  • For our community
Why not buy it?
  • Salad dressings purchased are often loaded with preservatives, so they can last a long time on the shelves.
  • They often contain too much sugar. Often the sugars used are the least expensive, such as high fructose corn syrup and liquid sucrose.
  • The oils are often the cheap varieties, which are of poor quality, like transgenic soybean oil or corn oil 
  • Store-bought dressings also often contain artificial flavors, flavors and colors.
  • They contain unpronounceable ingredients that are best eliminated from our diet.
What is vinaigrette?
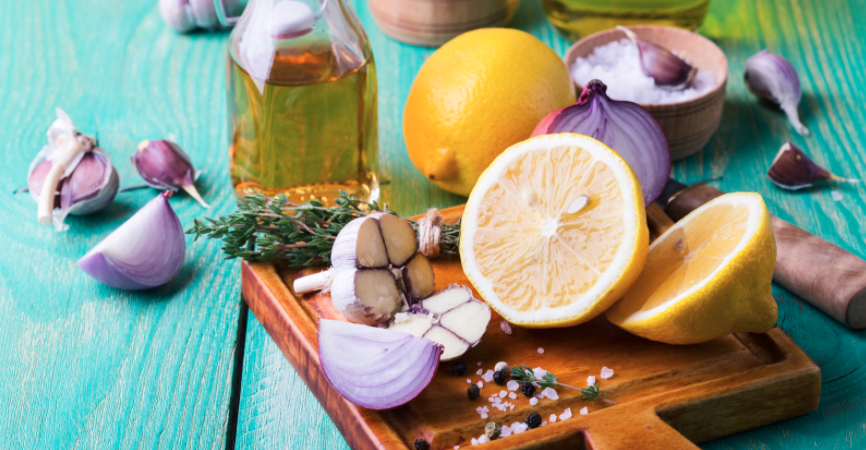
A dressing can have a very wide variety of ingredients, but in it usually contains 3 elements: Oil, an acidifier and an emulsifier (thickener).

  1. Oil:
    • Cameline oil (e.g. Three Farmers of Saskatoon)
    • Flavoured oil  (e.g. Oliv Tasting room of Moose Jaw)
    • olive oil
    • grapeseed oil
    • sunflower seed oil
    • nut oil
    • avocado oil
  2. Acidifier:
    • lemon/lime juive
    • balsamic vinegar (e.g. Oliv Tasting room of Moose Jaw)
    • apple cider vinegar
    • wine vinegar
    • rice vinegar
  3. emulsifier (thickener) – optional

For even more flavour we can add spices and other aromathe.

Many of these ingredients can be purchased online at theses Saskatchewan retailers.

Formula - 3:1

No matter what kind of oil or vinegar you prepare, the proportions are as follows:

  • 3 quantities of oil
  • 1 quantity of acidifier

In a mason jar, add the acidifier and salt / pepper. Close the cap and mix. Add oil and other ingredients to taste. Close the jar and shake vigorously until well blended.

You can keep the rest in the closed jar in the fridge for the next time. If there isn’t quite enough left for next time, no problem – save what you have, add a little oil and vinegar and stir again. The homemade vinaigrette will keep for several weeks in the fridge.

Local ingredients to discover

One of the largest mustard producers in the world is Saskatchewan. About 80% of Canadian mustard comes from Saskatchewan. Mustard is perfect for making a creamy dressing. It stabilizes the oil and vinegar emulsion – its creates a creamy effect and texture. For a sweeter flavor, add maple syrup or honey. I really like using Gravelbourg mustard made by Val Michaud de Gravelbourg. Their mustards are delicious and offer a variety of flavours.

It tastes nutty and adds a lot of flavor to dishes. Camelina oil is rich in omega 3. Several studies show that the proportion of fat in an oil is high (omega 3, 6, 9). The fats in camelina oil are balanced which allows for better absorption of good fats. Three farmers in Saskatoon make delicious camelina oil. This company is founded by two sisters: Natasha and Elysa – They make products with the crops of their father and his two friends – hence the three farmers. This company tells a great story of mutual help and a sense of community.

Flavoured oils and vinegar are superb to use in salad dressings. We like to use a small amount of flavoured oil combined with an unflavoured oil to adjust the strenght of the flavour as needed.

  • Example of oils: blood orange, rosemary, Italian herbs
  • Example of vinegar: fig, raspberry, smoke, cherry.

We love using Oliv Tasting Room‘s flavoured oils and vinegars. Oliv started in Moose Jaw. It is now a large company offering its products in 5 provinces across Canada
Recipe

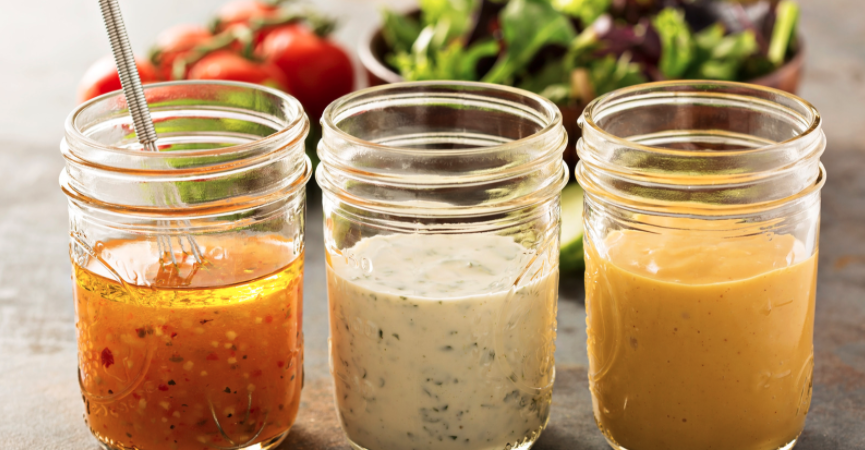
With salad dressings, you can easily transform your salad into the perfect accompaniment to meals – no matter the flavor of your meal. Follow the 3: 1 formula and add the aromatics in the proportions of your choice.

The easiest
  • Olive oil, lemon juice, salt
Greek
  • Olive oil, lemon juice, lemon zest, Dijon mustard, garlic, Greek spice, salt & pepper
Herbes
  • Olive oil, balsamic vinegar, cider vinegar, garlic, Dijon mustard, fresh herb of your choice (dill, mint, oregano, parsley, basil)
Asiatique
  • Vegetable oil, toasted sesame oil, garlic, fresh ginger, rice vinegar, honey, salt & pepper
Franch
  • Olive oil, Dijon mustard, white wine vinegar, dried tarragon, set & pepper
Cajun
  • olive oil, cider vinegar, Cajun spice, Cajun mustard, honey, French shallot, rainfort, salt & pepper.
Dish with salad dressing

We can use salad dressing in many dishes:

  • Bowls
  • pizza ( as sauce)
  • salads
  • On grilled meats and fish

Pizza with roasted beet and onion, Parmesan, Italian sausage, pumpkin seed and arugula.

the pizza base sauce is a saskatoon berry and cherry vinaigrette.

More Blogs
blog

Cabane à sucre maison

blog

Make the Best Sugar Shack Feast

blog

Butter

blog

Beurre

blog

Truffles

La vinaigrette

Pourquoi faire la vinaigrette maison ?
  • Ça ne prend que quelques minutes et c’est facile
  • Ça coûte moins cher
  • On a déjà tous les ingrédients sous la main. On utilise des ingrédients du garde manger.
  • On va y mettre des ingrédients qui sont de meilleure qualité et meilleurs pour notre santé.
  • On peut utiliser des produits du terroir Saskatchewanais et supporter nos producteurs et fermiers. 

Une situation avantageuspour tous.

  • Pour nous-même et notre famille
  • Pour notre communauté
Pourquoi ne pas l'acheter?
  • Les vinaigrettes achetées sont souvent remplies d’agents de conservation,  pour qu’elles puissent durer longtemps sur les tablettes.
  • Elles contiennent souvent beaucoup trop de sucre. Souvent les sucres utilisés sont les moins chers comme le sirop de maïs à haute teneur en fructose et le sucrose liquide.
  • Les huiles sont souvent bon marché et de mauvaise qualité, comme l’huile de soya ou l’huile de maïs transgénique.
  • Les vinaigrettes du commerce contiennent aussi souvent des saveurs, arômes et colorants artificiels
  • Elles contiennent des ingrédients imprononçables qu’il vaut mieux éliminer de notre alimentation.
La vinaigrette, c'est quoi?

Une vinaigrette peut avoir une très grande diversité d’ingrédients. Elle contient généralement 3 éléments: huile, un acidifiant et un épaississant

  1. Huile:
    • huile de cameline (e.g. Three Farmers de Saskatoon)
    • huile assaisoner (e.g. Oliv Tasting room de Moose Jaw)
    • huile d’olive
    • huile de pépin de raisin
    • huile de tournesol
    • huile de noix
    • huile d’avocat
  2. Acidifiant:
    • jus de citron/lime/pamplemousse/orange
    • vinaigre balsamique (e.g. Oliv Tasting room de Moose Jaw)
    • vinaigre de cidre de pomme
    • vinaigre de vin
    • vinaigre de riz
  3. Optionnel épaississant:

Pour encore plus de saveurs on peut ajouter des aromates.

Plusieurs de ces produits locaux peuvent être acheté en ligne. 

Formule de base - 3:1

Peu importe la sorte d’huile ou de vinaigre qu’on utilise, les proportions sont les suivantes: 

  • 3 quantités d’huile
  • 1 quantités d’acidifiant

Dans un pot masson, ajouter l’acidifiant et le sel/poivre. Fermer le bouchon et mélanger. Ajouter l’huile et autres ingrédients au goût. Fermer le bocal et agiter vigoureusement jusqu’à consistance homogène.

On peut conserver le reste dans le bocal fermé au frigo. S’il n’en reste plus tout à fait assez pour la prochaine fois, pas de problème – on conserve ce qu’on a, on ajoute un peu d’huile et de vinaigre et on agite à nouveau. La vinaigrette maison se conserve plusieurs semaines au frigo. 

Ingrédients locaux à découvrir
Moutarde

Un des plus grands producteurs de moutarde dans le monde est la Saskatchewan. Environ 80% de la moutarde Canadienne vient de Saskatchewan.  La moutarde est parfaite pour faire une vinaigrette crémeuse. Elle stabilise l’émulsion huile et vinaigre. Cela crée un effet et une texture crémeuse. Pour une saveur plus sucrée, on ajoute du sirop d’érable ou du miel. J’aime beaucoup utiliser la moutarde de Gravelbourg fait par Val Michaud. Leur moutarde est délicieuse et offre une variété de saveurs.

Huile de cameline

L’huile de cameline a un goût de noisettes et ajoute beaucoup de saveur aux plats. Plusieurs études démontre que la proportion des gras dans une huile est importante (oméga 3, 6, 9). Les gras dans l’huile de cameline sont équilibrés ce qui permet une meilleure absorption des bons gras.  Three farmers à Saskatoon fait une délicieuse huile de cameline. Cette compagnie est fondée par deux sœurs: Natasha et Elysa. Elles font des produits avec les récoltes de leur père et ses deux amis de-là les trois fermiers. Cette companie raconte une belle histoire d’entraide et de sens de la communauté.

Huile d'olive et vinaigre balsamique

Les huiles et les vinaigres assaisonnés sont superbes quand ils sont utilisés en vinaigrette. J’aime utiliser une petite quantité d’huile assaisonné mélanger à une huile neutre comme l’huile d’avocat.

    • Exemples d’huiles: orange sanguine, romarin, herbes italiennes.
    • Exemples de vinaigres: figue, framboise, fumé, cerise.

J’aime beaucoup les huiles et vinaigres assaisonnés de Oliv Tasting Room. Oliv a commencé à Moose Jaw et est maintenant une grande compagnie qui offre ses produits dans 5 provinces canadiennes.

Recettes

Avec les vinaigrettes, on peut facilement transformer sa salade en parfait accompagnement de repas – peu importe les saveurs de notre repas. Suivez la formule 3:1 et ajouter les aromates dans les proportions de votre choix. 

La plus facile
  • Huile d’olive, jus citron, sel
Grecque
  • Huile d’olive, jus de citron, zeste de citron, moutarde de Dijon, ail, épices grecque, sel & poivre
Herbes
  • Huile d’olive, vinaigre balsamique, vinaigre de cidre, ail, moutarde de Dijon, herbes fraîches de votre choix (aneth, menthe, origan, persil, basilique)
Asiatique
  • Huile végétale, huile de sésame grille, ail, gingembre frais, vinaigre de riz, miel, sel & poivre
Française
  • Huile d’olive, moutarde de Dijon, vinaigre de vin blanc, estragon séché, sel & poivre
Cajun
  • huile d’olive, vinaigre de cidre, épice Cajun, moutarde Cajun, miel, échalotte française, raifort, sel & poivre.
Plats avec vinaigrette

On peut utiliser les vinaigrettes dans plusieurs plats:

  • bol repas
  • pizza (comme sauce)
  • salade
  • viandes et poissons

Pizza avec betteraves et oignons rôtis, parmesan, saucisse italienne, graine de citrouille et roquette.

La sauce à la base de la pizza est une vinaigrette à la cerise et baies de Saskatoon.

More Blogs
blog

Cabane à sucre maison

blog

Make the Best Sugar Shack Feast

blog

Butter

blog

Beurre

blog

Truffles

Pesto

We love pesto! Pesto is a delicious, easy and healthy way to enjoy fresh herbs. Pesto ads tons of flavour to dishes takes just a few seconds to make.

Pesto can be made using a traditional mortar and pestle, food processor or an immersion blender.

In this blog you will learn how to make:

  • Traditional basil pesto
  • Sun dried tomato pesto
  • Walnut pesto
  • Prairie pesto

Traditional Basil Pesto

pesto

Traditional Basil Pesto

This tradtional basil pesto is ready in seconds and is a delicious way to add flavour to pasta, pizza, grilled fish or even serve with a cheese plater.

This recipe makes 1 cup of pesto.
  • Total Time 1 to 5 Minutes

Ingredients

  • 1/4 tsp coarse salt
  • 1/4 clove of garlic
  • 1/3 cup pinenuts
  • 1/2 cup olive oil
  • 2 cups fresh basil
  • 1/4 cup grated parmesan

Instructions

  1. In a mortar, add the garlic and salt. Cruch for a few seconds to form a paste.
  2. Add the pine nuts to the mortar with about half the oil. Crush into a paste.
  3. Add the parmesan and half the basil to the mortar and crush. Add the rest of the basil and olive oil. Crush in the mortar until the basil leaves are fully incorporated to the other ingredients.

Sundried Tomatoe Pesto

Sundried tomato pesto

Sundried Pesto

This sundried pesto is ready in seconds and is a delicious way to add flavour to pasta, pizza, grilled fish or even serve with a cheese plater.

This delicious pesto comes together in seconds with a food processor.

This recipe makes 1 cup of pesto.
  • Total Time 1 Minutes

Ingredients

  • 1/2 cup sun-dried tomatoes
  • 1 cup fresh basil
  • 1/4 clove of garlic
  • 1/3 cup pinenuts
  • 1/2 cup grated parmesan
  • 1/2 tsp salt
  • 1/2 cup olive oil

Instructions

  1. In a food processor, add all ingredients and pulse until a paste forms - about 30 seconds.

Walnut Pesto

Walnut pesto

Walnut pesto

This Tuscan walnut pesto is a nice twist on traditional basil pesto.

Tuscan walnut pesto is a white pesto filled with walnuts, parmesan, milk and toasted bread.

This recipe is delicious on pasta

Makes 1 1/2 cup.
  • Total Time 17 Minutes

Ingredients

  • 1 cup toasted or stale bread cubes
  • 1/2 cup milk
  • 1/2 cup walnuts
  • 1/4 cup grated parmesan
  • 1/2 clove garlic
  • 1/4 tsp coarse salt

Instructions

  1. In a small bowl, place the bread and milk and allow the bread to soak the milk for 15 minutes.
  2. In a mortar, place the garlic and salt. Crush into a paste.
  3. Add the walnuts in the mortar and crush into a paste.
  4. Remove extra milk from the bread and add with the parmesan to the garlic. Crush into a paste.

Notes

If you'd prefer to use a food processor, complete step 1 as describe. Drain the extra milk and add all the ingredients to the food processor until a paste forms. 

Prairie Pesto

Prairie pesto

Prairie Pesto

This prairie pesto is ready in seconds and is a delicious way to add prairie flavour to sandwishes, and pizza.

This recipe makes 1 cup of pesto.
  • Total Time 1 to 5 Minutes

Ingredients

  • 1/2 tsp salt
  • 1/2 clove of garlic
  • 1/2 cup ground flax seeds
  • 1/2 cup olive oil
  • 2 cup fresh basil
  • 1/3 cup water

Instructions

  1. In a food processor, add the basil, oil, salt and garlic. Blend until a paste forms.
  2. Add the flaxseeds and water. Blend into a paste.

Jam

JAM! What better way to bottle up the Summer’s rays of sunshine than with delicious jams? When the days get shorter, darker and we begin to miss the summer days, we reach in the pantry and take a jar of jam. It always brings us back to the joys of summer. 

Reduce food waste with jams. Yes, you read that right! Jams are a delicious way to use bruised fruits. Often fruits that are a little older are sweeter and actually make better jams. 

In this blog you will learn how to make:

  • Easiest Strawberry Jam
  • Plum Preserves
  • Apricot Preserves
  • Saskatoon and Blueberry Jam

Strawberry Jam

strawberryjam2

Easiest Strawberry Jam

This Strawberry jam is done in 30 minutes with 3 ingredients in 3 easy steps. It doesn’t get any better than this!

This recipe makes 3 cups of jam and can easily be multiplied. You can make this jam with ANY berry. As long as you respect the sugar to berry ratio, your jam will be perfect every time.
  • Total Time 30 Minutes

Ingredients

  • 2 cups sugar
  • 1 pound, 4 cups whole Strawberries (fresh or frozen)
  • 2 tbsp lemon juice

Instructions

  1. In a pan, combine the strawberries, sugar, lemon juice. Bring to a boil uncovered on medium heat. Place a plate in the freezer to test when the jam is ready (step 2).
  2. Let boil for 10 to 15 minutes. Test if the jam is ready by placing a few drops on jam on the cold plate and drawing your finger through it. If the jam stays parted it is ready. If you would like small pieces of fruit you can mash the fruit using a potato masher.
  3. Carefully place the jam in clean jars. The jam will keep in the fridge for a week.

Notes

OPTIONAL: If you would like to keep your jam at room temperature you will need to can it. To do so, ensure your jars and lids have been sterilized (you can wash them in the dishwasher on sterilize mode). Bring a large pot of water to a boil and ensure there would be at least 2 inches of water over the jars. Fill the sterilized jars up to 1 inch from the top. Carefully place the lid and thighten  loosely. Place a dish towel at the bottom of the pot to provide a cushion between to bottom of the pot and the glass jars. Place the jars in the boiling water for 5 minutes (1 cup jars). Place the jars of jam on the counter to let them cool. You will hear the lid sceal and they will make a "pop" sound. If after a few hours, you didnt hear the sound, lightly press on the button on top of the lid, if it stays down the jars are scealed. 

Plum Jam

plum jam

Plum Preserve

Let’s take jam up a notch and move from the breakfast comfort of Strawberry jam to the dinner party. This plum preserve is lightly spiced with star anise. Plum preserve is amazing to serve with a cheese board. We love eating it with French bread, brie, and pear slices.

This recipe makes 4 cups of jam and can easily be multiplied.
  • Total Time 80 Minutes

Ingredients

  • 1 1/3 cups sugar
  • 2 pounds, 5 cups diced plums
  • 3 star anise

Instructions

  1. In a pan, combine the plums, sugar and star anise. Let sit for an hour or until the fruit becomes syrupy with the sugar. Bring to a boil uncovered on medium heat. Place a plate in the freezer to test when the preserve is ready (step 2).
  2. Let boil for 10 to 15 minutes. Test if the preserve is ready by placing a few drops on jam on the cold plate and drawing your finger through it. If the preserves stays parted it is ready.
  3. Carefully place the preserve in clean jars. The preserve will keep in the fridge for a week.

Notes

OPTIONAL: If you would like to keep your preserves at room temperature you will need to can it. To do so, ensure your jars and lids have been sterilized (you can wash them in the dishwasher on sterilize mode). Bring a large pot of water to a boil and ensure there would be at least 2 inches of water over the jars. Fill the sterilized jars up to 1 inch from the top. Carefully place the lid and thighten  loosely. Place a dish towel at the bottom of the pot to provide a cushion between to bottom of the pot and the glass jars. Place the jars in the boiling water for 5 minutes (1 cup jars). Place the jars of preserve on the counter to let them cool. You will hear the lid sceal and they will make a "pop" sound. If after a few hours, you didnt hear the sound, lightly press on the button on top of the lid, if it stays down the jars are scealed. 

Apricot Preserves

Apricot jam

Apricot Preserves

This apricot preserves is based on an old French recipes and represents the best of French country cuisine – delicious and simple.

Makes 3 cups. This recipe can easily be multiplied to make a larger quantity.
  • Total Time 60 Minutes

Ingredients

  • 1 cup sugar OR honey
  • 1/2 cup water
  • 1 1/2 pound, 3 cups diced apricot (save 1 pit)
  • 1 1/2 tbsp lemon juice
  • 2 tbsp almonds

Instructions

  1. Open 1 apricot pit and remove the almond like nut in it. Chop it coarsly. Chop coarsly the almonds. In a pan, combine the strawberries, sugar, lemon juice. Bring to a boil uncovered on medium heat. Place a plate in the freezer to test when the jam is ready (step 3).
  2. In a pot, add the sugar OR honey and water. bring to a boil uncovered on medium heat. Add the apricots, lemon juice, choped apricot pit and almonds.
  3. Let boil for about 30 minutes. Test if the preserve is ready by placing a few drops on jam on the cold plate and drawing your finger through it. If the jam stays parted it is ready.
  4. Carefully place the preserve in clean jars. The jam will keep in the fridge for a week.

Notes

OPTIONAL: If you would like to keep your preserves at room temperature you will need to can it. To do so, ensure your jars and lids have been sterilized (you can wash them in the dishwasher on sterilize mode). Bring a large pot of water to a boil and ensure there would be at least 2 inches of water over the jars. Fill the sterilized jars up to 1 inch from the top. Carefully place the lid and thighten  loosely. Place a dish towel at the bottom of the pot to provide a cushion between to bottom of the pot and the glass jars. Place the jars in the boiling water for 5 minutes (1 cup jars). Place the jars of preserves on the counter to let them cool. You will hear the lid sceal and they will make a "pop" sound. If after a few hours, you didnt hear the sound, lightly press on the button on top of the lid, if it stays down the jars are scealed. 

Saskatoon and Blueberry Jam

blueberry jam

Saskatoon and Blueberry Jam

This Saskatoon and Blueberry jam is done in 30 minutes with 3 ingredients in 3 easy steps. It doesn’t get any better than this! This recipe makes 3 cups of jam and can easily be multiplied. You can make this jam with ANY berry. As long as you respect the sugar to berry ratio, your jam will be perfect every time.
  • Total Time 30 Minutes

Ingredients

  • 2 cups sugar
  • 1/2 pound, 2 cups Saskatoon berries (fresh or frozen)
  • 1/2 pound, 2 cups blueberries (fresh or frozen)
  • 2 tbsp lemon juice

Instructions

  1. In a pan, combine the berries, sugar, lemon juice. Bring to a boil uncovered on medium heat. Place a plate in the freezer to test when the jam is ready (step 2).
  2. Let boil for 10 to 15 minutes. Test if the jam is ready by placing a few drops on jam on the cold plate and drawing your finger through it. If the jam stays parted it is ready. If you would like small pieces of fruit you can mash the fruit using a potato masher.
  3. Carefully place the jam in clean jars. The jam will keep in the fridge for a week.

Notes

OPTIONAL: If you would like to keep your jam at room temperature you will need to can it. To do so, ensure your jars and lids have been sterilized (you can wash them in the dishwasher on sterilize mode). Bring a large pot of water to a boil and ensure there would be at least 2 inches of water over the jars. Fill the sterilized jars up to 1 inch from the top. Carefully place the lid and thighten  loosely. Place a dish towel at the bottom of the pot to provide a cushion between to bottom of the pot and the glass jars. Place the jars in the boiling water for 5 minutes (1 cup jars). Place the jars of jam on the counter to let them cool. You will hear the lid sceal and they will make a "pop" sound. If after a few hours, you didnt hear the sound, lightly press on the button on top of the lid, if it stays down the jars are scealed. 

Perfect Pies

PIES! Pies are filled with memories and comfort. They remind us of holidays, spending quality time with our grand-mothers and mother. 

Reduce food waste with pies. Yes, you read that right! Pies are a delicious way to use bruised fruits and vegetables. Often fruits and vegetables that are a little older are sweeter and actually make better pies. 

In this blog you will learn how to make:

  • Perfect pie crust
  • Saskatoon apple pie
  • Tomato tart

Perfect Pie Crust

crust ingredients

Perfect Pie Crust

This is our mother’s fail prof pie recipe! We cherish it and are excited to share it with you. We use this pie crust recipe to make all kinds of pies. From tourtieres to saskatoon berry pies you will get the perfect buttery puffed layered crust. This recipe makes three 8 inch pies (top and bottom).
  • Total Time 75 Minutes

Ingredients

  • 3 cups all purpose flour
  • 1 cup cold unsalted butter
  • 1 egg
  • 1/2 tbsp apple cider vinegar
  • 1/2 tsp salt
  • 3/4 cup cold water

Instructions

  1. In a medium bowl, add the flour. Cube the cold water. Using a pastry blender (or 2 butter knifes) cut the butter in the flour until the pieces of butter are about the size of rolled oats.
  2. In a small bowl, add and combine the egg, apple cider vinegar, salt and cold water.
  3. Add the liquid ingredient to the flour and butter. Combine until there is no more dry flour and ensuring not to overmix the dough.
  4. Cover the dough with plastic wrap and chill in the fridge for about 1 hour.
  5. Turn on the oven to 425F. Divide the chilled dough in 6 even segment. Each segment will become an 8" crust. Spread flour on the counter and on a rolling pin. Roll the dough starting from the middle out to form a circle. If you notice to dough starts to stick, add a bit of flour on the counter and on the dough to ensure it does not stick. Roll the dough to about 1/4 cm thickness.
  6. Place the dough in an 8" pie mold and cut the excess dough. Fill the pie and cover with another pie crust. Cut the top crust about 1 cm larger than the pie mold. Fold the top pie crust under the bottom pie crust and press the edge with a fork. Bake at 425F for 15 minutes. Reduce the heat to 350F and bake for an additional 30 minutes.

Notes

Freezing: This crust can easily be frozen for up to 4 months. After combining the dough (step 3), divide the dough in 6 and wrap each ball of dough in plastic wrap before freezing. Blind baking pies: To bake only the bottom of a pie crust, make wholes in the crust with a fork and place foil on top of the crust and fill with pie weights or dry beans. This will ensure the pie keeps its shape while it bakes. Bake at 400F for about 10-15 minutes if the pie will bake again (e.g. quiche) if the crust needs to be fully cooked (e.g. banana cream pie) bake until the bottom crust is golden brown - about 20 minutes.

Saskatoon Apple Pie

filling ingredients

Saskatoon Apple Pie

Saskatoon apple pie is not only an amazing flavour combination; it also holds a special meaning for us. We grew up in Quebec beside an apple orchard. The delicious combination of Saskatoon berries and apples represent our 2 homes. This recipe makes an 8 inch pie and easily serves 6.
  • Prep Time 5 Minutes
  • Cook Time 45 Minutes
  • Total Time 50 Minutes
  • Serves 6 People

Ingredients

  • 2 pie crust (1/3 of the above recipe)
  • 3 tbsp all purpose flour
  • 3 tbsp Saskatoon berry jelly
  • juice and zest of 1/2 lemon
  • 2/3 cup sugar
  • 3 cups Saskatoon berries
  • 2 peeled and diced apples

Instructions

  1. Turn on the oven to 425F. In a bowl, add and combine all filling ingredients.
  2. Divide the chilled dough in 6 even segment. Each segment will become an 8" crust. Spread flour on the counter and on a rolling pin. Roll the dough starting from the middle out to form a circle. If you notice to dough starts to stick, add a bit of flour on the counter and on the dough to ensure it does not stick. Roll the dough to about 1/4 cm thickness.
  3. Place the dough in an 8" pie mold and cut the excess dough. Fill the pie and cover with another pie crust. Cut the top crust about 1 cm larger than the pie mold. Fold the top pie crust under the bottom pie crust and press the edge with a fork. Bake at 425F for 15 minutes. Reduce the heat to 350F and bake for an additional 30 minutes.

Notes

Freeze: You can freeze the pie before baking for up to 3 months. Bake at 400F for 30 minutes. 

Tomato Tart

tomato tart

Tomato Tart

This tart is a beautiful ways to use the abundance of garden tomatoes this summer. It is filled with layers of fresh tomatoes, cheeses and fresh herbs. We love serving it with a large green salad dressed with lemon juice and olive oil.
  • Prep Time 10 Minutes
  • Cook Time 60 Minutes
  • Total Time 70 Minutes
  • Serves 4 People

Ingredients

  • 1 1/2 lb tomatoes
  • 1 tsp salt
  • 2 tsp french style mustard
  • 1/3 cup goat cheese
  • 1/3 cup fetta cheese
  • 1/3 cup mozarella
  • 1/2 cup fresh herbs (basil, chilves, teragon)

Instructions

  1. Cut the tomatoes into 1/2 cm. Place the tomatoes in a strainer and sprinkle with salt. Let the tomatoes drain for about 15 minutes.
  2. While the tomatoes are draining, spread flour on the counter and on a rolling pin. Roll the dough starting from the middle out to form a circle. If you notice to dough starts to stick, add a bit of flour on the counter and on the dough to ensure it does not stick. Roll the dough to about 1/4 cm thickness. Place the crust at the bottom of an 8 inch pie mold. (You can also use a rectangular pie mold, just ensure to roll the dough in a rectangular shape)
  3. Use a fork to make wholes in the pie crust and place foil on top of the crust and fill with pie weights or dry beans. This will ensure the pie keeps its shape while it bakes. Bake at 400F for 10 - 15 minutes.
  4. Evenly spread the mustard on the bottom of the tart. Place 1/2 of each cheeses on top of the mustard add a layer of tomatoes and 1/2 of the fresh herbs. Place the rest of the cheese, herbs and garnish with an other layer of tomatoes.
  5. Bake at 350F for 25 to 30 minutes until the cheese is melted. Let cool about 10 minutes and serve with a green salad.

Fun Way to Get Fit – Kettlebell Kickboxing

Blog author: Jodi Barrett
CEO of Kettlebell Kickboxing Canada
Master Level Trainer- KBIA and MKC Certified
BA -PAS F/L

After 13 years of being a stay at home mom Jodi found Kettlebell Kickboxing! She
now runs Kettlebell Kickboxing Canada in Regina and Certifies trainers across
Canada in KBIA!

Website: www.kettlebellkickboxingcanada.com
Instagram: kettlebellkickboxingcanada

Let me introduce you to Kettlebell Kickboxing, you have never experienced such a full body workout that has fused the Russian Kettlebell with Martial Arts Motion! It increases your cardio, your strength and mobility like no other! While training Kettlebell Kickboxing you will find the program implements the 5 Pillars of human movement. Allow me to show you Kettlebell training with the 5 Pillars.

Kettlebell Training …Why We Need 5 Pillars!

When training we always want to look at a balanced training program. In today’s busy life we need to embrace this holistic approach to help create a positive healthy habit that can carry you forward.

First, what is even exercise today? We all discuss it or the lack of it but when looking at exercise it is crucial to know exactly what exercise is. There is widespread confusion about what constitutes recreation and what constitutes exercise. This confusion inhibits
people from reaching their best potential, getting the most benefits from their training, or worse, injuring themselves and losing the healthy lifestyle all together. Exercise should make you stronger, more mobile and it should be measurable. Exercise is injury prevention and performance enhancement.

So now that we know what exercise is, we need to dig a little deeper and look at how to find a proper exercise program. Your fitness class/training program should train the five human movement patterns, Pushing, Pulling, Level Change, Rotation and Locomotion!

Now let’s build what that looks like:

Exercises Using Your Pillars:

1.Kettlebell Push Ups (Push- horizontal)
Overhead Press (Push -vertical)
2.Kettlebell One Arm Rows (Pull- horizontal)
Pull Up (Pull- vertical)
3.Kettlebell Full Mobility Swing (Level Change-hip dominant)
Kettlebell Goblet Squat (Level Change-knee dominant)
4.Windmill loaded with Kettlebell (Rotation)
5.Kettlebell Farmer Carry (Locomotion)

Increasing your weight as you progress, making it a measurable and progressive workout!

Why, train these pillars? To remove risk of injury that comes from muscle imbalances.

For Kettlebell Kickboxing we can incorporate each pattern with a kettlebell other than the pull up, which we include without the kettlebell as it is a vital part of the equation. When training our bodies, we need to be aware that our training is functional, hence the 5 pillars.

At the end of the day if you are not able to have functional ability you will be lacking in longevity. Your fitness program should make you stronger. Finding a class or program that has the 5 pillars will give you a holistic approach towards your success! Physically, you deserve the right to feel capable, powerful and able-bodied. Training with the pillars gives you a program that you can take full pride in, enjoying your newfound abilities to move successfully. Mentally and physically as you train you will become a stronger and a more confident person, giving you a strong mind as well as a strong body!

Blog author: Jodi Barrett
CEO of Kettlebell Kickboxing Canada
Master Level Trainer- KBIA and MKC Certified
BA -PAS F/L

After 13 years of being a stay at home mom Jodi found Kettlebell Kickboxing! She
now runs Kettlebell Kickboxing Canada in Regina and Certifies trainers across
Canada in KBIA!

Website: www.kettlebellkickboxingcanada.com
Instagram: kettlebellkickboxingcanada

The Art of Making Bread – Overnight

We are taking you on a journey to discover Saskatchewan through your kitchen. The art of making bread has been passed from generation to generation in our family and we are proud to share this beautiful satisfying art with you.

Rosemary olive bread - baked

Olive Rosemary Bread

Olive and rosemary are a delicious pairing of flavours. This bread can be made with ingredients sourced from farmers and producers of Saskatchewan. This recipe is a delicious side for the Minestrone Soup on the ZestyKits menu next week.
  • Prep Time 5 Minutes
  • Cook Time 45-50 Minutes

Ingredients

  • 3 1/2 cup flour
  • 1 1/2 tsp salt
  • 1/2 tsp liquid honey
  • 1/2 tsp instant yeast
  • 1 1/2 tsp fresh or dry rosemary
  • 3/4 cup pitted black olives
  • 1 3/4 cup water

Instructions

  1. Disolve the honey into the water.
  2. Combine all ingredients (water last) in a large bowl. We love using a wooden spoon. Ensure there is no dry flour left. Cover with a tea towel and let rise from 8 to 18 hours.
  3. Once you are ready to bake the bread, turn on the oven to 450F. Place a 3 qt or larger dutch oven in the oven to heat up. While the oven is heating, place the risen dough on floured parchment paper and shape the dough into a ball. Garnish the top of the bread as desired. We used rosemary and finishing salt.
  4. Carefully remove the hot dutch oven from the oven. Lift the bread with the parchment paper and place the dough and parchment paper in the dutch oven. Cover and bake 30 minutes covered. Remove the lid and continue to bake for approximately 15 minutes.
  5. Bon appetit!

Notes

It is very important to heat up the dutch oven before adding the bread. This will create a contrast in temperature that will make your crust crispy. You can make this recipe using ingredients sourced from Saskatchewan farmers and producers. We used flour from R&J milling, rosemary from splendor garden, yeast from Local & Fresh, local honey and  black olives from the Italian Star Deli.

Flat Out Delicious

What is Flat Out Delicious?

Flat Out Delicious is a valuable travel book that takes us on a journey to meet Saskatchewan’s farmers and producers. This book captures the stories and values of Saskatchewan’s resilient and inspiring farmers and producers. Through their stories and beautiful photography, we are taken behind the scenes, into the fields, kitchens and backstores of each food artisan. This book reveals the breadth and depth of Saskatchewan food landmarks. Each story is an opportunity to fall in love with our local culinary artisans.   

Through this book we discover Saskatchewan’s varied personalities and culinary experience. These 167 stories cumulate into this beautiful expression of Saskatchewan’s nickname: Les grenier du monde, the world’s attic. From grain fields that expand as far as the eye can see to northern boreal forest, Saskatchewan is home to one of Canada’s most unique food systems. Saskatchewan’s farmers and producers have been rising quietly for decades; Flat Out Delicious is a tribute to their legacy. 

Picture by our beautiful cousin and friend Myriam @the.farm.folk 
Our little cousin, Asher, and Zina are enjoying the sun after a long rain.

Why we love Flat Out Delicious

We received our book less than 10 days ago and are flat out in love with it! We expected a lot from this book and have received way more than we could have hoped for. 

The main reasons we have such a strong connection with Flat Out Delicious are:

  • It aligns with our roots
  • It tells the story of ZestyKits’ stars 
  • It bring awareness to the value of eating local 
  • It is truly a labour of love

Aligns with ZestyKits’ Roots

Picture by our dear friend and cousin Myriam @the.farm.folk 
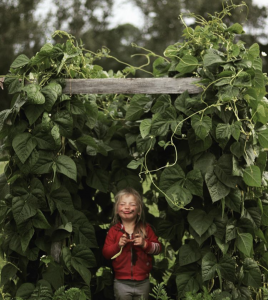
Havilah playing in her “bean house”. It’s the little memories that will last a lifetime. 

Growing up with a French background, our parents raised us with artisanally produced simple ingredients. We lived across the road from an artisanal vegetable and fruit farm which we visited regularly to buy seasonal produce. Our parents promoted the importance of knowing where our food comes from, to eat the best quality ingredients produced as close to home as possible. They helped us understand that our wealth is our health while money comes and goes. Even though we grew up with limited resources, our parents always supported artisanal farmers and producers. They raised us with a deep respect for food and understanding of the impact it has on our personal health and on our community’s health. 

Picture by our dear friend and cousin Myriam @the.farm.folk 
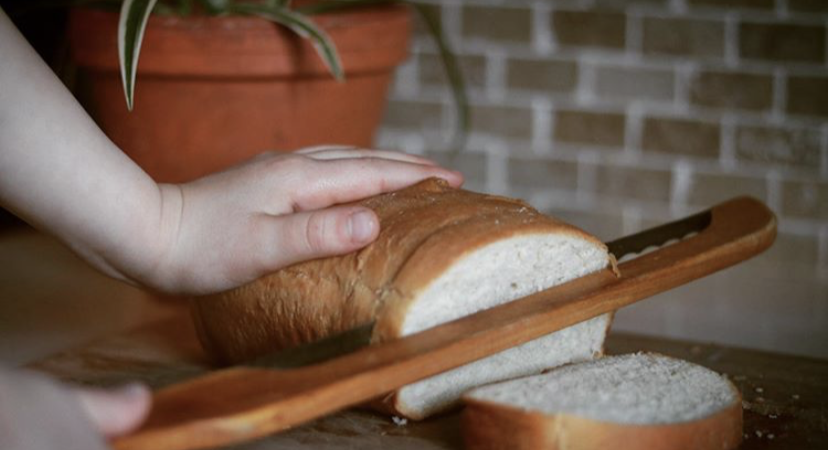
Our mother and Myriam’s mother both had this bread knife since before we were born. This bread knife reminds us of the smell of warm breads our mothers made.

Artisanal food production is in our blood; from the dairy farm on which our mother was raised to the strawberry fields our great uncle harvested until his 96th birthday. Our parents artisanally raised bees and chicken for our family and dreamt of, one day, owning an artisanal farm. They value learning the stories of the farmers and producers behind each ingredient. Growing up some of our best memories include picking raspberries under the hot sun of June and apples with the cold breeze of September. We remember visiting artisanal farms including cheese, vegetables, berry, honey, goat, and ostrich farms. We fondly remember meeting the farmers, hearing their stories, meeting the animals, feeling the dirt between our toes, smelling the fresh air and tasting the delicious food. Food nourishes more than our bodies, it nourishes our soul, it nourishes our community. 

Picture by our dear friend and cousin Myriam @the.farm.folk 
“In an age of speed, I began to think, nothing could be more invigorating than going slow.
In an age of distraction, nothing can feel more luxurious than paying attention.
And in an age of constant movement, nothing is more urgent than sittling still” – Pico Lyer

When we moved to Saskatchewan from Quebec, we learned to know farmers and producers that give this province the nickname of les grenier de monde, the worlds’ attic. It is through taking the time to truly feel and experience Saskatchewan over the past 20 years, that the land of living sky became part of our soul. 

Picture by our dear friend and cousin Myriam @the.farm.folk 
Our little cousin, Asher, planted the corn in the background himself.

We created ZestyKits to empower families to come back to the roots, to reconnect with food, to get to know their producers, to discover delicious food farmed and produced with love.

ZestyKits' Stars

Picture by our dear friend and cousin Myriam @the.farm.folk 
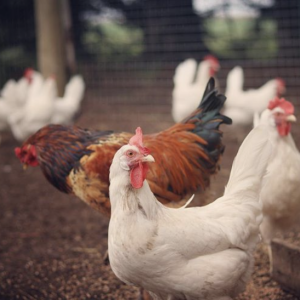
“You know you love your chicken when you watch them play in the yard more than you watch tv” – Myriam

Picture by our dear friend and cousin Myriam @the.farm.folk 
The ladies enjoying the mild weather in early March.

Jenn’s book tells the stories of many farmers and producers who are the stars behind every ZestyKits meal. We strongly encourage you to, not only read the book, but also use it as a travel guide – once physical distancing ends. Go visit the farmers and producers of Saskatchewan’s food, go meet the friendly faces behind the food you eat, go feel the dirt between your toes, go smell the fresh air. You will discover a new love and respect for food as well as the farmers and producers behind it. 

Value of Local Food

At ZestyKits we believe supporting local farmers is supporting health. If we are what we eat, understanding where our food comes from and valuing high-quality local food is a priority.  As Jenn eloquently said in Flat Out Delicious, we believe the key factor when it comes to personal health, sustainability and community economic health is the way our food is grown, raised and how far it travels. As Jenn does in Flat Out Delicious, we encourage you to be curious about the history of your food. Similarly to many important choices such as a trainer, hairdresser, house builder or insurance company; our daily food choices have a significant impact. Our daily food choices impact our personal health and our community health. We encourage you to think of food not as fuel for our bodies but as an investment in our health and our communities. These daily choices are building Saskatchewan’s vibrant future food system.

asher and garden

Picture by our dear friend and cousin Myriam @the.farm.folk 
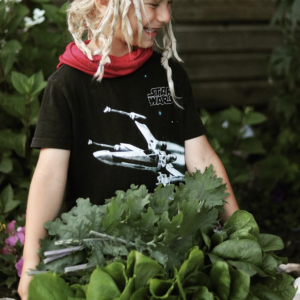
Asher is having fun in the garden and smiling at his little sister who brings powdered doughnuts. Life is about the little pleasures. 

Labour of Love

havi and chick

Picture by our dear friend and cousin Myriam @the.farm.folk 
Havilah holding a spring chick on her heart. 

Between the lines of each artisan’s story, we can feel the author’s love for the community and her joy to share Saskatchewan’s food history. Through the lines of Flat Out Delicious we can feel the passion of the pioneers who create Saskatchewan’s food ecosystem. From thriving as multi-generational farmers, to producers who recently left corporate jobs to pursue their dream, Saskatchewan’s food ecosystem is broad, thriving and growing. Reading each story inspires pride for Saskatchewan and demonstrates how bright Saskatchewan food’s future is. 

Meet Jenn & Richard

Jenn Sharp

Having had the pleasure to get to know Jenn Sharp, we consider her a kindred spirit and a dear friend. Her passion and love for Saskatchewan’s farmers and producers is contagious and a joy to see. For five years, Jenn was a featured writer, columnist, and editor at the Saskatoon StarPhoenix. She currently writes the Flat Out Food column for the StarPhoenix and the Regina Leader-Post. Jenn is a regular contributor to CBC Saskatchewan and Eat North as well as has been featured in a variety of Canadian publications.

Picture by Richard Marjan

Richard Marjan

Photo credit: http://moore4mayor.ca/endorsements/richard-marjan-endorses-kelley-moore-for-mayor/

Richard Marjan’s photography throughout Flat Out Delicious speaks volume to his talent as a photographer. They say a picture is worth a thousand words; this is especially true of the photographs found in this book. Each photo beautifully represents the story of Saskatchewan’s food history, they take us on a journey with them. Richard is an award winning retired photojournalist for the Saskatoon StarPhoenix. His work appeared in Canadian Geographic, the New York Times, and the Globe and Mail.

@the.farm.folk

The beautiful photography in this blog is by @the.farm.folk

Myriam is our dear friend and cousin. She is raising two amazing children with her husband on their farm in Northern Saskatchewan. Our mothers were sisters and best friends. We grew up as sisters than more cousins and moved to Saskatchewan within a week of each other. It is such a joy for us to share her photography and a glimpse of her life with you. 

Perfect baked fries – 5 ways

Canada’s potato industry is struggling due to the COVID-19 pandemic. The demand for potatoes has plummeted with the closure of restaurants. It is estimates that over 200 million pounds of potatoes are in limbo. Canadian potato farmers are asking for your help. By eating locally grown potatoes we are supporting our local farmers and economy.

BBQ season is here! Fries are one of our favourite BBQ side. How about a healthier alternative to the traditional fried fries? How about the PERFECT baked fries?!

We are offering baked fries recipes because they are just as delicious and crispy as fried but without the extra calories.  In this blog we teaching you how to make the perfect baked fries. As you learn the basic techniques, we teach you new techniques to elevate your baked fries to poutine and truffle parmesan lemon garlic fries – perfect for date night. 

In this blog you will learn 5 delicious ways to use and modify your baked fries:

  1. Perfect baked fries
  2. Greek baked fries with lemon garlic aioli 
  3. Cajun baked fries with Cajun Remoulade
  4. Poutine
  5. Truffle parmesan garlic lemon baked fries
oven baked friesResized

Perfect Baked Fries

Many baked fries recipe make soggy fries. This recipe makes perfect crispy oven baked fries that are as tasty as restaurant fries. An added bonus of baked fries is they are the healthiest fries! Baking fries not only saves you money and extra calories but also lets you easily use locally sourced ingredients. Note that the baking time depnds on how thick your fries are.
  • Prep Time 10 + 10 Minutes
  • Cook Time 35 Minutes
  • Total Time 55 Minutes
  • Serves 4 to 6 People

Ingredients

  • 1500 gr (about 6) yukon gold potatoes
  • 1/4 cup vegetable oil - we use camelina oil
  • 1/2 tsp granulated garlic
  • 1/2 tsp onion powder
  • 1 tsp salt
  • 1/4 tsp black pepper

Instructions

  1. Preheat oven to 450 F. Place a cooling rack on a baking sheet.
  2. Place the potatoes in a large bowl, then pour very hot tap water over the top so that it covers the potatoes by at least 1 inch. Let sit 10 minutes.
  3. Drain the potatoes, then transfer them to a clean towel and dry as completely as you can. Note: you may need to use 2 towels.
  4. Return the potato sticks to the bowl. Add the vegetable oil, granulated garlic, onion powder, salt, and black pepper and combine to evenly coat to potatoes. On the cooling rack, spread the potato sticks in a single layer, leaving space around each potato.
  5. Bake in the preheated oven for 30 to 35 minutes - or until desired crisp.

Notes

Baked fries are best the day they are made. If you need to reheat them, you can make them crispy again by heating them in a 400F oven for about 5 to 6 minutes.If you don't have a cooling rack, you can line a baking sheet with parchment paper and bake the fries directly on the parchment paper. You will need to turn the fries are 15-20 minutes to ensure they are baked evenly. 
garlic friesResized

Greek baked fries with lemon garlic aioli 

These fries with a greek salad are our favourite sides for Greek chicken souvlaki. The baked fries are filled with greek flavours which is enhanced by the lemon garlic aioli. The aioli can also be used as a dipping sauce for your souvlakis.
  • Prep Time 10 + 10 Minutes
  • Cook Time 35 Minutes
  • Total Time 55 Minutes
  • Serves 4 to 6 People

Ingredients

  • 1500 gr (about 6) yukon gold potatoes
  • 1/4 cup vegetable oil - we use camelina oil
  • 2 tbsp greek spice blend - we use Splendor garden
  • 1 tsp salt
  • 1/4 tsp black pepper
  • 3/4 cup mayonaise
  • 2 to 3 medium clove garlic - minced
  • 1/2 tsp salt
  • 1/2 tsp lemon zest
  • 2 1/2 tbsp lemon juice

Instructions

  1. Preheat oven to 450 F. Place a cooling rack on a baking sheet.
  2. Place the potatoes in a large bowl, then pour very hot tap water over the top so that it covers the potatoes by at least 1 inch. Let sit 10 minutes.
  3. Drain the potatoes, then transfer them to a clean towel and dry as completely as you can. Note: you may need to use 2 towels.
  4. Return the potato sticks to the bowl. Add the vegetable oil, Greek spice blend, salt, and black pepper and combine to evenly coat to potatoes. On the cooling rack, spread the potato sticks in a single layer, leaving space around each potato.
  5. Bake in the preheated oven for 30 to 35 minutes - or until desired crisp.
  6. While the fries are cooking, make the aioli by adding in a small bowl: mayonaise, minced garlic, salt, lemon zest and lemon juice. Combine.

Notes

Baked fries are best the day they are made. If you need to reheat them, you can make them crispy again by heating them in a 400F oven for about 5 to 6 minutes.If you don't have a cooling rack, you can line a baking sheet with parchment paper and bake the fries directly on the parchment paper. You will need to turn the fries are 15-20 minutes to ensure they are baked evenly.  Whats an aioli?Aioli is an emulsified sauce made of oil and garlic.  Garlic infused mayonnaise is the most basic aioli.  Many restaurants will start with mayonnaise as the base of their aiolis.
cajun friesResized

Cajun fries with cajun remoulade sauce

These cajun fries with cajun green breans are our favourite sides with a BBQ cajun steak, tofu steak of chicken breast. The cajun remoulade features beautiful Saskatchewan ingredients and is filled with layers of flavour.
  • Prep Time 10 + 10 Minutes
  • Cook Time 35 Minutes
  • Total Time 55 Minutes
  • Serves 4 to 6 People

Ingredients

  • 1500 gr (about 6) yukon gold potatoes
  • 1/4 cup vegetable oil - we use camelina oil
  • 2 tbsp greek spice blend - we use Splendor garden
  • 1 tsp salt
  • 1/4 tsp black pepper
  • 3/4 cup mayonaise
  • 1 medium clove garlic - minced
  • 2 tsp cajun blacking spice - we use Splendor Gardens
  • 2 tbsp cajun mustard - we use Gravelbourg mustard
  • 2 tbsp horseradish
  • 1 tbsp worcestershire sauce
  • 1 tsp lemon juice
  • 1/4 cup parsley minced

Instructions

  1. Preheat oven to 450 F. Place a cooling rack on a baking sheet.
  2. Place the potatoes in a large bowl, then pour very hot tap water over the top so that it covers the potatoes by at least 1 inch. Let sit 10 minutes.
  3. Drain the potatoes, then transfer them to a clean towel and dry as completely as you can. Note: you may need to use 2 towels.
  4. Return the potato sticks to the bowl. Add the vegetable oil, salt, and black pepper and combine to evenly coat to potatoes. On the cooling rack, spread the potato sticks in a single layer, leaving space around each potato.
  5. Bake in the preheated oven for 30 to 35 minutes - or until desired crisp.
  6. While the fries are cooking, make the aioli by adding in a small bowl: mayonaise, minced garlic, cajun blackning spice, cajun mustard, horseradish, worcestershire sauce, lemon juice and parsley. Combine.

Notes

Baked fries are best the day they are made. If you need to reheat them, you can make them crispy again by heating them in a 400F oven for about 5 to 6 minutes.What is a remoulade? Remoulade is an aioli served chilled with a variety of herbs and spices.  The traditional French remoulade is made with mayonaise, mustard, capers, anchovies, and pickles.  In this cajun inspired remoulade we used creamed horseradish to bring the pickled element (replacing the capers and pickles) and worcestershire sauce to bring the umami (replacing the anchovies).Cooling rack note: If you don't have a cooling rack, you can line a baking sheet with parchment paper and bake the fries directly on the parchment paper. You will need to turn the fries are 15-20 minutes to ensure they are baked evenly. 
truffle friesResized

Truffle parmesan garlic lemon baked fries

These truffle fries can proudly be served for a date night or at a dinner party. They are simple but are filled with layers of flavour you will be proud of! We love serving these fries with white wine garlic mussels to create the iconing “moules frites”.
  • Prep Time 10 + 10 Minutes
  • Cook Time 35 Minutes
  • Total Time 55 Minutes
  • Serves 4 to 6 People

Ingredients

  • 1500 gr (about 6) yukon gold potatoes
  • 1/4 cup vegetable oil - we use camelina oil
  • 2 tbsp greek spice blend - we use Splendor garden
  • 1 tsp salt
  • 1/4 tsp black pepper
  • 2 medium clove garlic - minced
  • 1 tsp lemon zest
  • 2 tbsp gratted parmesan
  • 1/4 cup parsley
  • 1 tbsp truffle oil - we get ours at Italian Star Deli or Oliv Tasting Room

Instructions

  1. Preheat oven to 450 F. Place a cooling rack on a baking sheet.
  2. Place the potatoes in a large bowl, then pour very hot tap water over the top so that it covers the potatoes by at least 1 inch. Let sit 10 minutes.
  3. Drain the potatoes, then transfer them to a clean towel and dry as completely as you can. Note: you may need to use 2 towels.
  4. Return the potato sticks to the bowl. Add the vegetable oil, salt, and black pepper and combine to evenly coat to potatoes. On the cooling rack, spread the potato sticks in a single layer, leaving space around each potato.
  5. Bake in the preheated oven for 25 to 30 minutes - or until almost desired crisp. Add the minced garlic on the fries and return to the oven for about 5 minutes
  6. Garnish the fries with lemon zest, parmesan, parsley and truffle oil.

Notes

Baked fries are best the day they are made. If you need to reheat them, you can make them crispy again by heating them in a 400F oven for about 5 to 6 minutes.Cooling rack note: If you don't have a cooling rack, you can line a baking sheet with parchment paper and bake the fries directly on the parchment paper. You will need to turn the fries are 15-20 minutes to ensure they are baked evenly. 
poutine

Poutine

Now we are talking! Having mastered the technique of oven baked fries let’s make the ultimate French Canadian savoury delight – Poutine! This poutine offers the authentic taste of Quebec’s iconic poutine: crispy fries, cheese curds and tons of poutine gravy.
  • Prep Time 10 + 10 Minutes
  • Cook Time 35 Minutes
  • Total Time 55 Minutes
  • Serves 4 to 6 People

Ingredients

  • 1500 gr (about 6) yukon gold potatoes
  • 1/4 cup vegetable oil - we use camelina oil
  • 2 tbsp greek spice blend - we use Splendor garden
  • 1 tsp salt
  • 1/4 tsp black pepper
  • 480 gr cheese curds - we use Bothwell “Squeak’rs”
  • 2 cloves garlic - minced
  • 3 tbsp cornstarch
  • 2 tbsp water
  • 1/3 cup unslated butter
  • 1/4 cup all purpose flour
  • 1 tbsp worcestershire sauce
  • 1 tbsp balsamic vinegar
  • 1 tsp onion powder
  • 2 tbsp ketchup
  • 2 cup beef broth - we use pine view farms
  • 1 cup chicken broth - we use pine view farms
  • 3/4 cup stout beer - there are so many good local options: District, Rebellion, Pile of Bones...
  • 1/2 tsp pepper + 1/2 tsp salt

Instructions

  1. Preheat oven to 450 F. Place a cooling rack on a baking sheet.
  2. Place the potatoes in a large bowl, then pour very hot tap water over the top so that it covers the potatoes by at least 1 inch. Let sit 10 minutes.
  3. Drain the potatoes, then transfer them to a clean towel and dry as completely as you can. Note: you may need to use 2 towels.
  4. Return the potato sticks to the bowl. Add the vegetable oil, salt, and black pepper and combine to evenly coat to potatoes. On the cooling rack, spread the potato sticks in a single layer, leaving space around each potato.
  5. Bake in the preheated oven for 30 to 35 minutes. Because in Saskatchewan it's difficult to get fresh cheese curd we recommend spreading the cheese curds on the fries evenly and leaving them in the oven for an additional 30 seconds to enhance the "squeek".
  6. While the fries are baking, make the poutine gravey. In a small bowl add the cornstarch and water. Combine and set aside. In a pot, melt the butter. Add the flour and cook for 5 minutes, stirring regularly - until it turns a light golden. Add the minced garlic and cook an additional 30 seconds - stirring regularly to prevent the garlic from burning.
  7. Add the worcestershire sauce, balsamic vinegar, onion powder, ketchup, beef and chicken broth and beer. Bring to a boil whisking regularly. Add about half the cornstarch mixture let simmer, whisking regularly. If you would like your gravey thicker add the rest of the cornstarch mixture. Season with salt and pepper. Taste and adjust seasoning.
  8. Serve the fries and cheese by topping them with a generous amount of poutine gravey.

Notes

Baked fries are best the day they are made. If you need to reheat them, you can make them crispy again by heating them in a 400F oven for about 5 to 6 minutes.Cooling rack note: If you don't have a cooling rack, you can line a baking sheet with parchment paper and bake the fries directly on the parchment paper. You will need to turn the fries are 15-20 minutes to ensure they are baked evenly. You can replace the beer by beef or chicken stock. 

Let’s celebrate mothers

Moms are very specials in our lives and even when we are all grown up we still need them. We love their voice, their supporting presence and everything they do for us. When moms are there, everything suddenly feels better. Moms work hard to make our lives easier and Mother’s Day is a great time to celebrate how much we love them.

As we are doing our best to respect physical distancing, Mother’s Day can be a little more challenging this year as our mother’s arms cannot give us a hug. The challenges we are facing due to physical distancing is an opportunity to be especially thankful for our mothers and to make this Mother Day extra special for the mothers who are so important in our lives. 

Even with social distancing, we have the opportunity to make sure this day is very special for the women we love so much. This year, ZestyKits is here to help you make this day very special eventhough we might not be able to visit with eachother.

Take the Time to Make a Video Call

One thing we have learned in the last few weeks is that we need to make time to connect with our loved ones. Text messages and emails are great. However, for a special day like Mother’s Day, we encourage you to make a video phone call to enrich the quality of communication. Talking allows us to hear eachothers voice. The voice is the connection with our soul and allow us to feel closer even though we still have to stay apart. Viewing each other, even through a camera, makes us feel close and enables us to read eachothers body language. Research shows communication is 93% non-verbal. Non-verbal communication includes: vocal tone, facial expression, fidgeting,  head and hand movement, posture. The more non-verbal attribute a method of communication provides, the richer the quality of interaction. Video calls enables a richer communication and we encourage you to video call the mothers you cannot see in person this Mother’s Day. 

Order the ZestyKits Mother’s Day Brunch

Surprise mom by ordering a special meal toshare on a virtual brunch. Being apart does not means that you cannot share a meal together. Our wonderful Mother’s Day brunch menu let’s dad easily make brunch with the kids to celebrate mom with a delicious and local Sunday brunch.

Make a Card with the Colouring Page in your Brunch Kit

Handmade cards are a sweet reminder of love and appreciation. In your brunch kit you will find a special mother’s day colouring page made by a Saskatchewan artist. You can ask the kids to colour and write personal notes in the card to give a special handmade present to mom.  Colouring and writing in the mother’s day card is a beautiful and memorable activity for children that will warm mom’s heart.