Butter

In this blog we discuss

  • butter industry and demand
  • What is happening with our dairy products in Canada? #Buttergate
  • How to make butter at home
  • The seasonality of butter
  • Types of butter sold in stores
Butter industry and demand

The butter industry in Canada is estimated at $ 20 billion. According to the National Post, butter sales increased 21% in 2020.

Demand for butter is generally seasonal, increasing during the holidays and other festivities that require baking. The waves of the pandemic, however, have created a new kind of seasonality: sales of butter have increased during periods of containment. As people sought solace in baking and began to cook the vast majority of their meals at home, they turned to butter.

What is happening with our dairy? #buttergate

For months now, many Canadians have noticed that the quality of dairy products has changed: e.g. cheeses with a funny texture, butter that does not soften as much at room temperature, coffee milk that does not foam properly.

Apparently, since last summer, some dairy farmers have been giving their dairy cows energy supplements. One of these supplements contains a lot of palmitic acid or … palm oil. In other words, some producers feed their dairy cows palm oil or palmitic acids – one of the most dreaded food ingredients by humans. Palm oil not only has devastating effects on the environment but can also promote bad cholesterol – which increases cardiovascular risks.

The surge in demand for butter is putting pressure on farmers. Mixing palm oil with cow feed boosts milk fat, weight, and profits.

The effects on human health of this important change in the diet of cows are not known. Sylvain Charlebois, director of the Laboratory of Agri-Food Analytical Sciences at Dalhousie University, goes so far as to say that he is extremely concerned about this change.

Some brands of butter seem to have retained the same quality. No one can say for sure which brands or products are affected by these supplements. Some companies are developing technology that will allow butter manufacturers to detect palmitic acids in the product they receive.

The recent surge in demand for butter is putting pressure on farmers. Mixing palm oil with cow feed boosts milk fat, weight, and profits. The vast majority of small producers prefer not to use their additives because they are concern about the impact on the milk’s quality. Most dairy farmers want the situation to end as soon as possible.

How to make butter at home

If you like high quality butters, you can buy cream from small local producers and make your own! This is a great pandemic project.

  • 2 cups good quality high fat whipping cream
  • 1/2 tsp. Salt (optional)
  1. Pour the cream into a bowl. With an electric whisk, whip the 35% cream with the salt (optional) at medium speed. After about 10 minutes, the cream will become lumpy, and a clear, whitish liquid will appear.
  2. Continue whisking gently for a few minutes, until the butter begins to form a ball around the beaters.
  3. Place a cheesecloth in a sieve. Place the sieve in a bowl to catch the buttermilk. Press the butter into the cotton cheese to remove the liquid.
    wash the butter to remove the remaining buttermilk. Rinse the butter in a bowl of VERY cold water. This rinses out any remaining whey which could make the butter rancid, and you can even use ice water if you want.
  4. Store the butter in an airtight container in the refrigerator. The butter will keep for up to a week.

Makes: about 3/4 cup

Cutured butter: Cultured butter has a complex flavour profile. To make cultured butter add 2 tbsp of high quality plain yogurt to the cream and combine. Let sit in a bowl covered at room temperature 8 to 24 hours before making the butter. You will know the cream is ready to use when you see small bubbles on the cream. Place the cream in the fridge about 1 hour before whipping it. After following these steps, follow the recipe above.

The seasonality of butter

Just as butter consumption depends on the seasons, so too is the butter itself.

Butter is the expression of what cows eat and their environment. The taste, color and texture of butter reflects its terroir (soil, topography and climate), the breed and the diet of the cows, its complex flavor is the result of more than 500 fatty acids and 400 compounds volatile.

In spring and early summer the butter is a darker yellow because cows eat grass at this time of year, which contains a high percentage of orange and yellow carotenes. The pasture is also filled with herbs and flowers, which gives the butter floral and herbaceous notes.In winter, the cow’s diet is supplemented with silage, so the butter is pale, more fatty, firmer and sweeter to the taste.

More Blogs
blog

Chocolate Fudge Sauce

blog

BBQ season

blog

Mother’s day brunch

blog

Soupe vide-frigo

blog

Reduce food cost & food waste with soup

Perfect Pies

PIES! Pies are filled with memories and comfort. They remind us of holidays, spending quality time with our grand-mothers and mother. 

Reduce food waste with pies. Yes, you read that right! Pies are a delicious way to use bruised fruits and vegetables. Often fruits and vegetables that are a little older are sweeter and actually make better pies. 

In this blog you will learn how to make:

  • Perfect pie crust
  • Saskatoon apple pie
  • Tomato tart

Perfect Pie Crust

crust ingredients

Perfect Pie Crust

This is our mother’s fail prof pie recipe! We cherish it and are excited to share it with you. We use this pie crust recipe to make all kinds of pies. From tourtieres to saskatoon berry pies you will get the perfect buttery puffed layered crust. This recipe makes three 8 inch pies (top and bottom).
  • Total Time 75 Minutes

Ingredients

  • 3 cups all purpose flour
  • 1 cup cold unsalted butter
  • 1 egg
  • 1/2 tbsp apple cider vinegar
  • 1/2 tsp salt
  • 3/4 cup cold water

Instructions

  1. In a medium bowl, add the flour. Cube the cold water. Using a pastry blender (or 2 butter knifes) cut the butter in the flour until the pieces of butter are about the size of rolled oats.
  2. In a small bowl, add and combine the egg, apple cider vinegar, salt and cold water.
  3. Add the liquid ingredient to the flour and butter. Combine until there is no more dry flour and ensuring not to overmix the dough.
  4. Cover the dough with plastic wrap and chill in the fridge for about 1 hour.
  5. Turn on the oven to 425F. Divide the chilled dough in 6 even segment. Each segment will become an 8" crust. Spread flour on the counter and on a rolling pin. Roll the dough starting from the middle out to form a circle. If you notice to dough starts to stick, add a bit of flour on the counter and on the dough to ensure it does not stick. Roll the dough to about 1/4 cm thickness.
  6. Place the dough in an 8" pie mold and cut the excess dough. Fill the pie and cover with another pie crust. Cut the top crust about 1 cm larger than the pie mold. Fold the top pie crust under the bottom pie crust and press the edge with a fork. Bake at 425F for 15 minutes. Reduce the heat to 350F and bake for an additional 30 minutes.

Notes

Freezing: This crust can easily be frozen for up to 4 months. After combining the dough (step 3), divide the dough in 6 and wrap each ball of dough in plastic wrap before freezing. Blind baking pies: To bake only the bottom of a pie crust, make wholes in the crust with a fork and place foil on top of the crust and fill with pie weights or dry beans. This will ensure the pie keeps its shape while it bakes. Bake at 400F for about 10-15 minutes if the pie will bake again (e.g. quiche) if the crust needs to be fully cooked (e.g. banana cream pie) bake until the bottom crust is golden brown - about 20 minutes.

Saskatoon Apple Pie

filling ingredients

Saskatoon Apple Pie

Saskatoon apple pie is not only an amazing flavour combination; it also holds a special meaning for us. We grew up in Quebec beside an apple orchard. The delicious combination of Saskatoon berries and apples represent our 2 homes. This recipe makes an 8 inch pie and easily serves 6.
  • Prep Time 5 Minutes
  • Cook Time 45 Minutes
  • Total Time 50 Minutes
  • Serves 6 People

Ingredients

  • 2 pie crust (1/3 of the above recipe)
  • 3 tbsp all purpose flour
  • 3 tbsp Saskatoon berry jelly
  • juice and zest of 1/2 lemon
  • 2/3 cup sugar
  • 3 cups Saskatoon berries
  • 2 peeled and diced apples

Instructions

  1. Turn on the oven to 425F. In a bowl, add and combine all filling ingredients.
  2. Divide the chilled dough in 6 even segment. Each segment will become an 8" crust. Spread flour on the counter and on a rolling pin. Roll the dough starting from the middle out to form a circle. If you notice to dough starts to stick, add a bit of flour on the counter and on the dough to ensure it does not stick. Roll the dough to about 1/4 cm thickness.
  3. Place the dough in an 8" pie mold and cut the excess dough. Fill the pie and cover with another pie crust. Cut the top crust about 1 cm larger than the pie mold. Fold the top pie crust under the bottom pie crust and press the edge with a fork. Bake at 425F for 15 minutes. Reduce the heat to 350F and bake for an additional 30 minutes.

Notes

Freeze: You can freeze the pie before baking for up to 3 months. Bake at 400F for 30 minutes. 

Tomato Tart

tomato tart

Tomato Tart

This tart is a beautiful ways to use the abundance of garden tomatoes this summer. It is filled with layers of fresh tomatoes, cheeses and fresh herbs. We love serving it with a large green salad dressed with lemon juice and olive oil.
  • Prep Time 10 Minutes
  • Cook Time 60 Minutes
  • Total Time 70 Minutes
  • Serves 4 People

Ingredients

  • 1 1/2 lb tomatoes
  • 1 tsp salt
  • 2 tsp french style mustard
  • 1/3 cup goat cheese
  • 1/3 cup fetta cheese
  • 1/3 cup mozarella
  • 1/2 cup fresh herbs (basil, chilves, teragon)

Instructions

  1. Cut the tomatoes into 1/2 cm. Place the tomatoes in a strainer and sprinkle with salt. Let the tomatoes drain for about 15 minutes.
  2. While the tomatoes are draining, spread flour on the counter and on a rolling pin. Roll the dough starting from the middle out to form a circle. If you notice to dough starts to stick, add a bit of flour on the counter and on the dough to ensure it does not stick. Roll the dough to about 1/4 cm thickness. Place the crust at the bottom of an 8 inch pie mold. (You can also use a rectangular pie mold, just ensure to roll the dough in a rectangular shape)
  3. Use a fork to make wholes in the pie crust and place foil on top of the crust and fill with pie weights or dry beans. This will ensure the pie keeps its shape while it bakes. Bake at 400F for 10 - 15 minutes.
  4. Evenly spread the mustard on the bottom of the tart. Place 1/2 of each cheeses on top of the mustard add a layer of tomatoes and 1/2 of the fresh herbs. Place the rest of the cheese, herbs and garnish with an other layer of tomatoes.
  5. Bake at 350F for 25 to 30 minutes until the cheese is melted. Let cool about 10 minutes and serve with a green salad.

The Art of Making Bread – Overnight

We are taking you on a journey to discover Saskatchewan through your kitchen. The art of making bread has been passed from generation to generation in our family and we are proud to share this beautiful satisfying art with you.

Rosemary olive bread - baked

Olive Rosemary Bread

Olive and rosemary are a delicious pairing of flavours. This bread can be made with ingredients sourced from farmers and producers of Saskatchewan. This recipe is a delicious side for the Minestrone Soup on the ZestyKits menu next week.
  • Prep Time 5 Minutes
  • Cook Time 45-50 Minutes

Ingredients

  • 3 1/2 cup flour
  • 1 1/2 tsp salt
  • 1/2 tsp liquid honey
  • 1/2 tsp instant yeast
  • 1 1/2 tsp fresh or dry rosemary
  • 3/4 cup pitted black olives
  • 1 3/4 cup water

Instructions

  1. Disolve the honey into the water.
  2. Combine all ingredients (water last) in a large bowl. We love using a wooden spoon. Ensure there is no dry flour left. Cover with a tea towel and let rise from 8 to 18 hours.
  3. Once you are ready to bake the bread, turn on the oven to 450F. Place a 3 qt or larger dutch oven in the oven to heat up. While the oven is heating, place the risen dough on floured parchment paper and shape the dough into a ball. Garnish the top of the bread as desired. We used rosemary and finishing salt.
  4. Carefully remove the hot dutch oven from the oven. Lift the bread with the parchment paper and place the dough and parchment paper in the dutch oven. Cover and bake 30 minutes covered. Remove the lid and continue to bake for approximately 15 minutes.
  5. Bon appetit!

Notes

It is very important to heat up the dutch oven before adding the bread. This will create a contrast in temperature that will make your crust crispy. You can make this recipe using ingredients sourced from Saskatchewan farmers and producers. We used flour from R&J milling, rosemary from splendor garden, yeast from Local & Fresh, local honey and  black olives from the Italian Star Deli.

Flat Out Delicious

What is Flat Out Delicious?

Flat Out Delicious is a valuable travel book that takes us on a journey to meet Saskatchewan’s farmers and producers. This book captures the stories and values of Saskatchewan’s resilient and inspiring farmers and producers. Through their stories and beautiful photography, we are taken behind the scenes, into the fields, kitchens and backstores of each food artisan. This book reveals the breadth and depth of Saskatchewan food landmarks. Each story is an opportunity to fall in love with our local culinary artisans.   

Through this book we discover Saskatchewan’s varied personalities and culinary experience. These 167 stories cumulate into this beautiful expression of Saskatchewan’s nickname: Les grenier du monde, the world’s attic. From grain fields that expand as far as the eye can see to northern boreal forest, Saskatchewan is home to one of Canada’s most unique food systems. Saskatchewan’s farmers and producers have been rising quietly for decades; Flat Out Delicious is a tribute to their legacy. 

Picture by our beautiful cousin and friend Myriam @the.farm.folk 
Our little cousin, Asher, and Zina are enjoying the sun after a long rain.

Why we love Flat Out Delicious

We received our book less than 10 days ago and are flat out in love with it! We expected a lot from this book and have received way more than we could have hoped for. 

The main reasons we have such a strong connection with Flat Out Delicious are:

  • It aligns with our roots
  • It tells the story of ZestyKits’ stars 
  • It bring awareness to the value of eating local 
  • It is truly a labour of love

Aligns with ZestyKits’ Roots

Picture by our dear friend and cousin Myriam @the.farm.folk 
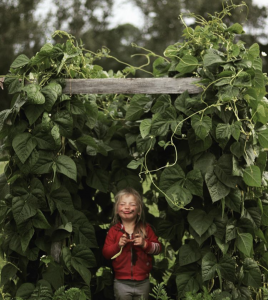
Havilah playing in her “bean house”. It’s the little memories that will last a lifetime. 

Growing up with a French background, our parents raised us with artisanally produced simple ingredients. We lived across the road from an artisanal vegetable and fruit farm which we visited regularly to buy seasonal produce. Our parents promoted the importance of knowing where our food comes from, to eat the best quality ingredients produced as close to home as possible. They helped us understand that our wealth is our health while money comes and goes. Even though we grew up with limited resources, our parents always supported artisanal farmers and producers. They raised us with a deep respect for food and understanding of the impact it has on our personal health and on our community’s health. 

Picture by our dear friend and cousin Myriam @the.farm.folk 
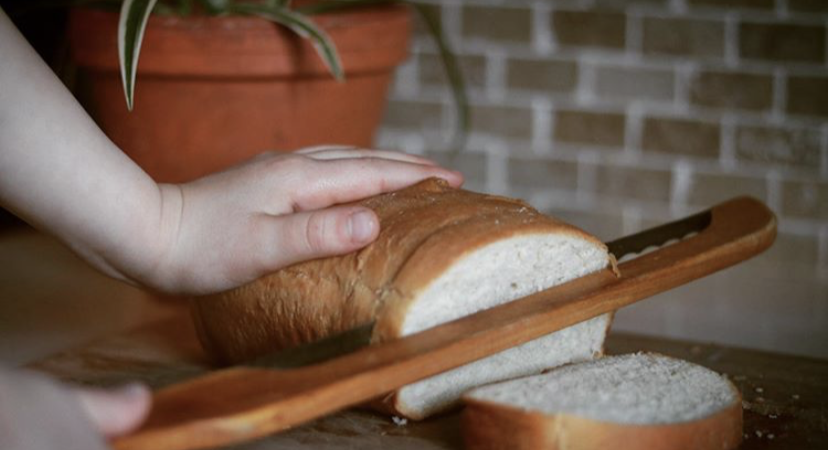
Our mother and Myriam’s mother both had this bread knife since before we were born. This bread knife reminds us of the smell of warm breads our mothers made.

Artisanal food production is in our blood; from the dairy farm on which our mother was raised to the strawberry fields our great uncle harvested until his 96th birthday. Our parents artisanally raised bees and chicken for our family and dreamt of, one day, owning an artisanal farm. They value learning the stories of the farmers and producers behind each ingredient. Growing up some of our best memories include picking raspberries under the hot sun of June and apples with the cold breeze of September. We remember visiting artisanal farms including cheese, vegetables, berry, honey, goat, and ostrich farms. We fondly remember meeting the farmers, hearing their stories, meeting the animals, feeling the dirt between our toes, smelling the fresh air and tasting the delicious food. Food nourishes more than our bodies, it nourishes our soul, it nourishes our community. 

Picture by our dear friend and cousin Myriam @the.farm.folk 
“In an age of speed, I began to think, nothing could be more invigorating than going slow.
In an age of distraction, nothing can feel more luxurious than paying attention.
And in an age of constant movement, nothing is more urgent than sittling still” – Pico Lyer

When we moved to Saskatchewan from Quebec, we learned to know farmers and producers that give this province the nickname of les grenier de monde, the worlds’ attic. It is through taking the time to truly feel and experience Saskatchewan over the past 20 years, that the land of living sky became part of our soul. 

Picture by our dear friend and cousin Myriam @the.farm.folk 
Our little cousin, Asher, planted the corn in the background himself.

We created ZestyKits to empower families to come back to the roots, to reconnect with food, to get to know their producers, to discover delicious food farmed and produced with love.

ZestyKits' Stars

Picture by our dear friend and cousin Myriam @the.farm.folk 
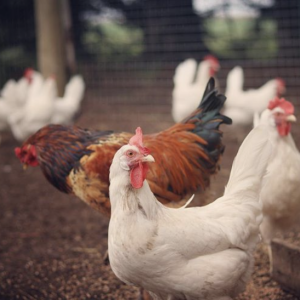
“You know you love your chicken when you watch them play in the yard more than you watch tv” – Myriam

Picture by our dear friend and cousin Myriam @the.farm.folk 
The ladies enjoying the mild weather in early March.

Jenn’s book tells the stories of many farmers and producers who are the stars behind every ZestyKits meal. We strongly encourage you to, not only read the book, but also use it as a travel guide – once physical distancing ends. Go visit the farmers and producers of Saskatchewan’s food, go meet the friendly faces behind the food you eat, go feel the dirt between your toes, go smell the fresh air. You will discover a new love and respect for food as well as the farmers and producers behind it. 

Value of Local Food

At ZestyKits we believe supporting local farmers is supporting health. If we are what we eat, understanding where our food comes from and valuing high-quality local food is a priority.  As Jenn eloquently said in Flat Out Delicious, we believe the key factor when it comes to personal health, sustainability and community economic health is the way our food is grown, raised and how far it travels. As Jenn does in Flat Out Delicious, we encourage you to be curious about the history of your food. Similarly to many important choices such as a trainer, hairdresser, house builder or insurance company; our daily food choices have a significant impact. Our daily food choices impact our personal health and our community health. We encourage you to think of food not as fuel for our bodies but as an investment in our health and our communities. These daily choices are building Saskatchewan’s vibrant future food system.

asher and garden

Picture by our dear friend and cousin Myriam @the.farm.folk 
Asher is having fun in the garden and smiling at his little sister who brings powdered doughnuts. Life is about the little pleasures. 

Labour of Love

havi and chick

Picture by our dear friend and cousin Myriam @the.farm.folk 
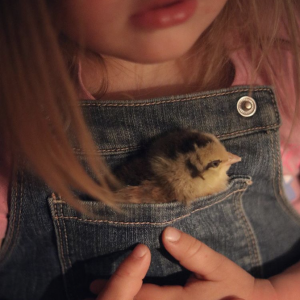
Havilah holding a spring chick on her heart. 

Between the lines of each artisan’s story, we can feel the author’s love for the community and her joy to share Saskatchewan’s food history. Through the lines of Flat Out Delicious we can feel the passion of the pioneers who create Saskatchewan’s food ecosystem. From thriving as multi-generational farmers, to producers who recently left corporate jobs to pursue their dream, Saskatchewan’s food ecosystem is broad, thriving and growing. Reading each story inspires pride for Saskatchewan and demonstrates how bright Saskatchewan food’s future is. 

Meet Jenn & Richard

Jenn Sharp

Having had the pleasure to get to know Jenn Sharp, we consider her a kindred spirit and a dear friend. Her passion and love for Saskatchewan’s farmers and producers is contagious and a joy to see. For five years, Jenn was a featured writer, columnist, and editor at the Saskatoon StarPhoenix. She currently writes the Flat Out Food column for the StarPhoenix and the Regina Leader-Post. Jenn is a regular contributor to CBC Saskatchewan and Eat North as well as has been featured in a variety of Canadian publications.

Picture by Richard Marjan

Richard Marjan

Photo credit: http://moore4mayor.ca/endorsements/richard-marjan-endorses-kelley-moore-for-mayor/

Richard Marjan’s photography throughout Flat Out Delicious speaks volume to his talent as a photographer. They say a picture is worth a thousand words; this is especially true of the photographs found in this book. Each photo beautifully represents the story of Saskatchewan’s food history, they take us on a journey with them. Richard is an award winning retired photojournalist for the Saskatoon StarPhoenix. His work appeared in Canadian Geographic, the New York Times, and the Globe and Mail.

@the.farm.folk

The beautiful photography in this blog is by @the.farm.folk

Myriam is our dear friend and cousin. She is raising two amazing children with her husband on their farm in Northern Saskatchewan. Our mothers were sisters and best friends. We grew up as sisters than more cousins and moved to Saskatchewan within a week of each other. It is such a joy for us to share her photography and a glimpse of her life with you. 

Perfect baked fries – 5 ways

Canada’s potato industry is struggling due to the COVID-19 pandemic. The demand for potatoes has plummeted with the closure of restaurants. It is estimates that over 200 million pounds of potatoes are in limbo. Canadian potato farmers are asking for your help. By eating locally grown potatoes we are supporting our local farmers and economy.

BBQ season is here! Fries are one of our favourite BBQ side. How about a healthier alternative to the traditional fried fries? How about the PERFECT baked fries?!

We are offering baked fries recipes because they are just as delicious and crispy as fried but without the extra calories.  In this blog we teaching you how to make the perfect baked fries. As you learn the basic techniques, we teach you new techniques to elevate your baked fries to poutine and truffle parmesan lemon garlic fries – perfect for date night. 

In this blog you will learn 5 delicious ways to use and modify your baked fries:

  1. Perfect baked fries
  2. Greek baked fries with lemon garlic aioli 
  3. Cajun baked fries with Cajun Remoulade
  4. Poutine
  5. Truffle parmesan garlic lemon baked fries
oven baked friesResized

Perfect Baked Fries

Many baked fries recipe make soggy fries. This recipe makes perfect crispy oven baked fries that are as tasty as restaurant fries. An added bonus of baked fries is they are the healthiest fries! Baking fries not only saves you money and extra calories but also lets you easily use locally sourced ingredients. Note that the baking time depnds on how thick your fries are.
  • Prep Time 10 + 10 Minutes
  • Cook Time 35 Minutes
  • Total Time 55 Minutes
  • Serves 4 to 6 People

Ingredients

  • 1500 gr (about 6) yukon gold potatoes
  • 1/4 cup vegetable oil - we use camelina oil
  • 1/2 tsp granulated garlic
  • 1/2 tsp onion powder
  • 1 tsp salt
  • 1/4 tsp black pepper

Instructions

  1. Preheat oven to 450 F. Place a cooling rack on a baking sheet.
  2. Place the potatoes in a large bowl, then pour very hot tap water over the top so that it covers the potatoes by at least 1 inch. Let sit 10 minutes.
  3. Drain the potatoes, then transfer them to a clean towel and dry as completely as you can. Note: you may need to use 2 towels.
  4. Return the potato sticks to the bowl. Add the vegetable oil, granulated garlic, onion powder, salt, and black pepper and combine to evenly coat to potatoes. On the cooling rack, spread the potato sticks in a single layer, leaving space around each potato.
  5. Bake in the preheated oven for 30 to 35 minutes - or until desired crisp.

Notes

Baked fries are best the day they are made. If you need to reheat them, you can make them crispy again by heating them in a 400F oven for about 5 to 6 minutes.If you don't have a cooling rack, you can line a baking sheet with parchment paper and bake the fries directly on the parchment paper. You will need to turn the fries are 15-20 minutes to ensure they are baked evenly. 
garlic friesResized

Greek baked fries with lemon garlic aioli 

These fries with a greek salad are our favourite sides for Greek chicken souvlaki. The baked fries are filled with greek flavours which is enhanced by the lemon garlic aioli. The aioli can also be used as a dipping sauce for your souvlakis.
  • Prep Time 10 + 10 Minutes
  • Cook Time 35 Minutes
  • Total Time 55 Minutes
  • Serves 4 to 6 People

Ingredients

  • 1500 gr (about 6) yukon gold potatoes
  • 1/4 cup vegetable oil - we use camelina oil
  • 2 tbsp greek spice blend - we use Splendor garden
  • 1 tsp salt
  • 1/4 tsp black pepper
  • 3/4 cup mayonaise
  • 2 to 3 medium clove garlic - minced
  • 1/2 tsp salt
  • 1/2 tsp lemon zest
  • 2 1/2 tbsp lemon juice

Instructions

  1. Preheat oven to 450 F. Place a cooling rack on a baking sheet.
  2. Place the potatoes in a large bowl, then pour very hot tap water over the top so that it covers the potatoes by at least 1 inch. Let sit 10 minutes.
  3. Drain the potatoes, then transfer them to a clean towel and dry as completely as you can. Note: you may need to use 2 towels.
  4. Return the potato sticks to the bowl. Add the vegetable oil, Greek spice blend, salt, and black pepper and combine to evenly coat to potatoes. On the cooling rack, spread the potato sticks in a single layer, leaving space around each potato.
  5. Bake in the preheated oven for 30 to 35 minutes - or until desired crisp.
  6. While the fries are cooking, make the aioli by adding in a small bowl: mayonaise, minced garlic, salt, lemon zest and lemon juice. Combine.

Notes

Baked fries are best the day they are made. If you need to reheat them, you can make them crispy again by heating them in a 400F oven for about 5 to 6 minutes.If you don't have a cooling rack, you can line a baking sheet with parchment paper and bake the fries directly on the parchment paper. You will need to turn the fries are 15-20 minutes to ensure they are baked evenly.  Whats an aioli?Aioli is an emulsified sauce made of oil and garlic.  Garlic infused mayonnaise is the most basic aioli.  Many restaurants will start with mayonnaise as the base of their aiolis.
cajun friesResized

Cajun fries with cajun remoulade sauce

These cajun fries with cajun green breans are our favourite sides with a BBQ cajun steak, tofu steak of chicken breast. The cajun remoulade features beautiful Saskatchewan ingredients and is filled with layers of flavour.
  • Prep Time 10 + 10 Minutes
  • Cook Time 35 Minutes
  • Total Time 55 Minutes
  • Serves 4 to 6 People

Ingredients

  • 1500 gr (about 6) yukon gold potatoes
  • 1/4 cup vegetable oil - we use camelina oil
  • 2 tbsp greek spice blend - we use Splendor garden
  • 1 tsp salt
  • 1/4 tsp black pepper
  • 3/4 cup mayonaise
  • 1 medium clove garlic - minced
  • 2 tsp cajun blacking spice - we use Splendor Gardens
  • 2 tbsp cajun mustard - we use Gravelbourg mustard
  • 2 tbsp horseradish
  • 1 tbsp worcestershire sauce
  • 1 tsp lemon juice
  • 1/4 cup parsley minced

Instructions

  1. Preheat oven to 450 F. Place a cooling rack on a baking sheet.
  2. Place the potatoes in a large bowl, then pour very hot tap water over the top so that it covers the potatoes by at least 1 inch. Let sit 10 minutes.
  3. Drain the potatoes, then transfer them to a clean towel and dry as completely as you can. Note: you may need to use 2 towels.
  4. Return the potato sticks to the bowl. Add the vegetable oil, salt, and black pepper and combine to evenly coat to potatoes. On the cooling rack, spread the potato sticks in a single layer, leaving space around each potato.
  5. Bake in the preheated oven for 30 to 35 minutes - or until desired crisp.
  6. While the fries are cooking, make the aioli by adding in a small bowl: mayonaise, minced garlic, cajun blackning spice, cajun mustard, horseradish, worcestershire sauce, lemon juice and parsley. Combine.

Notes

Baked fries are best the day they are made. If you need to reheat them, you can make them crispy again by heating them in a 400F oven for about 5 to 6 minutes.What is a remoulade? Remoulade is an aioli served chilled with a variety of herbs and spices.  The traditional French remoulade is made with mayonaise, mustard, capers, anchovies, and pickles.  In this cajun inspired remoulade we used creamed horseradish to bring the pickled element (replacing the capers and pickles) and worcestershire sauce to bring the umami (replacing the anchovies).Cooling rack note: If you don't have a cooling rack, you can line a baking sheet with parchment paper and bake the fries directly on the parchment paper. You will need to turn the fries are 15-20 minutes to ensure they are baked evenly. 
truffle friesResized

Truffle parmesan garlic lemon baked fries

These truffle fries can proudly be served for a date night or at a dinner party. They are simple but are filled with layers of flavour you will be proud of! We love serving these fries with white wine garlic mussels to create the iconing “moules frites”.
  • Prep Time 10 + 10 Minutes
  • Cook Time 35 Minutes
  • Total Time 55 Minutes
  • Serves 4 to 6 People

Ingredients

  • 1500 gr (about 6) yukon gold potatoes
  • 1/4 cup vegetable oil - we use camelina oil
  • 2 tbsp greek spice blend - we use Splendor garden
  • 1 tsp salt
  • 1/4 tsp black pepper
  • 2 medium clove garlic - minced
  • 1 tsp lemon zest
  • 2 tbsp gratted parmesan
  • 1/4 cup parsley
  • 1 tbsp truffle oil - we get ours at Italian Star Deli or Oliv Tasting Room

Instructions

  1. Preheat oven to 450 F. Place a cooling rack on a baking sheet.
  2. Place the potatoes in a large bowl, then pour very hot tap water over the top so that it covers the potatoes by at least 1 inch. Let sit 10 minutes.
  3. Drain the potatoes, then transfer them to a clean towel and dry as completely as you can. Note: you may need to use 2 towels.
  4. Return the potato sticks to the bowl. Add the vegetable oil, salt, and black pepper and combine to evenly coat to potatoes. On the cooling rack, spread the potato sticks in a single layer, leaving space around each potato.
  5. Bake in the preheated oven for 25 to 30 minutes - or until almost desired crisp. Add the minced garlic on the fries and return to the oven for about 5 minutes
  6. Garnish the fries with lemon zest, parmesan, parsley and truffle oil.

Notes

Baked fries are best the day they are made. If you need to reheat them, you can make them crispy again by heating them in a 400F oven for about 5 to 6 minutes.Cooling rack note: If you don't have a cooling rack, you can line a baking sheet with parchment paper and bake the fries directly on the parchment paper. You will need to turn the fries are 15-20 minutes to ensure they are baked evenly. 
poutine

Poutine

Now we are talking! Having mastered the technique of oven baked fries let’s make the ultimate French Canadian savoury delight – Poutine! This poutine offers the authentic taste of Quebec’s iconic poutine: crispy fries, cheese curds and tons of poutine gravy.
  • Prep Time 10 + 10 Minutes
  • Cook Time 35 Minutes
  • Total Time 55 Minutes
  • Serves 4 to 6 People

Ingredients

  • 1500 gr (about 6) yukon gold potatoes
  • 1/4 cup vegetable oil - we use camelina oil
  • 2 tbsp greek spice blend - we use Splendor garden
  • 1 tsp salt
  • 1/4 tsp black pepper
  • 480 gr cheese curds - we use Bothwell “Squeak’rs”
  • 2 cloves garlic - minced
  • 3 tbsp cornstarch
  • 2 tbsp water
  • 1/3 cup unslated butter
  • 1/4 cup all purpose flour
  • 1 tbsp worcestershire sauce
  • 1 tbsp balsamic vinegar
  • 1 tsp onion powder
  • 2 tbsp ketchup
  • 2 cup beef broth - we use pine view farms
  • 1 cup chicken broth - we use pine view farms
  • 3/4 cup stout beer - there are so many good local options: District, Rebellion, Pile of Bones...
  • 1/2 tsp pepper + 1/2 tsp salt

Instructions

  1. Preheat oven to 450 F. Place a cooling rack on a baking sheet.
  2. Place the potatoes in a large bowl, then pour very hot tap water over the top so that it covers the potatoes by at least 1 inch. Let sit 10 minutes.
  3. Drain the potatoes, then transfer them to a clean towel and dry as completely as you can. Note: you may need to use 2 towels.
  4. Return the potato sticks to the bowl. Add the vegetable oil, salt, and black pepper and combine to evenly coat to potatoes. On the cooling rack, spread the potato sticks in a single layer, leaving space around each potato.
  5. Bake in the preheated oven for 30 to 35 minutes. Because in Saskatchewan it's difficult to get fresh cheese curd we recommend spreading the cheese curds on the fries evenly and leaving them in the oven for an additional 30 seconds to enhance the "squeek".
  6. While the fries are baking, make the poutine gravey. In a small bowl add the cornstarch and water. Combine and set aside. In a pot, melt the butter. Add the flour and cook for 5 minutes, stirring regularly - until it turns a light golden. Add the minced garlic and cook an additional 30 seconds - stirring regularly to prevent the garlic from burning.
  7. Add the worcestershire sauce, balsamic vinegar, onion powder, ketchup, beef and chicken broth and beer. Bring to a boil whisking regularly. Add about half the cornstarch mixture let simmer, whisking regularly. If you would like your gravey thicker add the rest of the cornstarch mixture. Season with salt and pepper. Taste and adjust seasoning.
  8. Serve the fries and cheese by topping them with a generous amount of poutine gravey.

Notes

Baked fries are best the day they are made. If you need to reheat them, you can make them crispy again by heating them in a 400F oven for about 5 to 6 minutes.Cooling rack note: If you don't have a cooling rack, you can line a baking sheet with parchment paper and bake the fries directly on the parchment paper. You will need to turn the fries are 15-20 minutes to ensure they are baked evenly. You can replace the beer by beef or chicken stock. 

Let’s celebrate mothers

Moms are very specials in our lives and even when we are all grown up we still need them. We love their voice, their supporting presence and everything they do for us. When moms are there, everything suddenly feels better. Moms work hard to make our lives easier and Mother’s Day is a great time to celebrate how much we love them.

As we are doing our best to respect physical distancing, Mother’s Day can be a little more challenging this year as our mother’s arms cannot give us a hug. The challenges we are facing due to physical distancing is an opportunity to be especially thankful for our mothers and to make this Mother Day extra special for the mothers who are so important in our lives. 

Even with social distancing, we have the opportunity to make sure this day is very special for the women we love so much. This year, ZestyKits is here to help you make this day very special eventhough we might not be able to visit with eachother.

Take the Time to Make a Video Call

One thing we have learned in the last few weeks is that we need to make time to connect with our loved ones. Text messages and emails are great. However, for a special day like Mother’s Day, we encourage you to make a video phone call to enrich the quality of communication. Talking allows us to hear eachothers voice. The voice is the connection with our soul and allow us to feel closer even though we still have to stay apart. Viewing each other, even through a camera, makes us feel close and enables us to read eachothers body language. Research shows communication is 93% non-verbal. Non-verbal communication includes: vocal tone, facial expression, fidgeting,  head and hand movement, posture. The more non-verbal attribute a method of communication provides, the richer the quality of interaction. Video calls enables a richer communication and we encourage you to video call the mothers you cannot see in person this Mother’s Day. 

Order the ZestyKits Mother’s Day Brunch

Surprise mom by ordering a special meal toshare on a virtual brunch. Being apart does not means that you cannot share a meal together. Our wonderful Mother’s Day brunch menu let’s dad easily make brunch with the kids to celebrate mom with a delicious and local Sunday brunch.

Make a Card with the Colouring Page in your Brunch Kit

Handmade cards are a sweet reminder of love and appreciation. In your brunch kit you will find a special mother’s day colouring page made by a Saskatchewan artist. You can ask the kids to colour and write personal notes in the card to give a special handmade present to mom.  Colouring and writing in the mother’s day card is a beautiful and memorable activity for children that will warm mom’s heart.

How do I get my kids in the kitchen: An ages and stages guide

Blog provided by:
Lacey Engel, Registered Dietitian 
BSc. Nutrition, BSc. Kinesiology.
Owner of Beyond Baby Nutrition

Don’t let the cute videos online fool you, having your kids in the kitchen is no joy ride. It’s more like a roller-coaster of emotions; at least that’s been my experience with my twin boys. With this handy ages and stages guide, we can help show you exactly the best ways to have your kid help in the kitchen, and keep your sanity too!

Disclaimer: All kids develop at different rates. Please keep in mind these activities and age ranges are just a suggestion. You are the expert on your child and know what they are capable of. Supervision is always required at every age and stage.

Your Guide to Kids in the Kitchen Based On Age

0-18 months

Baby in the kitchen? You bet!! Having your baby near you in the kitchen from the start is a great sensory experience for them.

How to include them:

Baby-wearing works great if it’s safe to do so.  If not, we suggest your child some place safe like a highchair, playpen, baby-swing or bouncer so they can see and hear what’s going on. At around the 4 month mark your baby will love if you offer them cooking utensils, Tupperware, plastic cups, a whisk or a wooden spoon to bang around. Again, use your judgement on what’s safe and appropriate for your child.

  • Talk to them about what you’re doing. It may sound silly but just hearing your voice is reassuring, and in the long run it helps with your child’s communication development.
  • Describe ingredients – what colour, shape? Is it in a can? Fresh or frozen.
  • Show them ingredients – have them smell or touch if it’s safe to do so. You get the gist.

18 months to 3 years

Prime time to get those idle hands working on something productive, instead of tearing the house apart while you cook. The key to this age and stage is to keep tasks simple, easy to complete, and quick to finish.

Ideas for getting your 18-month-old to 3-year-old to help in the kitchen:

  • Rinse fruit and vegetables in a sink, or colander with water.
  • Scrub potatoes.
  • Tear lettuce or other greens into pieces. Be sure to show them how big or small you want the pieces.
  • Stir batter in a bowl.
  • Assist with mashing food, or help hold the hand mixer.
  • Push specific buttons on a blender or food processor.
  • Sprinkle spices or herbs.
  • Measuring ingredients with help.

Kids at this age can get bored really easily. So, if you want them in the kitchen longer than a few minutes, try these ideas:

  1. Have food cut or pre-measured so they can dump the ingredients and help mix.
  2. Make up goofy songs that go along with activities – “This is how we wash potatoes, wash potatoes, wash potatoes,” to the tune of So Early in The Morning.
  3. Look, smell, and describe. This is a great time to encourage your child to explore the food you’re working with.

Look, smell and describe questions:

  1. What colour is it?
  2. Can you think of one other food that is that colour too?
  3. Does it feel soft? Scratchy? Hard?
  4. What does it smell like? What if you rub it between your fingers; does it smell then?
  5. Do you want to taste it? It tastes like…

4- 5 years old

This is prime time to get those idle, little hands working on something productive, instead of tearing the house apart while you cook. Your little preschooler is hard at work refining their fine motor skills, so this is a great time to give them some more challenging kitchen tasks.

Ideas for getting your 4-5 year old to help in the kitchen:

  • Any of the tasks listed above, PLUS
  • Peeling a hard-boiled egg.
  • Cracking an egg (suggest into a bowl first to fish out any shells)
  • Measure out dry ingredients.
  • Find and grab ingredients from the fridge and pantry.
  • Spread sauces to make sandwiches.
  • Whisk ingredients slowly.
  • Use a child-safe knife to cut soft fruits, veggies, cheese, etc.
  • Help set and clear the table.
  • Use a spatula to scrape the bowl
  • Knead, roll, and use cookie cutters
  • May be able to start identifying numbers in the cookbook for measurements, or keep track of which step you are on
  • Be involved in cleaning up such as sweeping, holding the dust pan, or vacuuming

To get your kids more involved in the whole meal process, you may also want them to also help set and clear the table.

  •  

6 to 9 years old

Your mini chef is ready to spread their wings and take on way more responsibility in the kitchen; dare I say they may even be ready to tackle a simple recipe with supervision! Check out these simple, wholesome recipes from my friends over at Zesty Kits.

At this age, your elementary-age kid can be tasked with anything listed above along with:

  • Any of the above tasks, PLUS…
  • Reading recipes out-loud
  • Using larger kitchen utensils like a stand-mixer, hand-mixer, oven, stove, and knives (all with supervision).
  • Use a grater or peeler for vegetables.
  • With supervision, use a small paring knife to cut fruit and soft vegetables.
  • Stir or mix food cooking on the stove.
  • With oven mitts, set in and pull food from the oven.
  • Grease baking pans.
  • And the list goes on and on.

1. Choose the right time

Expect everything to take longer than it usually would so set aside extra time for cooking.

  • For mom: If you’re in a rush to get a meal on the table, enlist your child’s help on the weekend when you don’t feel crunched for time.
  • For your child: Choose a time when they are well rested and fed.

2. Plan ahead

Find a recipe that isn’t too complex or takes too long to prepare, or do some prep work before your kids join you in the kitchen if needed.

3. Expect a lot of mess

For younger kids you may want to put them in clothes you don’t mind getting dirty. Or put down a plastic tablecloth on the floor, or a tray under their work station. Aprons are also great if you have them.

4. Think of it as a great learning opportunity for your kids (because it is!)

Here’s just a few things you’ll be teaching them by having them in the kitchen with you:

  • Food safety – washing hands before cooking, and between touching raw and cooked foods for example. Learn more here.
  • Nutrition and health – you can talk about food, where it comes from. Smell, touch, taste foods, and introduce new foods. Be sure not to focus too much on “health talk.” (New blog coming soon!)
  • Math or science – weighing or measuring ingredients. Talk about why certain ingredients need to be added. Check out this link for some cool facts about the science behind baking.
  • Communication skills, time management, and following instruction and so much more!

5. Safety First

As always, remember you are the foremost expert in your own child. The above suggestions are just that, suggestions. The kitchen can be a dangerous place for kids of all ages.

  • For younger kids
    • Remove any unsafe items on the counter top that are close enough for them to reach (ahem.. knife block any one?)
    • Remind them what is safe for them to touch and not safe to touch.
    • Set up a work station for them on the kitchen island or away from things you are concerned about if that’s an option.
  • For older kids
    • Don’t over-estimate their need and desire to still have you in the kitchen with them for guidance and trouble-shooting.

Well there you have it, an ages and stages guide to cooking with your kid! My question to you now is, which task are you going to have your child help you with first?

3 Simple Self-Care Practices to Calm the Nervous System

Blog provided by: Bee Bierman
Yoga teacher, Massotherapist, Reiki Level 3
beebierman.com

Through our body, we can lovingly reach in and touch the inner garden of our mind, and often, our mind-garden has many weeds that need pulling, seeds that need sowing and water that needs flowing. 

If there is ever a time to tend to our inner garden, it is now.

With the Covid-19 virus continuously spreading and a global call for all-hands-on-deck (sanitized hands, that is), it is truly an extraordinary time to be alive. Many people are facing some very challenging emotions, thoughts and sensations. With this reality, I am finding that this is the best time to share a few self-care tips that have immensely helped me when I feel overwhelmed. Meditation, breathing and movement practices are three of my go-to’s when I find myself struggling with difficult emotions and feelings of uncertainty.


As a collective, I believe that now more than ever, we are being asked to consciously observe our thoughts and the effects those thoughts have on our state of being. With the onset of Covid-19 and its ability to render people feeling helpless in their day to day, the mind then becomes the only thing that one can have some control over. Unless you consciously witness your thoughts, it is all too easy to become overwhelmed by what your mind is telling you and equally so, all too easy to believe your thoughts, even if they are not in your best interest. 

Let’s look at the emotion fear, for example. When we allow fear to sit in the driver’s seat of our everyday experiences, we also enable many other emotions connected to fear to infiltrate otherwise precious moments of our life, such as anxiety, overwhelm, etc. With this being said, fear, anxiety, and overwhelm are all understandable responses to the pandemic that we are facing, and in no way am I suggesting that we should not feel fear – no, not at all. We should feel any emotion that arises, but to what depth we allow our feelings to be explored, and to what degree we allow our emotions to control our state of being, is ultimately a choice. As challenging as it may be, it can also be equally simple to work with when we have the right tools at hand. 

Four-Step Mindfulness and Compassion Meditation

Psychologist and meditation teacher Tara Brach offers a supportive four-step mindfulness and compassion practice called RAIN when confronted with challenging emotions. The acronym RAIN stands for recognize, allow, investigate, and nurture. This meditation is essentially a process of conscious and curious inquiry rather than turning away from the uncomfortable emotion, thought or sensation. 

As with most meditation practices, find a comfortable seat in a quiet space and begin to connect with your breath. Bring to mind the emotion that you want to work with and use the process of RAIN as follows.

Recognize, recognize what is happening. Allow, allow the experience to be there, just as it is. Investigate, investigate with interest and care. Nurture, nurture with self-compassion.

I have found this practice to be incredibly useful during times of overwhelm and stress. For more information about Tara’s work and many free guided meditations, please visit https://www.tarabrach.com/guided-meditations/.

Simple Breathing Practice to Activate the Parasympathetic Nervous System:

In addition to observing your thoughts and practicing meditation, various breathing techniques can support the activation of one’s parasympathetic (rest and digest) nervous system. In particular, lengthening one’s exhaled breath is known to combat stress and feelings of overwhelm. By elongating your exhale, you are signalling to your body to calm, which means the vagus nerve is stimulated, heart rate variability (HRV) decreases, cortisol levels drop, and the mental fog that creeps in when in fight or flight, clears. 

For more information about the science behind the vagus nerve and elongated exhales, please visit https://www.psychologytoday.com/us/blog/the-athletes-way/201905/longer-exhalations-are-easy-way-hack-your-vagus-nerve.

Breathing Practice: 

The Breathing Formula:

  • Inhale 4 count (4, 6, 8)
  • Pause 1 count (or skip)
  • Exhale 6 count (6, 8, 10)
  • = 1 breathing cycle

Complete 7-10x

Guided Practice: 

Find a comfortable seat on a cushion or in a chair, or find yourself lying down with knees propped up under a bolster to give support to your lower back.

Next, begin by simply noticing the consistency and natural rhythm of your breath without changing it. Feel the rhythm of breath fall and fill beneath your clothes. Soften your brow, the creases of your eyes, your tongue, throat and the entirety of your upper and lower body.

Briefly continue this body scan as you move through feeling the intricacies of inhabiting your alive and healthy body. 

Next, come back to the awareness of your breath and begin to exhale completely — pressing ALL of the air in your lungs and chest cavity out. 

Then begin your next inhale for a count of 4. 

At the top of your 4 count inhale, pause and hold your breath for a count of 1, then exhale for a count of 6. Pause and hold your breath for a count of 1, then inhale for a count of 4 and continue the cycle as instructed.

Continue this inhale (4 count) pause (1 count) and exhale (6 count) for 7 to 10 cycles. If you feel that you would like to deepen the length of inhaling and exhaling, add 2 counts to both inhale and exhale.

For example:

Inhale 6 count, pause 1 count, exhale 8 count for 10 cycles of breath.

Inhale 8 count, pause 1 count, exhale 10 count for 10 cycles of breath.

You are welcome to skip the 1 count pause altogether as you do not need to pause to receive the benefits of relaxation. The pause is there to increase your awareness of breath. 

Movement as Medicine

Humans have been moving, dancing, rhythmically celebrating and expressing since the beginning of recorded time (and probably earlier), so for most of you reading this, it goes without saying that movement is so vital for optimal and thriving health. In truth, it doesn’t particularly matter what kind of movement you do as long as you enjoy it. Walking, running, dancing, yoga, biking, hiking, rowing, climbing, swimming or pole dancing! Anything to get you feeling inspired and up and moving is the key. The more that you enjoy the movement, the longer and more likely you are to stick with it, which promotes a fuller dose of happy hormones, such as endorphins, dopamine and serotonin. 

If I’m not able to go outside, due to weather or, more recently, the outbreak of Covid-19, my go-to forms of movement are either yoga or dancing. 

For my latest movement playlist, click the link below and happy shimmying! https://open.spotify.com/playlist/6jJRrWJYtvtPumGODNcgut?si=XrsWvgzFQOCg3Q4KlAVHBg.

For more information about hormones and boosting your mood, check out this article: https://www.healthline.com/health/happy-hormone#massage.

Sometimes it feels incredibly difficult to take the first steps towards self-care, and this I say this from experience, but in all honesty, it simply begins with one step. May this article be the first step in planting a nutritious seed in your self-care garden. As with all seeds, each needs a little of this, and a little of that; ultimately, it is up to you to decide when to water. 

I wish you a fertile Spring Season full of new growth and abundant opportunities.

May your garden grow full and lush with these new and familiar tools.

Some Questions to Ponder

Can you feel an emotion such as fear, observe it, accept it and then let it go? 

Can you practice self-compassion and loving acceptance towards yourself and others, especially during times like now? 

Can you see this as an opportunity to turn our attention inward with a loving child-like curiosity?

Can you take this time of social distancing not as something that is happening to you, but something that is happening for you? 

Recap with Actionable Steps:

 
  • Four-Step Mindfulness and Compassion Meditation: RAIN recognize, allow, investigate, and nurture.
  • Simple Breathing Practice to Activate the Parasympathetic Nervous System: Elongating exhale by two counts.
  • Movement as Medicine: With a curious mind and in any way that you enjoy, get your body moving! 

6 Comforting Pantry Recipes

Catherine Beaudoin
Co-founder ZestyKits

During difficult times, I turn to comforting dishes from my childhood. These classic dishes fill the house with nostalgic smells that bring me back in time, and for a moment, I feel the joy and peace of childhood. 

Growing up, my sisters and I spent countless hours in the apple orchard behind our house. I remember coming back home on cold spring afternoons after spending hours with my sisters in the apple orchard. As soon as we walked in, the smell of these dishes welcomed us home, as if to say – you are safe, you are loved.

These recipes use pantry ingredients and are easy to prepare. To learn how to fully stock your pantry check out the Ultimate Guide to Pantry Essentials.  These easy and comforting pantry recipes will help you get a delicious dinner on the table quickly using everyday pantry ingredients. I hope these classic recipes bring joy into your home as they do in mine.

Crusty White Bread

Raising time: 12 hours
Makes: 1 loaf
  • Prep Time 20 Minutes
  • Cook Time 60 Minutes

Ingredients

  • 3 ½ cups all-purpose flour
  • 1 ½ tsp. salt
  • ½ tsp. dry yeast
  • 1 ¾ cups cold water
  • ¼ cup whole-wheat flour

Instructions

  1. In a large pot, combine the flour, salt and yeast. Add the water. With a fork, stir until the flour is completely moistened, but not necessarily smooth. Cover and let rise at room temperature for 8 to 12 hours, or overnight.
  2. In a large bowl, place the whole wheat flour. Set aside.
  3. With your hands, directly in the pot, fold the risen dough onto itself until smooth (about 6 times).
  4. Transfer the dough into the bowl with the whole wheat flour and turn to coat the entire surface of the dough. Cover and let rise for 45 minutes at room temperature or until it has doubled in volume.
  5. Meanwhile, with the rack in the middle position, preheat the oven to 450°F. Place a 3 litre Dutch oven or ovenproof pot with its lid (not glass) in the oven, and heat for about 30 minutes.
  6. Drop the floured bread dough in the centre of the hot pot. Cover and bake for 30 minutes. Remove the lid and continue baking for 30 minutes.
  7. Let the bread cool on a wire rack or in the pot.

Tomato Soup

Serve with: Grilled cheese
  • Prep Time 15 Minutes
  • Cook Time 35 Minutes
  • Total Time 50 Minutes
  • Serves 6 People

Ingredients

  • 2 onions - diced
  • 2 cloves garlic - thinly sliced
  • 2 tbsp olive oil
  • 2 cans (28oz, 796ml) whole tomatoes
  • 4 cups chicken or vegetable broth
  • 1 tbsp. brown sugar
  • 1 tsp. dried oregano
  • 1 tsp. Salt
  • ¼ tsp. pepper
  • Sliced chorizo - optional
  • pesto - optional

Instructions

  1. In a large saucepan over medium-high heat, soften the onions and garlic in the oil.
  2. Add the tomatoes, broth, brown sugar and oregano. Bring to a boil. Let simmer for 30 minutes. Season with salt and pepper
  3. With an immersion blender, purée until smooth. Garnish and serve with grilled cheese

Meatloaf

Serve with: Mashed potatoes, green peas, salad
  • Prep Time 10 Minutes
  • Cook Time 90 Minutes
  • Total Time 100 Minutes
  • Serves 6 People

Ingredients

  • 1 egg
  • 1 onion - finely diced
  • 1 tbsp. relish
  • 1 tbsp. ketchup
  • 1 tsp. dry parsley
  • 1 ½ tsp. salt
  • ¼ tsp. pepper
  • 2 lbs ground beef
  • ½ cup quick oats
  • ¼ cup ketchup
  • 1 tbsp. brown sugar
  • ¼ tsp. dry mustard

Instructions

  1. Turn on the oven to 350F. In a large bowl, combine the egg, diced onion, relish, ketchup, parsley, salt and pepper. Add the ground beef and oats. Using your hands or a wooden spoon, combine.
  2. Place the meat in a loaf pan 23cm x 13cm x 6cm (9” x 5” x 3”).
  3. Combine all the topping ingredients in a small bowl. Place the topping evenly on top of the loaf.
  4. Bake about 1 hour 30 minutes or until fully cooked.

Beef Stew

Serve with: Bread
  • Prep Time 15 Minutes
  • Cook Time 120 Minutes
  • Total Time 135 Minutes
  • Serves 6 People

Ingredients

  • 2 lbs beef cubes
  • ⅓ cups flour
  • 2 tbsp. oil
  • 2 tsp. salt
  • ¼ tsp. pepper
  • 2 tbsp dried parsley
  • ¼ tsp. dried thyme
  • 4 cups tomato juice
  • 3 carrots - in 1 cm slices
  • 1 cup - rutabaga - dices
  • 2 cups - potatoes - diced
  • 12 oz - frozen peas
  • Fresh parsley

Instructions

  1. Coat the beef cubes with flour.
  2. Add the oil to a large pot on medium-high heat. Roast the beef cubes about 4 minutes per side until browned. Do not over crowd the pot - ensure there is space between each cube to promote browning.
  3. Add the salt, pepper, parsley, thyme and tomato juice. Bring to a boil, cover, lower the heat to low and let simmer for 1 hour. Stir a few times while cooking.
  4. Add the carrots, rutabaga and potatoes. Cover and let simmer an additional 50 minutes.
  5. Add the frozen peas and cook for an additional 10 minutes. Garnish with fresh parsley. Serve with bread.

Sweet and Sour Pork

Serve with: Rice
  • Prep Time 20 Minutes
  • Cook Time 60 Minutes
  • Total Time 80 Minutes
  • Serves 6 People

Ingredients

  • 1 tbsp. oil
  • 2 tbsp. cornstarch
  • ½ cup sugar
  • ½ cup vinegar
  • 2 tbsp soy sauce
  • 1 green pepper diced
  • 1 red pepper diced
  • 1 540 ml can pineapple - dice the pineapple
  • 1 large onion diced
  • 2 lbs pork tenderloin

Instructions

  1. Turn on the oven to 350F. Cut the pork into bite size pieces.
  2. In a large pot that goes in the oven, add 1 tbsp. oil and pork. Cook about 4 minutes on each side to brown the meat. Add the diced onion.
  3. Combine the cornstarch, sugar, vinegar, soy sauce, in a small pot. Cook on medium heat, until the sauce is transparent. Add the sauce to the pork.
  4. Add the soy sauce, green pepper, pineapple and juice to the pork.
  5. Cover and bake at 350F for 1 hour or until the meat is tender. Serve with rice.

Slow-Cooker Chicken-Tortilla Soup

Cook 4 hours on high OR 8 hours on low
  • Prep Time 20 Minutes
  • Serves 8 People

Ingredients

  • 2 lb. skinless, boneless chicken thighs
  • 1 large onion - diced
  • 2 red bell pepper - diced
  • 4 garlic clove - minced
  • 4 cups chicken stock
  • 1 can (28oz, 796ml) diced tomatoes
  • 2 cans (8 oz.) tomato sauce
  • 1 tsp. chili powder
  • 1 tbsp. paprika
  • 1 tbsp. brown sugar
  • 2 tsp. dried oregano
  • 1 1/2 tsp. ground cumin
  • 1 tsp. Sea salt
  • 1/4 tsp. black pepper
  • 3 zucchini, halved and sliced
  • 200 gr green beans, halved
  • 2 tbsp. fresh lime juice
  • fresh cilantro - optional
  • sliced jalapenos - optional
  • sour cream - optional
  • tortilla chips - optional

Instructions

  1. Combine chicken, onion, bell pepper, garlic, stock, diced tomatoes, tomato sauce, chiles, chili powder, brown sugar, oregano, and cumin in the slow cooker. Season with salt and pepper.
  2. Cook, covered, until chicken is cooked through on low 8 hours or on high 4 hours. Add zucchini and green beans and cook, covered, for 30 minutes. Remove chicken, shred meat; return to slow cooker. Stir in lime juice.
  3. Serve and garnish with cilantro, jalapeños, and sour cream, with tortilla chips.

Enjoy Your Little Kids

11 Survival Tips from a Home-school Mom of 7

Jane Flannery
Home-school Mom of 7
flanneryjane@hotmail.com

Schools are closed, and the panic of even thinking about taking on home-schooling your kids has set in. So I asked a long time home-school pro, Flannery Salkeld, mom of seven to share some survival tips with us so we can actually enjoy our little kids during this extra trying time.

A quick perspective change

Before we dive right in to the 11 tips here are two really, REALLY important perspective switches Brett, Flannery’s husband, suggests:

  1. Realize that most days you can probably get the content you’d get in a school day in about 2 hours, though that number is a little higher in the higher grades. So don’t worry about keeping them busy for 7 hours a day.
  2. Everything you do is education. Don’t panic about the curriculum. Enjoy your kids and work on them enjoying their time together and with you. That is priority number one. That will pay dividends for years. Your kids aren’t going to end up adults not knowing the ONE IMPORTANT THING that everyone was supposed to learn in grade whatever.

And remember, this is a great opportunity to get to know your kids better.

When COVID-19 is over, you have succeeded if you have done that.

Make that your goal!

11 Tips For A Home-schooling Newbie

1. Structure

Map out a structure or routine for the day. Keep it simple and incorporate things like meal and snack times (more on that later), outside time, higher and lower-key activities (including naps if applicable), tidy up times, and books or audiobooks.

Having a routine shifts responsibility from you to the routine. When your kids are resistant, hang on to your vision of the routine but at the same time expect things to be bumpy at first. Remember, everyone needs time to adjust.

Pro Tips:

  • Save screen time for when you need it most (more on that later).
  • Consider your and your kids’ times of naturally higher and lower energy when planning.
    • Sandwich pleasant and less pleasant activities.
      • For example, if your kids are reluctant to go outside, you could say “It’s outside time and then hot chocolate time.” (It’s not a bribe, it’s just on the schedule!)

Here is an idea of what you COULD include when mapping out a routine for your kids:

Keep in mind:

  1. Start building your schedule off of what is already going well, or working day to day.
  2. You don’t need to have every 30 minutes of the day planned.
  3. Follow the natural rhythm of the day with your kids, and pivot when they need something fresh to focus on.
  4. Build moments of connection early on in the day and throughout the day. More on this below.
  5. If your mind is swirling with all the things you “should” do and teach your kids, choose one! More on keeping it simple and dealing with the “shoulds” below.

2. Connect early in the day

Try to connect with your little kids early in the day with a small amount of focused attention. Great examples of this are reading a book or playing a short game.

They will be less likely to be clingy or whiny when you have to get things done.

Why?

Because you’ve invested time in connecting with them, reaffirming that bond and love.

This same idea can work when you are trying to get your kids to play independently. You can sit down with them and play for a few minutes to help them get engaged, and then drift away.

3. Simplify

A calm and uncluttered environment will make it way easier for you to do your routine and feel good at home.

Step back and envision the flow of the day that you have planned, the activities, the meals.

Ask yourself:

  • Is everything accessible?
  • What’s in the way?
  • What’s overwhelming?

Pro tips:

  • Boxing up things and storing them out of the way.
    • You don’t have to worry about whether you will be getting rid of anything permanently at this point. Just clear away things that are stressing you out and getting in the way of a peaceful home life.
      • Include:  Anything you aren’t using now, excess supplies and toys, and even excess clothes.
  • Consider rotating toys
    • Having too many decisions to make is overwhelming, especially for kids.
      • It’s easier for kids to focus if they have fewer toy options.
      • They will play better and for longer periods at a time.

A good book on this topic is:
Simplicity Parenting by Kim John Payne.

There is a special audio series at simplicityparenting.com in response to today’s situation.

4. Meals and Snacks

Keep meals and snacks really simple and try to plan ahead.

We do breakfast, lunch, afternoon snack, supper, and maybe a very small evening snack. They are at around the same times every day. If your kids get up early they may need a morning snack. Have water available in fun cups if it isn’t time to eat yet.

When it’s time to eat, feel free to only offer what you are comfortable with them having. Again, limit options.

I am happy to share my meal and snack ideas on request. I could go on, but instead I will recommend a great article by my Registered Dietitian friend Lacey Engel, called “How Do I Stop My Kid Asking for SNACKS All Day?”

5. Screen time

As much as you can, try to save screen time for later in the day and times when you most need it.

For example:

  • When making supper, or meals.
  • Trying to get work done where you can’t be interrupted.
  • When your energy is particularly low.

I struggle with screen time getting out of control when I am stressed out; however, using the screen too much always backfires. The kids are whinier and don’t play as well!

Pro tips:

  • Think about what your personal criteria is for what your kids watch and have some ideas for options you are OK with.
  • To keep my stress low and the atmosphere pleasant, I try to pick audiobooks, kids’ shows and nature documentaries that I personally enjoy or at least don’t mind!

Need some more ideas on keeping kids entertained? Check out this post, What to do with kids when you’re stuck at home – The Ultimate Guide.

6. Social Media

You might find you need to make a screen time schedule for yourself, too. Especially nowadays with new information coming in all the time about the pandemic. The news and social media can be extremely distracting.

Pro tip:

  • You might want to practice “social media distancing”
    • Set certain times or a certain number of times per day that you will check in.
    • This allows you to stay present in your day the rest of the time.

7. Perspective

These last few tips are mostly about your mental game. When you feel stressed or overwhelmed, try to observe your situation without judgment.

Pro tips:

  • Mentally step back and take a bird’s eye view of your day and of your problem.
  • Brainstorm how to solve problems and alleviate pain points.
    • Since you can’t do everything, choose where to cut corners.
  •  Pick your battles and figure things out gradually.
    • You don’t have to respond to every misbehaviour right away.

8. Juggling is an art form

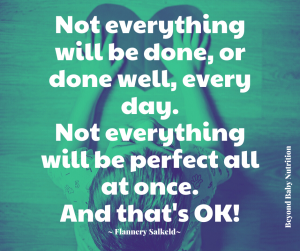
Not everything will be done – or done well – every day. Not everything will be perfect all at once.

For example:

I might make my kids a great lunch and congratulate myself on the enriching preschool activities I provided that morning.

BUT…. Realize I have eaten and drank nothing and have forgotten to make an important phone call.

I am dressed and all ready for the day. Have precooked a bunch of chicken and made soup. The baby is napping for an extra-long time.

BUT…. I look up and realize that the twins are on their second hour of Ben and Holly’s Little Kingdom.

The more purposefully you can juggle, the more peaceful and in control you will feel!

I can walk by a particular mess and say to myself, “Not now. That will get cleaned up at clean-up time.”

I’ve experienced that it is possible for me to spend literally all day in the kitchen, or all day trying to clean up, if I don’t intentionally structure how I will spend my time.

9. Eliminate “should”

I think that “should” is almost never a helpful word.

Listen to your thoughts. If you hear “should,” try to replace the word with something more specific to see what you actually mean by “should.”

For example:

“I should be dressed by now”

Could mean….

“I would feel better about myself and more energetic if I were dressed.”

In this case, you might decide to prioritize getting dressed because you want to take care of yourself.

Or it could mean…

“If my neighbour sees me, I worry she will judge me for not being dressed.”

In this case, you might just say “Pffft” and not worry about it any more.

10. Notice the positive

There will be both predictable and unexpected benefits of having your whole family staying home together.

Looking for all of the benefits and commenting on them out loud to your kids will help everyone’s outlook! You can notice more time to sleep in, the option to eat peanut butter, to reheat leftovers for lunch, to not have to rush out the door.

Pro tips:

  • Talk up how lucky you all are to get the chance to spend more time together.
  • Interpret and explain situations to your kids on how their energy and actions are being helpful, or could be used.
    • “Look! She’s smiling because she hears your voice and is excited you are here!”
    • “He’s crying; how can we help him?”
    • “Wow, you are a great big brother; he really loves when you play with him!”
    • “Look, he wants be like you! Can you show him how to do it?”
    • “She will learn to talk by listening to us!”
    • “I need your help. Can you please bring a diaper from over there? She needs a new one.”

You get to create the atmosphere in your home!

11. If Mama Ain’t Happy…

Finally, paying attention to your needs and preferences wherever you can is great for you and great for your kids.

They’ll learn from your example and, overall, they will be happy if you are happy.

Ask yourself:

  • What do you need to do in the morning to feel ready for the day?
    • If you are not used to staying home, consider what kind of clothes you enjoy wearing that are comfortable and practical for your new situation.
  • What really bothers YOU and is worth your attention?
    • For example, if you can’t handle whining, but don’t care if the kids jump on your couch, spend your energy training them not to whine.
  • What kind of a break do you need to recharge?
    • Read or listen to a podcast by yourself?
    • Talk on the phone with a friend?
    • Leave the house?
    • Be alone in the house?
    • Have music on in the background, or silence?
  • What are you interested in doing with the kids?
    • If you like having kids “help” you in the kitchen, do it. If the idea makes you want to scream and run away, don’t do it.
    • Choose something else that is more sustainable for you.

It’s a challenging time right now, and there are so many great choices you can make for your kids. It’s perfectly fine to pick the ones that suit YOU.


I hope these suggestions help give you the space to enjoy your extra time with your children!

Feel free to comment if you have questions or want more examples for any of the points I mentioned. If you want to get in touch with me directly, you can email me at flanneryjane@hotmail.com

Jane Flannery
Home-school Mom of 7
flanneryjane@hotmail.com