When is composting better than recycling?

As a society, we are becoming more aware of our environmental foot print and are spending more energy on improving  waste management. When thinking of waste management a few method come to mind including: reusing, composting, upcycling and recycling. Many items that use to find their way in landfill can now avoid it. Some of these items include: vegetable peels,  batteries and bottles. This contributes to reducing garbage pollution. 

Paper is a significant portion of waste and it can be composted or recycled.   Paper is responsible for 16% of landfill waste. Recycling or composting are both an improvement on throwing paper away.  It is better to compost or recycle paper? 

First let’s define both processes. 

Composting

Composting helps put organic waste to an alternative use. Items that are usually composted include grass cuttings, shredded leaves, fruit and coffee grounds. These products are combined in specific proportion with water and air to start the  decomposition process. The compost that is formed is helpful in growing plants. 

Recycling

Recycling is the manufacturing of products that could of been discarded in a landfill. Items are recycled by being converted into items that can be used again. 

Recycling and compositing each have pros and cons. Let’s examine each method to identify which is better overall.

Recycling
Pros
  • bring paper material back in the production stream which reduces the need for new trees
  • recycling reduces the need to produce new paper. One piece of A4 paper requires on average 5 liters water to produce
  • recycling 1 ton of paper saves around 682.5 gallons of oil, 26,500 liters of water and 17 trees
  • recycling uses resources but less than to produce new paper
Cons
  • the process of recycling paper produces a lot of waste.  
  • harmful chemicals are used in the recycling process
  • the recycling process pollutes water
  • encourage consumption of paper. Recycled paper may wrongfully appear to have minimal impacts on the environment.
Composting
Pros
  • composting instead of recycling paper could completely eliminate the resources needed to break it down and manufacture it back into fresh paper.
  • no recycling bins, no trucks to carry it to the recycling plant, no machinery or sludge or chemical processing agents.  Just paper breaking down into its component parts and then fertilizing your garden next year, helping your tomatoes grow.
Cons
  • composting paper removes it from the paper production stream
  • on a large scale, composting paper rather than recycling it, may cause more harm than good.
Soiled paper

When paper is soiled in any way it cannot be recycled.  Examples of soiled paper include art project and pizza box. Including soiled paper may impact an entire batch of recycled paper. It is recommended to tear soiled paper in small pieces and to add it to compost pile.  

Tips to easily follow the Canada Food Guide 3 Guidelines

The Canadian food guide outlines 3 guidelines. 

– Guideline 1: Foundation for healthy eating
– Guideline 2: Foods and beverages that undermine healthy eating
– Guideline 3: Importance of food skills

We will go over these guidelines and provide some tips to implement these guidelines in daily life.

Guideline 1: Foundation for healthy eating

Nutritious foods are the foundation for healthy eating. Nutritious foods includes, but is not limited to:

– Vegetables
– Fruits
– Whole grains
– Protein foods

Plant-based protein

Plant-based protein positively contributes to health and the environment. The guide recommends consuming plant-based protein more often. Plant-based protein includes: legumes, nuts, seeds, tofu. Other recommended source of protein include: fish, shellfish, eggs, poultry, lean red meat including wild game, lower fat milk, lower fat yogurts, lower fat kefir, and cheeses lower in fat and sodium. Plant-based protein have significant positive impact on health and on the environment. Research suggests that plant-based foods, which in rich in fiber, decrease cardiovascular disease risk, colon cancer and type 2 diabetes.

Tip: When using plant-based protein, meals can be planned around flavour profiles rather than protein. For example, Greek flavours include: lemon, black olives, oregano, tomatoes and cucumber. An easy plant-based Greek dish could be a quinoa bowl with Greek spice marinated chickpeas, spinach, lemon juice, tomatoes, cucumbers and black olives. 

Limit saturated fats & increase unsaturated fats

Limit saturated fats and increase unsaturated fats. Saturated fats should be limited and should be replaced by unsaturated fat foods. Examples of foods high in saturated fat includes fatty red meat, processed meats, fired foods and high fat cheeses. Saturated fats are usually present in meat while unsaturated fats are usually present in vegetarian foods. Examples of food high in unsaturated fat “good fats” includes: avocado, nuts, olives and fish. Research suggests unsaturated fats have a positive effect on overall heath as they lower risk of vascular disease, heart disease, and stroke.

Tip: To easily reduce saturated fats from dishes try reducing or eliminating cheese from dishes and replacing it with nuts or avocado. For example, you can replace the cheese in a sandwich or a burger by avocado.

Water is foundational to life

The human body is 75% water! Water is recommended as the beverage of choice. Water supports health and promote hydration without adding calories. Dinking adequate amounts of water is essential for metabolic and digestive processes. Impacts of dehydration are vast and include: constipation, weight gain, high cholesterol, fatigue, head ache, and high blood pressure. Drink up!  It can be difficult to drink enough water throughout the day. 

Tip: to increase your water intake try adding flavours to your water (e.g. cucumber slices, lemon or lime wedges), carrying a water bottle with you throughout the day and having a cool glass of water as soon as you wake up.

Healthy eating is more than food!

Food is an integral part of all social interactions, celebrations, cultures and family tradition. To make healthy eating a lifestyle, it is essential to enjoy your food. Nutritious foods should reflect your taste and preferences as well as your food traditions. Eating together reinforces these positive eating habits and supports a healthy relationship with food. Cooking and eating together is a fun way to connect with friends, family and to foster connections between generations and cultures. 

Tip: Organizing potlucks with friends and family or baking night with kids are fun and easy ways to spend quality time together and sustain a healthy relationship with food.

Guideline 2: Foods and beverages that undermine healthy eating

Processed foods and beverages are likely to negatively impact health as they often result in excess sodium, free sugars and/or saturated fat. It is important to understand that it is the way we eat the majority of the time that has the most impact on our health.

Free sugars

Free sugars are defined as being added to foods and beverages and do not include the naturally occurring sources of sugars found in intact or cut fruits and vegetables. Free sugars are found in a variety of products such as: sugary drinks, condiments, sugary breakfast cereals, confectioneries and other processed foods. The Canadian foods guide recommends consuming less than 10% of total energy intake from free sugars.

High sodium

High sodium intake is associated with higher blood pressure which is a risk factor for cardiovascular disease. High amount of sodium is often found in cheeses, processed meats, dips and condiments. The Canadian foods guide recommends consuming less than 2300 mg of sodium per day.

Saturated fats

Lowering intakes of foods that contain mostly saturated fat, by replacing with foods that contain mostly unsaturated fat, helps lower cardiovascular risk factors.

Saturated fats are found in animal-based foods such as cream, butter, cheeses, and fatty meats as well as some vegetable oils. The Canadian foods guide recommends consuming less than 10% of total energy intake from saturated fats.

Tip: Cooking at home using whole ingredients is a way to reduce intake of free sugars, sodium and saturated fats. You can reduce free sugar, sodium and saturated fats by using fresh herbs, garlic, lemon and lime zest, non-sodium added spice blends and essential oils. For example, instead of frying fish with batter and fries you can garnish fish with lemon zest and garlic, serve with fresh dill, oven roasted potatoes and steamed broccoli.

Guideline 3: Importance of food skills

Highly processed foods have become the easy choice in our food environment.  Food skills are essential to navigate the food environment and support healthy eating.  Food skills include the ability and knowledge to understand food labels, the ability to assess ripeness of vegetables and fruits, skills to plan meals within budget as well as technical skills to prepare meals. 

Food skills can be taught, learned and shared. At ZestyKits we believe food skills are fundamental to a healthy lifestyle. Our meal kits provide pre-measured fresh ingredients, recipes with illustrated instructions and ripe vegetables and fruits. As such, ZestyKits meal kits are a teaching tool, prevent food waste and are a time saver. 

Macaroons

These macaroons are chewy and soft on the inside, crispy and golden on the outside, dipped in chocolate and topped with a glazed cherry. They are sure to make you smile. Children can easily whip up these macaroon and experience the joy of sharing their own creations with family and friends.

Tools

Preparation

1

Add the coconut and condensed milk:Preheat oven to 325 F. Place rack in the middle of the oven. Line a baking sheet with parchment paper. 

In a medium bowl, add coconut mix, sweetened condensed milk and vanilla

2

Combine: Combine the coconut mix, sweetened condensed milk and vanilla. Set aside.

3

Beat the egg whiteIn the bowl of an electric mixer, beat the egg white (1) until stiff peaks form. Use a large rubber spatula to fold the egg white into the coconut mixture.
Cut the glazed cherries in halves. 

4

Form the macaroons and bakeUsing a mini ice cream scoop or two spoons, form heaping tablespoons of the mixture into mounds on the prepared baking sheets, spacing about 1 inch apart. Top each macaroon with a half glazed cherry.  Bake for 23 to 25 minutes until the tops and edges are golden. Let cool on the pans for a few minutes, then transfer to a wire rack to cook completely.

5

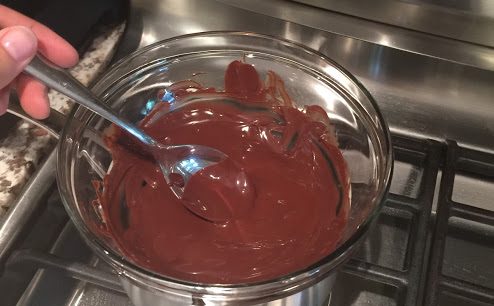
Melt chocolate: Add about 2 inch of water to a small pot and bring to a boil. Place a glass bowl that is slightly larger than the pot on the boiling water.  Place the chocolate in the bowl and melt stirring constantly with a spoon to avoid burning the chocolate.  

6

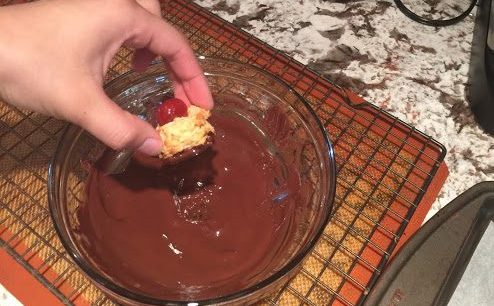
Dip the cookies in chocolateOnce the chocolate is melted, dip each macaroon in the chocolate. Place the macaroon on a cooling rack and let them cool until the chocolate is firm.

Note: These cookies can be made ahead. Store in airtight containers at room temperature up to 4 days, or freeze in airtight containers up to 3 month.

Bon Appétit!

Ingredients

Included

21 macaroons

coconut mix

2 2/3 cups

condensed milk

2/3 cup

milk chocolate

1/2 cup

glazed cherries

12

egg white

1 large

Cooking with Kids

Making this recipe with kids?

Ask the child to help by completing steps 1, 2, 4 &  6.

  • Add the coconut and condensed milk
  • combine
  • Form the macaroons & bake
  • Dip the cookies in chocolate

Tags

Note: We cannot guarantee any dish is allergen free. 

Nutritional Information

Fudge

Whether you’re craving something rich and chocolaty or creamy and nutty, this fudge recipe is for you! This decadent and easy chocolate fudge is sure to satisfy your sweet tooth. You will be surprised how fast these squares disappear.

Tools

Preparation

1

Combine butter, carnation and sugar:  Line an 8″ x 8″ baking dish with parchment paper. Use 2 pieces of paper of about 7.5″ x 12″ to cover all sides of the baking dish. 

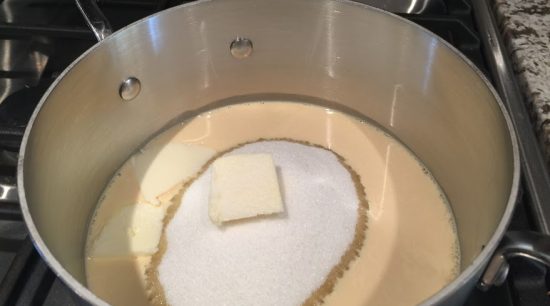
Add the sugar, unsalted butter & carnation milk in a medium pot.

2

Bring to a boil: On medium heat, bring to a  full boil stirring constantly. Boil for 4-5 minutes.

3

Add chocolate mix: Remove the pot from the heat, add vanilla and chocolate mix. Combine well with a whisk for 1 minute or until the marshmallows are melted. 

4

Transfer to moldPlace the mixture in the lined 8″ x 8″ baking dish. Use a spatula as needed.   

5

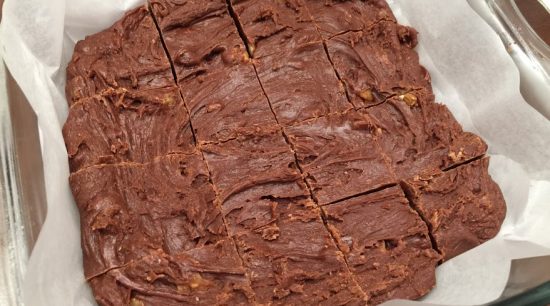
Cool & cut the squares: Refrigerate for 2 hours or until firm. Lift from the pan, remove the parchment paper and cut in 20 squares. 

Bon Appétit!

Ingredients

Included

20 squares

sugar & salt

1 1/2 cup

carnation milk

2/3 cup

vanilla

1/2 tsp

chocolate mix: mini marshmallow, chocolate chip & walnuts

4 cups

unsalted butter

2 tbsp

Cooking with Kids

Making this recipe with kids?

Ask the child to help by completing step 5.

  • Cool & cut the square

Tags

Note: We cannot guarantee any dish is allergen free. 

Nutritional Information

Fudge crinkle cookies

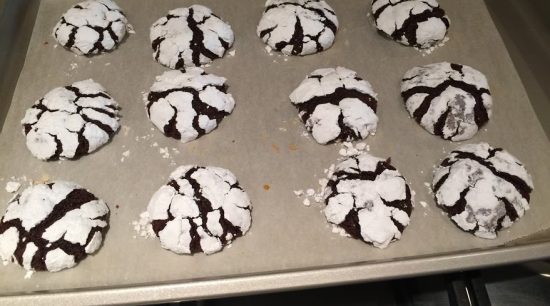
Fudgy chocolate crinkle cookies have an irresistible brownie textured center, with a crunch of cookie on the outside! They are delicious enjoyed beside a fire with a glass of cold milk playing a game of Monopoly!  Happy baking 🙂  

Tools

Preparation

1

Mix the sugar, cacao, egg, oil & vanilla: In a bowl, add the sugar & cacao powder mix, vegetable oil (1/4 cup) and the vanilla with an electric mixer until combined. Add the eggs (2), one at a time until fully incorporated. 

2

Add the Flour mixAdd the flour mix into the chocolate mixture. Combine just until a dough forms (do not over mix).

3

Cool the doughWrap dough in plastic wrap and cool the dough in the freeze for 1 hour or refrigerate at least 4 hours or overnight.

Note: Cooling the dough will result in crinkled cookies. 

4

Roll in icing sugar: Preheat oven to 350 F. Place rack in the middle of the oven. Line 2 baking sheet with parchment paper. 

Place the icing sugar in a small bowl. 

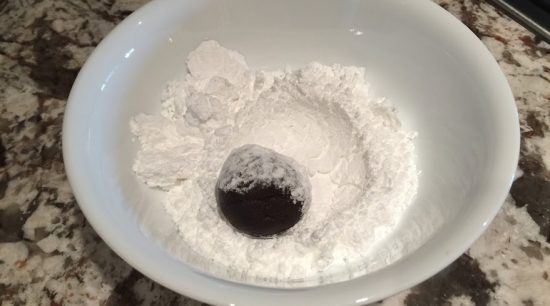
Measure cookies with 1 tbsp measuring spoon.  Place each dough ball in the icing sugar and roll to coat evenly. Place each cookie on the lined baking sheet. 

5

BakeBake in preheated oven for 10 minutes. The cookies will come out soft from the oven but will harden up as they cool. Allow to cool on the cookie sheet for 5 minutes before transferring to wire racks to cool.

Bon Appétit!

Ingredients

Included

20 cookies

Sugar & cocoa powder

1 1/2 cup

vanilla

1/2 tbs

Flour mix: flour, baking powder, salt

1 cup + 1 1/2 tsp

Icing sugar

1/3 cup

vegetable oil

1/4 cup

egg

2

Cooking with Kids

Making this recipe with kids?

Ask the child to help by completing steps 1, 2 &  6.

  • Mix the sugar, cacao, egg, oil & vanilla
  • Add the flour mix
  • Cool the dough
  • Roll in icing sugar
  • Bake

Tags

Note: We cannot guarantee any dish is allergen free. 

Nutritional Information

truffles

Truffles are classic and decadent treats everyone loves. They are quite simple to make, and the process will be more fun if you have a friend to help you. Waiting for the cooling time to be over is the hardest thing in this recipe. Children love rolling these delicious chocolate wonders almost as much as eating them. They are amazing with a cup of hot chocolate or a glass of red wine. 

Tools

Preparation

1

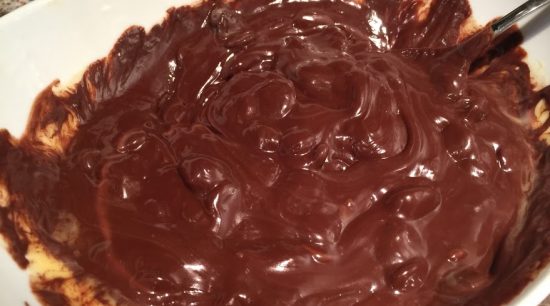
Melt the chocolate: In a microwave safe medium bowl, add the sweetened condensed milk and the chocolate. Heat in the microwave in 30 second increments. Mix with a spoon in between each 30 seconds to not over heat the chocolate. Chocolate can easily burn in the microwave. Combine until smooth. 

2

Add the vanilla: Add the vanilla to the melted chocolate. Refrigerate, covered, 2 hours or until firm enough to roll.

3

Crush the candy cane: Using a rolling pin, crush the candy cane in its wrapping. Remove the wrapping and place the candy cane crumbs in a bowl.

4

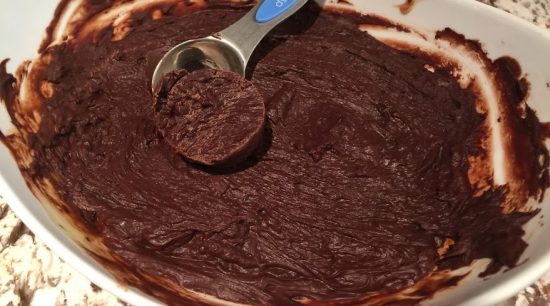
Roll the Truffles: Using 1/2 tbsp spoon or a metal spoon about that size, measure the cooled truffle dough. Roll each truffle and set aside in a clean bowl. 

5

Coat the truffles:  Place the cacao powder in a small bowl. Roll each truffle in either the candy cane crumbs or the cacao powder.

Bon Appétit!

Ingredients

Included

12 truffles

semi-sweet chocolate

1 1/2 cup

sweetened condensed milk

7 os (1/2 can)

vanilla

1/2 tsp

candy cane

2

cacao powder

1/4 cup

Cooking with Kids

Making this recipe with kids?

Ask the child to help by completing steps 2, 3, 4 & 5

  • Add the vanilla
  • Crush the candy cane
  • Roll the truffles
  • Coat the truffles

Tags

Note: We cannot guarantee any dish is allergen free. 

Nutritional Information

Sugar cookies

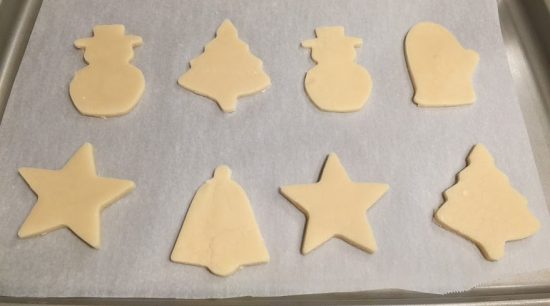
Sugar cookies cookies make for a fun family baking day. Use any shape cookie cutter you want and decorate to your heart’s desire. Baking as a family is one of the most memorable moments. Share laughter with a dusting of flour on your nose and your hands full of cookie dough. 

Tools

Preparation

1

Cream butter,egg & sugar:  Preheat oven to 350 F. Place two racks in the middle of the oven. Line two baking sheets with parchment paper.

In a bowl add the butter (1 cup) and the sugar. Mix with an electric mixer on medium speed about 3 minutes. Add in the egg (1) and vanilla. Mix until combined. 

2

Add the flour mixSlowing incorporate the flour mix to the butter mixture with the help of the electric mixer. The dough will become very stiff. If is becomes to stiff for your mixer, place the dough onto a counter top surface. Wet your hands and finish off kneading the dough with your hands.  

Note: Do NOT chill the dough.

3

Roll the doughLightly flour the counter.  Divide the dough in 4. Place 1 ball of dough at a time on the lightly floured work surface. Dust flour on the dough. Roll the dough to about ¼ – 1/8 inch thick. Dust more flour onto the dough if it is sticking to the roller. 

4

Cut the dough & bakeCut the dough with the help of a cookie cutter and transfer the cookie onto the parchment lined baking sheet. Use a spatula if necessary. Gather the dough scraps and knead into a ball, then roll out and cut again, adding more flour as necessary. Repeat until scraps are used up. 

Bake the cookies for 6-8 minutes or until they feel firm. Let the cookies cool on the baking sheet for 5 minutes until set, then transfer to a rack to cool completely.

5

Make the icing & decorate:  While waiting for the cookies to cool, place the icing sugar in a small bowl. Add the water or milk about 1 tbsp at a time, combining between each addition, until the icing is soft. You can place the icing in a small piping bag or use tooth picks to decorate the cookies. 

When the cookies are cooled, decorate using a tooth pick or small piping bag. Let the icing set and store the cookies in an airtight container. 

Bon Appétit!

Ingredients

Included

36 cookies

Sugar

1 cup

Flour mix: flour, baking powder, salt

3 cup + 2 1/2 tsp

vanilla

1/2 tsp

Icing sugar

1 1/2 cup

egg

1

unsalted butter

1 cup

milk or water

1 1/2 - 2 1/2 tbsp

flour for dusting

2 - 4 tbsp

Cooking with Kids

Making this recipe with kids?

Ask the child to help by completing steps 1, 2, 4 & 5.

  • Cream butter, egg & sugar
  • Add the flour mix
  • Roll the sough
  • Cut the dough
  • Make icing & decorate

Tags

Note: We cannot guarantee any dish is allergen free. 

Nutritional Information

Nanaimo bar

Nanaimo bars are a Canadian staple!  This iconic recipe comes straight from the heart of Nanaimo, B.C. This buttercream custard filled bar is a sweet-tooth’s dream! This delicious bar requires only 20 minutes of preparation time, leaving you plenty of time to eat them by the fireplace wrapped up in a warm blanket. 

Tools

Preparation

1

Combine butter, carnation and sugar:  Line an 8″ x 8″ baking dish with parchment paper. Use 2 pieces of paper of about 7.5″ x 12″ to cover all sides of the pyrex mold. 

Place about 3 inches of water in a medium pot. Bring to a boil on medium heat. Place a glass bowl a bit larger than the pot on top of the boiling water to create a double boiler.  Add the unsalted butter (1/2 cup) and sugar & cocoa powder to the bowl and melt together.  Add the egg (1) to the cacao mixture and stir until the mixture becomes thick and stays in a ball.

Note: Keep the water boiling in the pot since you will need the double boiler for the third layer. 

2

Finish the first layer: Remove the cacao mixture from the heat. Add the nut mix and stir in until combined. Press the mixture in lined 8″ x 8″ baking dish.

3

Make the second layer: In a medium bowl, add unsalted butter (1/2 cup), the cream 35% (2 tbsp + 2 tsp) and mix with the electric mixer. Add the icing sugar mix to the butter and beat until light. Spread over bottom layer in the 8″ x 8″ baking dish.

4

Make the third layer: Rinse the glass bowl used in the double layer on the first layer. Ensure the water is boiling. Place the bowl on top of the water and add the chocolate chips and unsalted butter (2 tbsp) to the bowl. 

5

Pour the third layer:Let cool for about 3 minutes, cool but still liquid. Pour the chocolate over the second layer.

6

Cool & cut the squares: Let chill in refrigerator for about 20 minutes. Cut the Nanaimo into 18 bars.

Bon Appétit!

Ingredients

Included

16 squares

sugar & cocoa powder

1/2 cup + 1 tbsp

Nut mix: graham wafer crumbs, coconut flakes & almonds powder

2 3/4 cup

Confectionery sugar mix: confectionery sugar, vanilla custard powder

2 cup + 2 tbsp

chocolate chips

4 oz

egg

1

cream 35%

2 tbsp + 2 tsp

unsalted butter

1 cup + 2 tbsp

Cooking with Kids

Making this recipe with kids?

Ask the child to help by completing step 2, 3, 5 & 6.

  • Finish the first layer
  • Make the second layer
  • Pour the third layer
  • Cool & cut the square

Tags

Note: We cannot guarantee any dish is allergen free. 

Nutritional Information

Chewy ginger cookies

These chewy ginger cookies are soft & sweet inside and crunchy on the outside. The secret ingredient is candied ginger which brings a new depth of flavour to these classics. We bet you will love to enjoy them reading a book by the fireplace. Happy baking!

Tools

Preparation

1

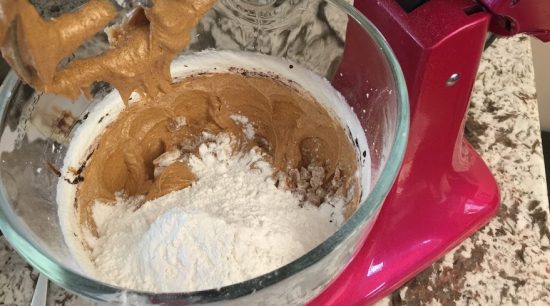
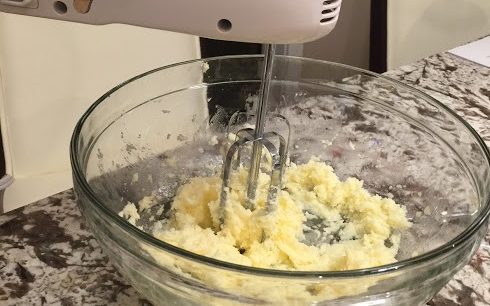
Cream butter,egg & sugar: In a medium bowl, add the room temperature unsalted butter (3/4 cup) and the sugar. Combine with an electric mixer on medium speed until light and fluffy, about 2 minutes.  Add the egg (1) & the molasses to the butter mixture. Mix on medium-low speed with an electric mixer until combined, for 1 minutes.

2

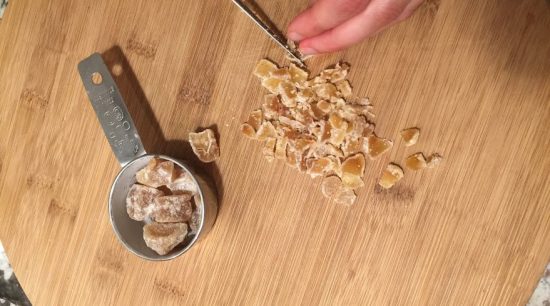
Cut the candied ginger: Cut the candied ginger in small 1/4 cm pieces. 

3

Add the flour mix & candied gingerGradually add the flour mix and candied ginger to the butter mixture with a mixer. Beat until combined.

4

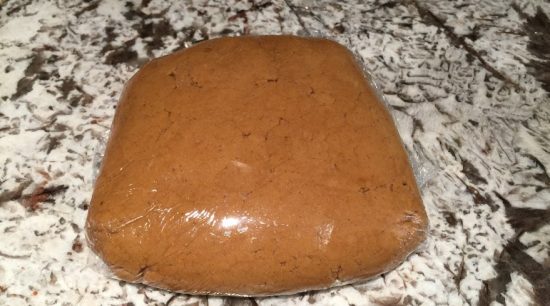
Cool the dough: Wrap the dough in a sheet of plastic wrap to completely cover it.  Cool the dough in the freezer for about 40 minutes or in the refrigerator for at least 2 hours.

Note: Cooling the dough will result in crinkled cookies. 

5

Roll in turbinado sugar:  Preheat oven to 375°F. Roll the dough into 1/2  to 1 tbsp balls, about 1-inch in diameter. Fill a small bowl with turbionado sugar, and roll each ball in the sugar until it is completely coated.  

6

Roll the cookiesPlace on cookie sheet at least 1 1/2 inch apart and bake for about 8 minutes, until the cookies begin to slightly crack on top. Let sit about 5 minutes and place on a cooling rack to cool completely. 

Note: These cookies can be made ahead. Store in airtight containers at room temperature up to 1 week.

Bon Appétit!

Ingredients

Included

24 cookies

flour mix: Flour, baking soda, ground cinnamon, ground clove, ground ginger, salt

2 cup + 1 tbsp

candied ginger

1/4 cup

molases

1/4 cup

sugar

1 cup

Turbinado sugar

1/4 cup

egg

1

room temperature unsalted butter

3/4 cup

Cooking with Kids

Making this recipe with kids?

Ask the child to help by completing steps 1, 2, 3, 4 &  5.

  • Cream butter, egg & sugar
  • Cut the ginger
  • Add flour mix & candied ginger
  • cool the dough
  • roll in turbinado sugar

Tags

Note: We cannot guarantee any dish is allergen free. 

Nutritional Information

Sucre à la crème

A timeless tradition in Québec, sucre à la Crème is a creamy and sinfully decadent square made very simply with, as it’s name suggests, sugar and cream. If you haven’t tried sucre à la Crème yet, you are in for a treat! they are delicious with a hot cup of coffee or a glass of milk. 

Tools

Preparation

1

Combine butter, carnation and brown sugar:  Line an 8″ x 8″ baking dish with parchment paper. Use 2 pieces of paper of about 7.5″ x 12″ to cover all sides of the pyrex mold. Coat the parchment paper with butter. 

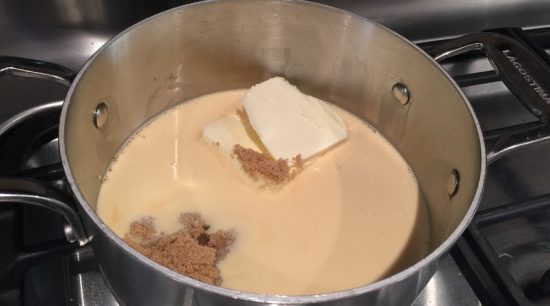
Add the brown sugar, unsalted butter & carnation milk in a medium pot.

2

Bring to a boil: On medium heat, bring to a boil and let simmer 6 minutes. It is important to let simmer exactly 6 minutes. 

3

Add confectionery sugar & vanilla: Remove the pot from the heat, add vanilla and confectionery sugar. Combine well with hand mixer – about 2 minutes. 

4

Transfer to moldPlace the mixture in the greased 8×8 8″ x 8″ baking dish. Use a spatula as needed.   

5

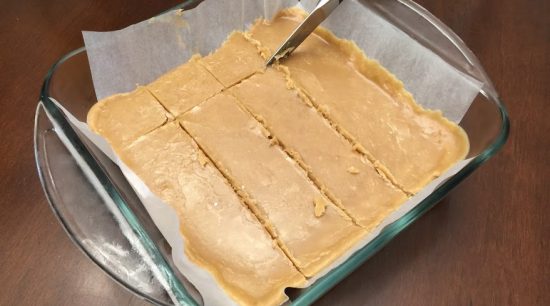
Cool & cut the squares: Let cool for 5 minutes at room temperature. Cut in 20 squares. Let cool completely in the fridge or freezer.

Bon Appétit!

Ingredients

Included

20 squares

brown sugar

2 cups

carnation milk

2/3 cup

vanilla

1/2 tsp

confectionery sugar & salt

2 cup

unsalted butter

1/3 cup + 1 tsp to coat the mould

Cooking with Kids

Making this recipe with kids?

Ask the child to help by completing step 5.

  • Cool & cut the square

Tags

Note: We cannot guarantee any dish is allergen free. 

Nutritional Information