Perfect Pies

PIES! Pies are filled with memories and comfort. They remind us of holidays, spending quality time with our grand-mothers and mother. 

Reduce food waste with pies. Yes, you read that right! Pies are a delicious way to use bruised fruits and vegetables. Often fruits and vegetables that are a little older are sweeter and actually make better pies. 

In this blog you will learn how to make:

  • Perfect pie crust
  • Saskatoon apple pie
  • Tomato tart

Perfect Pie Crust

crust ingredients

Perfect Pie Crust

This is our mother’s fail prof pie recipe! We cherish it and are excited to share it with you. We use this pie crust recipe to make all kinds of pies. From tourtieres to saskatoon berry pies you will get the perfect buttery puffed layered crust. This recipe makes three 8 inch pies (top and bottom).
  • Total Time 75 Minutes

Ingredients

  • 3 cups all purpose flour
  • 1 cup cold unsalted butter
  • 1 egg
  • 1/2 tbsp apple cider vinegar
  • 1/2 tsp salt
  • 3/4 cup cold water

Instructions

  1. In a medium bowl, add the flour. Cube the cold water. Using a pastry blender (or 2 butter knifes) cut the butter in the flour until the pieces of butter are about the size of rolled oats.
  2. In a small bowl, add and combine the egg, apple cider vinegar, salt and cold water.
  3. Add the liquid ingredient to the flour and butter. Combine until there is no more dry flour and ensuring not to overmix the dough.
  4. Cover the dough with plastic wrap and chill in the fridge for about 1 hour.
  5. Turn on the oven to 425F. Divide the chilled dough in 6 even segment. Each segment will become an 8" crust. Spread flour on the counter and on a rolling pin. Roll the dough starting from the middle out to form a circle. If you notice to dough starts to stick, add a bit of flour on the counter and on the dough to ensure it does not stick. Roll the dough to about 1/4 cm thickness.
  6. Place the dough in an 8" pie mold and cut the excess dough. Fill the pie and cover with another pie crust. Cut the top crust about 1 cm larger than the pie mold. Fold the top pie crust under the bottom pie crust and press the edge with a fork. Bake at 425F for 15 minutes. Reduce the heat to 350F and bake for an additional 30 minutes.

Notes

Freezing: This crust can easily be frozen for up to 4 months. After combining the dough (step 3), divide the dough in 6 and wrap each ball of dough in plastic wrap before freezing. Blind baking pies: To bake only the bottom of a pie crust, make wholes in the crust with a fork and place foil on top of the crust and fill with pie weights or dry beans. This will ensure the pie keeps its shape while it bakes. Bake at 400F for about 10-15 minutes if the pie will bake again (e.g. quiche) if the crust needs to be fully cooked (e.g. banana cream pie) bake until the bottom crust is golden brown - about 20 minutes.

Saskatoon Apple Pie

filling ingredients

Saskatoon Apple Pie

Saskatoon apple pie is not only an amazing flavour combination; it also holds a special meaning for us. We grew up in Quebec beside an apple orchard. The delicious combination of Saskatoon berries and apples represent our 2 homes. This recipe makes an 8 inch pie and easily serves 6.
  • Prep Time 5 Minutes
  • Cook Time 45 Minutes
  • Total Time 50 Minutes
  • Serves 6 People

Ingredients

  • 2 pie crust (1/3 of the above recipe)
  • 3 tbsp all purpose flour
  • 3 tbsp Saskatoon berry jelly
  • juice and zest of 1/2 lemon
  • 2/3 cup sugar
  • 3 cups Saskatoon berries
  • 2 peeled and diced apples

Instructions

  1. Turn on the oven to 425F. In a bowl, add and combine all filling ingredients.
  2. Divide the chilled dough in 6 even segment. Each segment will become an 8" crust. Spread flour on the counter and on a rolling pin. Roll the dough starting from the middle out to form a circle. If you notice to dough starts to stick, add a bit of flour on the counter and on the dough to ensure it does not stick. Roll the dough to about 1/4 cm thickness.
  3. Place the dough in an 8" pie mold and cut the excess dough. Fill the pie and cover with another pie crust. Cut the top crust about 1 cm larger than the pie mold. Fold the top pie crust under the bottom pie crust and press the edge with a fork. Bake at 425F for 15 minutes. Reduce the heat to 350F and bake for an additional 30 minutes.

Notes

Freeze: You can freeze the pie before baking for up to 3 months. Bake at 400F for 30 minutes. 

Tomato Tart

tomato tart

Tomato Tart

This tart is a beautiful ways to use the abundance of garden tomatoes this summer. It is filled with layers of fresh tomatoes, cheeses and fresh herbs. We love serving it with a large green salad dressed with lemon juice and olive oil.
  • Prep Time 10 Minutes
  • Cook Time 60 Minutes
  • Total Time 70 Minutes
  • Serves 4 People

Ingredients

  • 1 1/2 lb tomatoes
  • 1 tsp salt
  • 2 tsp french style mustard
  • 1/3 cup goat cheese
  • 1/3 cup fetta cheese
  • 1/3 cup mozarella
  • 1/2 cup fresh herbs (basil, chilves, teragon)

Instructions

  1. Cut the tomatoes into 1/2 cm. Place the tomatoes in a strainer and sprinkle with salt. Let the tomatoes drain for about 15 minutes.
  2. While the tomatoes are draining, spread flour on the counter and on a rolling pin. Roll the dough starting from the middle out to form a circle. If you notice to dough starts to stick, add a bit of flour on the counter and on the dough to ensure it does not stick. Roll the dough to about 1/4 cm thickness. Place the crust at the bottom of an 8 inch pie mold. (You can also use a rectangular pie mold, just ensure to roll the dough in a rectangular shape)
  3. Use a fork to make wholes in the pie crust and place foil on top of the crust and fill with pie weights or dry beans. This will ensure the pie keeps its shape while it bakes. Bake at 400F for 10 - 15 minutes.
  4. Evenly spread the mustard on the bottom of the tart. Place 1/2 of each cheeses on top of the mustard add a layer of tomatoes and 1/2 of the fresh herbs. Place the rest of the cheese, herbs and garnish with an other layer of tomatoes.
  5. Bake at 350F for 25 to 30 minutes until the cheese is melted. Let cool about 10 minutes and serve with a green salad.

Flat Out Delicious

What is Flat Out Delicious?

Flat Out Delicious is a valuable travel book that takes us on a journey to meet Saskatchewan’s farmers and producers. This book captures the stories and values of Saskatchewan’s resilient and inspiring farmers and producers. Through their stories and beautiful photography, we are taken behind the scenes, into the fields, kitchens and backstores of each food artisan. This book reveals the breadth and depth of Saskatchewan food landmarks. Each story is an opportunity to fall in love with our local culinary artisans.   

Through this book we discover Saskatchewan’s varied personalities and culinary experience. These 167 stories cumulate into this beautiful expression of Saskatchewan’s nickname: Les grenier du monde, the world’s attic. From grain fields that expand as far as the eye can see to northern boreal forest, Saskatchewan is home to one of Canada’s most unique food systems. Saskatchewan’s farmers and producers have been rising quietly for decades; Flat Out Delicious is a tribute to their legacy. 

Picture by our beautiful cousin and friend Myriam @the.farm.folk 
Our little cousin, Asher, and Zina are enjoying the sun after a long rain.

Why we love Flat Out Delicious

We received our book less than 10 days ago and are flat out in love with it! We expected a lot from this book and have received way more than we could have hoped for. 

The main reasons we have such a strong connection with Flat Out Delicious are:

  • It aligns with our roots
  • It tells the story of ZestyKits’ stars 
  • It bring awareness to the value of eating local 
  • It is truly a labour of love

Aligns with ZestyKits’ Roots

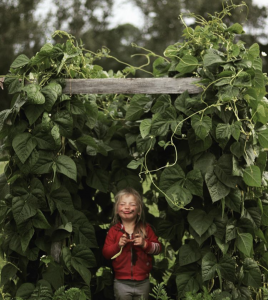
Picture by our dear friend and cousin Myriam @the.farm.folk 
Havilah playing in her “bean house”. It’s the little memories that will last a lifetime. 

Growing up with a French background, our parents raised us with artisanally produced simple ingredients. We lived across the road from an artisanal vegetable and fruit farm which we visited regularly to buy seasonal produce. Our parents promoted the importance of knowing where our food comes from, to eat the best quality ingredients produced as close to home as possible. They helped us understand that our wealth is our health while money comes and goes. Even though we grew up with limited resources, our parents always supported artisanal farmers and producers. They raised us with a deep respect for food and understanding of the impact it has on our personal health and on our community’s health. 

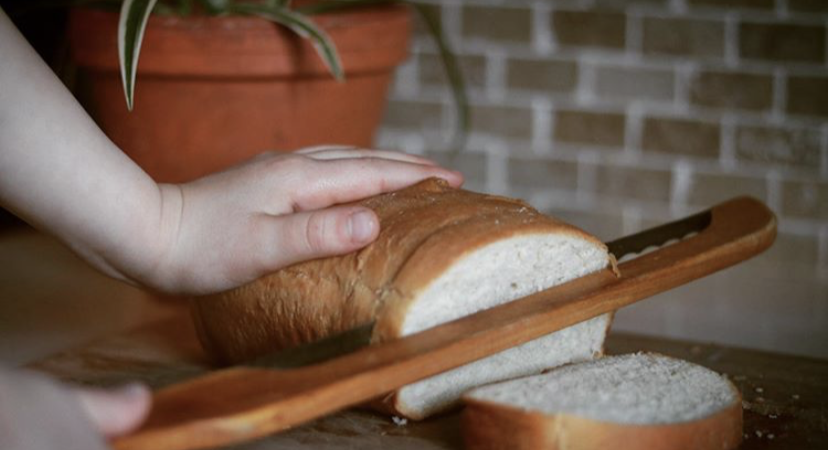
Picture by our dear friend and cousin Myriam @the.farm.folk 
Our mother and Myriam’s mother both had this bread knife since before we were born. This bread knife reminds us of the smell of warm breads our mothers made.

Artisanal food production is in our blood; from the dairy farm on which our mother was raised to the strawberry fields our great uncle harvested until his 96th birthday. Our parents artisanally raised bees and chicken for our family and dreamt of, one day, owning an artisanal farm. They value learning the stories of the farmers and producers behind each ingredient. Growing up some of our best memories include picking raspberries under the hot sun of June and apples with the cold breeze of September. We remember visiting artisanal farms including cheese, vegetables, berry, honey, goat, and ostrich farms. We fondly remember meeting the farmers, hearing their stories, meeting the animals, feeling the dirt between our toes, smelling the fresh air and tasting the delicious food. Food nourishes more than our bodies, it nourishes our soul, it nourishes our community. 

Picture by our dear friend and cousin Myriam @the.farm.folk 
“In an age of speed, I began to think, nothing could be more invigorating than going slow.
In an age of distraction, nothing can feel more luxurious than paying attention.
And in an age of constant movement, nothing is more urgent than sittling still” – Pico Lyer

When we moved to Saskatchewan from Quebec, we learned to know farmers and producers that give this province the nickname of les grenier de monde, the worlds’ attic. It is through taking the time to truly feel and experience Saskatchewan over the past 20 years, that the land of living sky became part of our soul. 

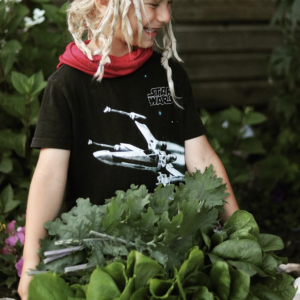
Picture by our dear friend and cousin Myriam @the.farm.folk 
Our little cousin, Asher, planted the corn in the background himself.

We created ZestyKits to empower families to come back to the roots, to reconnect with food, to get to know their producers, to discover delicious food farmed and produced with love.

ZestyKits' Stars

Picture by our dear friend and cousin Myriam @the.farm.folk 
“You know you love your chicken when you watch them play in the yard more than you watch tv” – Myriam

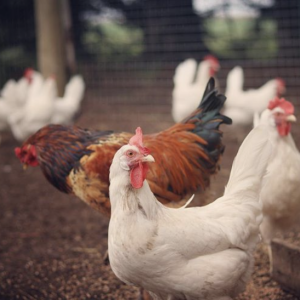
Picture by our dear friend and cousin Myriam @the.farm.folk 
The ladies enjoying the mild weather in early March.

Jenn’s book tells the stories of many farmers and producers who are the stars behind every ZestyKits meal. We strongly encourage you to, not only read the book, but also use it as a travel guide – once physical distancing ends. Go visit the farmers and producers of Saskatchewan’s food, go meet the friendly faces behind the food you eat, go feel the dirt between your toes, go smell the fresh air. You will discover a new love and respect for food as well as the farmers and producers behind it. 

Value of Local Food

At ZestyKits we believe supporting local farmers is supporting health. If we are what we eat, understanding where our food comes from and valuing high-quality local food is a priority.  As Jenn eloquently said in Flat Out Delicious, we believe the key factor when it comes to personal health, sustainability and community economic health is the way our food is grown, raised and how far it travels. As Jenn does in Flat Out Delicious, we encourage you to be curious about the history of your food. Similarly to many important choices such as a trainer, hairdresser, house builder or insurance company; our daily food choices have a significant impact. Our daily food choices impact our personal health and our community health. We encourage you to think of food not as fuel for our bodies but as an investment in our health and our communities. These daily choices are building Saskatchewan’s vibrant future food system.

asher and garden

Picture by our dear friend and cousin Myriam @the.farm.folk 
Asher is having fun in the garden and smiling at his little sister who brings powdered doughnuts. Life is about the little pleasures. 

Labour of Love

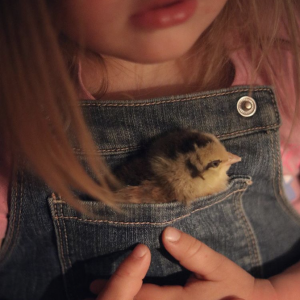
havi and chick

Picture by our dear friend and cousin Myriam @the.farm.folk 
Havilah holding a spring chick on her heart. 

Between the lines of each artisan’s story, we can feel the author’s love for the community and her joy to share Saskatchewan’s food history. Through the lines of Flat Out Delicious we can feel the passion of the pioneers who create Saskatchewan’s food ecosystem. From thriving as multi-generational farmers, to producers who recently left corporate jobs to pursue their dream, Saskatchewan’s food ecosystem is broad, thriving and growing. Reading each story inspires pride for Saskatchewan and demonstrates how bright Saskatchewan food’s future is. 

Meet Jenn & Richard

Jenn Sharp

Having had the pleasure to get to know Jenn Sharp, we consider her a kindred spirit and a dear friend. Her passion and love for Saskatchewan’s farmers and producers is contagious and a joy to see. For five years, Jenn was a featured writer, columnist, and editor at the Saskatoon StarPhoenix. She currently writes the Flat Out Food column for the StarPhoenix and the Regina Leader-Post. Jenn is a regular contributor to CBC Saskatchewan and Eat North as well as has been featured in a variety of Canadian publications.

Picture by Richard Marjan

Richard Marjan

Photo credit: http://moore4mayor.ca/endorsements/richard-marjan-endorses-kelley-moore-for-mayor/

Richard Marjan’s photography throughout Flat Out Delicious speaks volume to his talent as a photographer. They say a picture is worth a thousand words; this is especially true of the photographs found in this book. Each photo beautifully represents the story of Saskatchewan’s food history, they take us on a journey with them. Richard is an award winning retired photojournalist for the Saskatoon StarPhoenix. His work appeared in Canadian Geographic, the New York Times, and the Globe and Mail.

@the.farm.folk

The beautiful photography in this blog is by @the.farm.folk

Myriam is our dear friend and cousin. She is raising two amazing children with her husband on their farm in Northern Saskatchewan. Our mothers were sisters and best friends. We grew up as sisters than more cousins and moved to Saskatchewan within a week of each other. It is such a joy for us to share her photography and a glimpse of her life with you. 

Perfect baked fries – 5 ways

Canada’s potato industry is struggling due to the COVID-19 pandemic. The demand for potatoes has plummeted with the closure of restaurants. It is estimates that over 200 million pounds of potatoes are in limbo. Canadian potato farmers are asking for your help. By eating locally grown potatoes we are supporting our local farmers and economy.

BBQ season is here! Fries are one of our favourite BBQ side. How about a healthier alternative to the traditional fried fries? How about the PERFECT baked fries?!

We are offering baked fries recipes because they are just as delicious and crispy as fried but without the extra calories.  In this blog we teaching you how to make the perfect baked fries. As you learn the basic techniques, we teach you new techniques to elevate your baked fries to poutine and truffle parmesan lemon garlic fries – perfect for date night. 

In this blog you will learn 5 delicious ways to use and modify your baked fries:

  1. Perfect baked fries
  2. Greek baked fries with lemon garlic aioli 
  3. Cajun baked fries with Cajun Remoulade
  4. Poutine
  5. Truffle parmesan garlic lemon baked fries
oven baked friesResized

Perfect Baked Fries

Many baked fries recipe make soggy fries. This recipe makes perfect crispy oven baked fries that are as tasty as restaurant fries. An added bonus of baked fries is they are the healthiest fries! Baking fries not only saves you money and extra calories but also lets you easily use locally sourced ingredients. Note that the baking time depnds on how thick your fries are.
  • Prep Time 10 + 10 Minutes
  • Cook Time 35 Minutes
  • Total Time 55 Minutes
  • Serves 4 to 6 People

Ingredients

  • 1500 gr (about 6) yukon gold potatoes
  • 1/4 cup vegetable oil - we use camelina oil
  • 1/2 tsp granulated garlic
  • 1/2 tsp onion powder
  • 1 tsp salt
  • 1/4 tsp black pepper

Instructions

  1. Preheat oven to 450 F. Place a cooling rack on a baking sheet.
  2. Place the potatoes in a large bowl, then pour very hot tap water over the top so that it covers the potatoes by at least 1 inch. Let sit 10 minutes.
  3. Drain the potatoes, then transfer them to a clean towel and dry as completely as you can. Note: you may need to use 2 towels.
  4. Return the potato sticks to the bowl. Add the vegetable oil, granulated garlic, onion powder, salt, and black pepper and combine to evenly coat to potatoes. On the cooling rack, spread the potato sticks in a single layer, leaving space around each potato.
  5. Bake in the preheated oven for 30 to 35 minutes - or until desired crisp.

Notes

Baked fries are best the day they are made. If you need to reheat them, you can make them crispy again by heating them in a 400F oven for about 5 to 6 minutes.If you don't have a cooling rack, you can line a baking sheet with parchment paper and bake the fries directly on the parchment paper. You will need to turn the fries are 15-20 minutes to ensure they are baked evenly. 
garlic friesResized

Greek baked fries with lemon garlic aioli 

These fries with a greek salad are our favourite sides for Greek chicken souvlaki. The baked fries are filled with greek flavours which is enhanced by the lemon garlic aioli. The aioli can also be used as a dipping sauce for your souvlakis.
  • Prep Time 10 + 10 Minutes
  • Cook Time 35 Minutes
  • Total Time 55 Minutes
  • Serves 4 to 6 People

Ingredients

  • 1500 gr (about 6) yukon gold potatoes
  • 1/4 cup vegetable oil - we use camelina oil
  • 2 tbsp greek spice blend - we use Splendor garden
  • 1 tsp salt
  • 1/4 tsp black pepper
  • 3/4 cup mayonaise
  • 2 to 3 medium clove garlic - minced
  • 1/2 tsp salt
  • 1/2 tsp lemon zest
  • 2 1/2 tbsp lemon juice

Instructions

  1. Preheat oven to 450 F. Place a cooling rack on a baking sheet.
  2. Place the potatoes in a large bowl, then pour very hot tap water over the top so that it covers the potatoes by at least 1 inch. Let sit 10 minutes.
  3. Drain the potatoes, then transfer them to a clean towel and dry as completely as you can. Note: you may need to use 2 towels.
  4. Return the potato sticks to the bowl. Add the vegetable oil, Greek spice blend, salt, and black pepper and combine to evenly coat to potatoes. On the cooling rack, spread the potato sticks in a single layer, leaving space around each potato.
  5. Bake in the preheated oven for 30 to 35 minutes - or until desired crisp.
  6. While the fries are cooking, make the aioli by adding in a small bowl: mayonaise, minced garlic, salt, lemon zest and lemon juice. Combine.

Notes

Baked fries are best the day they are made. If you need to reheat them, you can make them crispy again by heating them in a 400F oven for about 5 to 6 minutes.If you don't have a cooling rack, you can line a baking sheet with parchment paper and bake the fries directly on the parchment paper. You will need to turn the fries are 15-20 minutes to ensure they are baked evenly.  Whats an aioli?Aioli is an emulsified sauce made of oil and garlic.  Garlic infused mayonnaise is the most basic aioli.  Many restaurants will start with mayonnaise as the base of their aiolis.
cajun friesResized

Cajun fries with cajun remoulade sauce

These cajun fries with cajun green breans are our favourite sides with a BBQ cajun steak, tofu steak of chicken breast. The cajun remoulade features beautiful Saskatchewan ingredients and is filled with layers of flavour.
  • Prep Time 10 + 10 Minutes
  • Cook Time 35 Minutes
  • Total Time 55 Minutes
  • Serves 4 to 6 People

Ingredients

  • 1500 gr (about 6) yukon gold potatoes
  • 1/4 cup vegetable oil - we use camelina oil
  • 2 tbsp greek spice blend - we use Splendor garden
  • 1 tsp salt
  • 1/4 tsp black pepper
  • 3/4 cup mayonaise
  • 1 medium clove garlic - minced
  • 2 tsp cajun blacking spice - we use Splendor Gardens
  • 2 tbsp cajun mustard - we use Gravelbourg mustard
  • 2 tbsp horseradish
  • 1 tbsp worcestershire sauce
  • 1 tsp lemon juice
  • 1/4 cup parsley minced

Instructions

  1. Preheat oven to 450 F. Place a cooling rack on a baking sheet.
  2. Place the potatoes in a large bowl, then pour very hot tap water over the top so that it covers the potatoes by at least 1 inch. Let sit 10 minutes.
  3. Drain the potatoes, then transfer them to a clean towel and dry as completely as you can. Note: you may need to use 2 towels.
  4. Return the potato sticks to the bowl. Add the vegetable oil, salt, and black pepper and combine to evenly coat to potatoes. On the cooling rack, spread the potato sticks in a single layer, leaving space around each potato.
  5. Bake in the preheated oven for 30 to 35 minutes - or until desired crisp.
  6. While the fries are cooking, make the aioli by adding in a small bowl: mayonaise, minced garlic, cajun blackning spice, cajun mustard, horseradish, worcestershire sauce, lemon juice and parsley. Combine.

Notes

Baked fries are best the day they are made. If you need to reheat them, you can make them crispy again by heating them in a 400F oven for about 5 to 6 minutes.What is a remoulade? Remoulade is an aioli served chilled with a variety of herbs and spices.  The traditional French remoulade is made with mayonaise, mustard, capers, anchovies, and pickles.  In this cajun inspired remoulade we used creamed horseradish to bring the pickled element (replacing the capers and pickles) and worcestershire sauce to bring the umami (replacing the anchovies).Cooling rack note: If you don't have a cooling rack, you can line a baking sheet with parchment paper and bake the fries directly on the parchment paper. You will need to turn the fries are 15-20 minutes to ensure they are baked evenly. 
truffle friesResized

Truffle parmesan garlic lemon baked fries

These truffle fries can proudly be served for a date night or at a dinner party. They are simple but are filled with layers of flavour you will be proud of! We love serving these fries with white wine garlic mussels to create the iconing “moules frites”.
  • Prep Time 10 + 10 Minutes
  • Cook Time 35 Minutes
  • Total Time 55 Minutes
  • Serves 4 to 6 People

Ingredients

  • 1500 gr (about 6) yukon gold potatoes
  • 1/4 cup vegetable oil - we use camelina oil
  • 2 tbsp greek spice blend - we use Splendor garden
  • 1 tsp salt
  • 1/4 tsp black pepper
  • 2 medium clove garlic - minced
  • 1 tsp lemon zest
  • 2 tbsp gratted parmesan
  • 1/4 cup parsley
  • 1 tbsp truffle oil - we get ours at Italian Star Deli or Oliv Tasting Room

Instructions

  1. Preheat oven to 450 F. Place a cooling rack on a baking sheet.
  2. Place the potatoes in a large bowl, then pour very hot tap water over the top so that it covers the potatoes by at least 1 inch. Let sit 10 minutes.
  3. Drain the potatoes, then transfer them to a clean towel and dry as completely as you can. Note: you may need to use 2 towels.
  4. Return the potato sticks to the bowl. Add the vegetable oil, salt, and black pepper and combine to evenly coat to potatoes. On the cooling rack, spread the potato sticks in a single layer, leaving space around each potato.
  5. Bake in the preheated oven for 25 to 30 minutes - or until almost desired crisp. Add the minced garlic on the fries and return to the oven for about 5 minutes
  6. Garnish the fries with lemon zest, parmesan, parsley and truffle oil.

Notes

Baked fries are best the day they are made. If you need to reheat them, you can make them crispy again by heating them in a 400F oven for about 5 to 6 minutes.Cooling rack note: If you don't have a cooling rack, you can line a baking sheet with parchment paper and bake the fries directly on the parchment paper. You will need to turn the fries are 15-20 minutes to ensure they are baked evenly. 
poutine

Poutine

Now we are talking! Having mastered the technique of oven baked fries let’s make the ultimate French Canadian savoury delight – Poutine! This poutine offers the authentic taste of Quebec’s iconic poutine: crispy fries, cheese curds and tons of poutine gravy.
  • Prep Time 10 + 10 Minutes
  • Cook Time 35 Minutes
  • Total Time 55 Minutes
  • Serves 4 to 6 People

Ingredients

  • 1500 gr (about 6) yukon gold potatoes
  • 1/4 cup vegetable oil - we use camelina oil
  • 2 tbsp greek spice blend - we use Splendor garden
  • 1 tsp salt
  • 1/4 tsp black pepper
  • 480 gr cheese curds - we use Bothwell “Squeak’rs”
  • 2 cloves garlic - minced
  • 3 tbsp cornstarch
  • 2 tbsp water
  • 1/3 cup unslated butter
  • 1/4 cup all purpose flour
  • 1 tbsp worcestershire sauce
  • 1 tbsp balsamic vinegar
  • 1 tsp onion powder
  • 2 tbsp ketchup
  • 2 cup beef broth - we use pine view farms
  • 1 cup chicken broth - we use pine view farms
  • 3/4 cup stout beer - there are so many good local options: District, Rebellion, Pile of Bones...
  • 1/2 tsp pepper + 1/2 tsp salt

Instructions

  1. Preheat oven to 450 F. Place a cooling rack on a baking sheet.
  2. Place the potatoes in a large bowl, then pour very hot tap water over the top so that it covers the potatoes by at least 1 inch. Let sit 10 minutes.
  3. Drain the potatoes, then transfer them to a clean towel and dry as completely as you can. Note: you may need to use 2 towels.
  4. Return the potato sticks to the bowl. Add the vegetable oil, salt, and black pepper and combine to evenly coat to potatoes. On the cooling rack, spread the potato sticks in a single layer, leaving space around each potato.
  5. Bake in the preheated oven for 30 to 35 minutes. Because in Saskatchewan it's difficult to get fresh cheese curd we recommend spreading the cheese curds on the fries evenly and leaving them in the oven for an additional 30 seconds to enhance the "squeek".
  6. While the fries are baking, make the poutine gravey. In a small bowl add the cornstarch and water. Combine and set aside. In a pot, melt the butter. Add the flour and cook for 5 minutes, stirring regularly - until it turns a light golden. Add the minced garlic and cook an additional 30 seconds - stirring regularly to prevent the garlic from burning.
  7. Add the worcestershire sauce, balsamic vinegar, onion powder, ketchup, beef and chicken broth and beer. Bring to a boil whisking regularly. Add about half the cornstarch mixture let simmer, whisking regularly. If you would like your gravey thicker add the rest of the cornstarch mixture. Season with salt and pepper. Taste and adjust seasoning.
  8. Serve the fries and cheese by topping them with a generous amount of poutine gravey.

Notes

Baked fries are best the day they are made. If you need to reheat them, you can make them crispy again by heating them in a 400F oven for about 5 to 6 minutes.Cooling rack note: If you don't have a cooling rack, you can line a baking sheet with parchment paper and bake the fries directly on the parchment paper. You will need to turn the fries are 15-20 minutes to ensure they are baked evenly. You can replace the beer by beef or chicken stock. 

Feed fear? Or find hope?

Blog provided by: Melanie Boldt
Owner of Pine View Farms.


Over the past few days, we have been bombarded with Covid-19 information. I fear we may have two outbreaks going on — a fear pandemic and a flu pandemic. Oh yes, there might be a third — a misinformation pandemic.

In these times of uncertainty, it’s critical we keep our wits about us, lest we worry ourselves sick — and I mean that quite literally.

So I ask myself hourly, “what is within my control?” The answer? Our reaction is 100% within our control.

In marketing and advertising, I know that two things sell products best: fear and sex.

At Pine View Farms, we have deliberately steered away from fear-based selling. Rather we talk about moving towards better things. And as for sex? Well, neither Kevin nor I are that sexy and somehow, I think that strategy would scare y’all away! Not a good strategy at all!

As humans, we are innately wired to respond very quickly to fear. Our fight or flight response saved our butts as Neanderthals.

We are hardwired for negativity. It’s called negativity bias. “Bad” things grab our attention and they tend to influence our decision making more than “good” things of equal magnitude.

Our brains perceive negative news as more truthful, drawing more attention and hence, having greater validity. Now we know why fake news runs rampant and has become a slick tool of nefarious politicians.

Covid-19 is the latest opportunity to feed fear to the masses. Now more than ever, the diet you consume every day — what you eat, read and watch matters.

(Writing is cathartic for me, and so be aware, I’m preaching to myself here.)

I’m not gonna lie. For the past week, I have vacillated between gut wrenching panic and heroic stoicism every hour, depending on where my mind dwells.

As a business owner, I feel the weight of responsibility for our staff’s health and economic stability. I feel scared for our farm’s economic future. Everything is on the line here and we have no safety net. And, we want to care generously for our parents, children and surrounding community.

Neuropsychologist Rick Hanson, author of Hardwiring Happiness: The New Brain Science of Contentment, Calm and Confidence says “The longer the neurons [brain cells] fire, the more of them that fire, and the more intensely they fire, the more they’re going to wire that inner strength – that happiness, gratitude, feeling confident, feeling successful, feeling loved and lovable.”

But on a daily basis, most of us dwell more on the negative than the positive. We need five times more positive interactions than negative reactions to thrive as a species! Those feel hard to come by these days.

So, what can we do?

  • In all things, remember that our reaction to events is ONE HUNDRED PERCENT within our control. We cannot control much in this life, but our personal reaction is a big one. Keep your head screwed on!
  • Don’t fall prey to the 24-hour news cycle. Find trusted, reliable news sources, get good science, and turn off the TV and/or put down your phone. Otherwise, you are feeding fear and soon your stomach will be churning like mad.
  • Nurture your mind, body and spirit. Do the things you always do to stay healthy. Eat well. Sleep well. Exercise. Get outside in nature. Meditate or pray. Find connection and community. These are the things that build resilience in your body and brain and will enable you to fend off sickness if, and when, it comes.
  • Feed your brain daily goodness. Be present in the moment. Breathe deeply. Try to affirm the positive moments you experience every day. Start a gratitude list. You will find joy.

There is one last thing I need to ask of you. You might think it’s self-serving, but this isn’t just about us. Wherever you can, support locally owned small businesses for your purchases. Now more than ever, it’s critical to have local production and supply chains for essential items like food, so that we have the economic resilience and capacity to take care of ourselves. We believe a creative, robust, local economy is critical to our recovery.

I remain resolute in hope — does that make me crazy? Maybe. Is it possible that that through this pandemic, we might realize that all of humanity is connected on this little ball of a planet, and that now more than ever, we need to work together and be very, very kind to one another? That would be the best thing ever.

No matter how you’re feeling this week, those emotions are valid. Let’s be cautious and calm, .Let’s be gracious to our neighbours, especially those who are vulnerable. Let’s find hope.

Blog provided by: Melanie Boldt
Owner of Pine View Farms.


What to do with kids when you’re stuck at home – The Ultimate Guide

Blog provided by:
Lacey Engel, Registered Dietitian 
BSc. Nutrition, BSc. Kinesiology.
Owner of Beyond Baby Nutrition

The current COVID-19 pandemic is wild to say the least. One minute you’re planning birthday parties, St. Patrick’s Day festivities, Easter feasts, and going on vacations, and in the next minute school is cancelled and you’re being told to “social isolate.” You’re overwhelmed, anxious, and uncertain of what’s to come to say the least; and you’re definitely not alone in those feelings. 


One of the major concerns I keep hearing from parents is “what the heck am I going to do with my kids?” It’s totally understandable if the idea of having to stay home leaves you feeling a little… or a lot overwhelmed. For many families, this may be the first time kids are all at home for an extended period of time without major travel plans or celebrations involved.


So I scoured the internet and found some pretty incredible resources to share with you to help you have fun as a family, take some extra stress off you, and provide some much needed distraction.

And hey, when the world gives you COVID-19, you could always turn it into a second Christmas!! Being stuck at home with your kids may not sound like a dream, but with a little perspective shift social isolation can easily be changed into a family, fun stay-cation (or at least we can try to pretend, right?!)

Let's plan your stay-cation!

It’s no secret that kids thrive with routine. But, and this is a BIG BUT….. if it takes you some time to carve out a new routine for your family that’s OK too!  And remember, you don’t need to plan every second of the day. You may want to have a few activities in your back pocket, so to speak, in case things start to go downhill fast.

So we’ve rounded up some incredible resources for you to access at your fingertips to make this stay-cation memorable in a good way!

Arts & Crafts

You don’t need to head out to a craft store and drop a ton of cash to be able to create fun, enticing things with your kids. But a little glitter, googly eyes, and paint never hurt either.

Here’s 50 + Quick and Easy Kids Crafts anyone can make, from Happiness is Homemade

More Indoor Fun

All crafted out? No problem. Put the glue and glitter away and check out 100+ ideas from The Best Ideas For Kids

Some of our families all time favourite indoor activities are:

  • Hide and seek
  • Lego building
  • Dinosaur imaginative play
  • Puzzles
  • Drawing, colouring, or painting
  • Building with blocks or Magniformers
  • Reading the same book a dozen times in a row
  • Obstacle courses with furniture
  • Building forts

Outdoor Fun

Nothing makes me happier than taking my kids outside. With social distancing being at the forefront of everyone’s mind, being outside has gotten slightly trickier but NOT IMPOSSIBLE!

The key to being outside is….. Stick with your family.

Play dates, a good ol’game of shinny with the neighbour kids is out. So what’s left? And where exactly can you go?

The good news is you can go pretty much anywhere you want (right now), so long as you’re trying to stay at least 6 feet away from other people. This means running, going for a bike ride or a stroll on a path isn’t out of the question.

Not interested in venturing that far out? No problem, check out these 50 Fun Things to Do Outside with Kids as a Family from Very Well Family.

Virtual field trips

So many INCREDIBLE places around that world have opened up virtual doors for us to explore from the comfort of our own home. Here’s a great link I found from Adventures in Familyhood that lists 20 different virtual tours.

Educational Apps, Websites & Print-Outs

This…. this is where things can get a little overwhelming, at least for me! So many resources exist online to help make learning fun and easy to access for kids of all ages.

Worried about limiting screen time? I hear ya! We’re not a huge screen time family, BUT you need to do what you need to do to get through each day.

So here they are a few links:

So many more options

This definitely isn’t an exhaustive list, but it’s a start. If you’ve been using any other resources, or you’ve created some yourself that you’d love to share we would be so grateful and thrilled to add them to our list!!

If you’ve found this helpful, please comment below AND share, share, share!!

~Lacey

Lacey Engel is a Registered Dietitian and owner of Beyond Baby Nutrition. She works with families of picky eaters to help them fix meal times for good. Lacey strongly believes that HOW
you deal with picky eating has HUGE and lasting impacts on how your kids eat for the rest of their life. There isn’t bad food, but there is a bad way to teach kids to learn to love and eat food. To learn how to help your kids develop a healthy relationship with food, visit beyondbabynutrition.com

compost

As a society, we are becoming more aware of our environmental foot print and are spending more energy on improving  waste management. When thinking of waste management a few method come to mind including: reusing, composting, upcycling and recycling. Many items that use to find their way in landfill can now avoid it. Some of these items include: vegetable peels,  batteries and bottles. This contributes to reducing garbage pollution. 

Paper is a significant portion of waste and it can be composted or recycled.   Paper is responsible for 16% of landfill waste. Recycling or composting are both an improvement on throwing paper away.  It is better to compost or recycle paper? 

First let’s define both processes. 

Composting

Composting helps put organic waste to an alternative use. Items that are usually composted include grass cuttings, shredded leaves, fruit and coffee grounds. These products are combined in specific proportion with water and air to start the  decomposition process. The compost that is formed is helpful in growing plants. 

Recycling

Recycling is the manufacturing of products that could of been discarded in a landfill. Items are recycled by being converted into items that can be used again. 

Recycling and compositing each have pros and cons. Let’s examine each method to identify which is better overall.

Recycling
Pros
  • bring paper material back in the production stream which reduces the need for new trees
  • recycling reduces the need to produce new paper. One piece of A4 paper requires on average 5 liters water to produce
  • recycling 1 ton of paper saves around 682.5 gallons of oil, 26,500 liters of water and 17 trees
  • recycling uses resources but less than to produce new paper
Cons
  • the process of recycling paper produces a lot of waste.  
  • harmful chemicals are used in the recycling process
  • the recycling process pollutes water
  • encourage consumption of paper. Recycled paper may wrongfully appear to have minimal impacts on the environment.
Composting
Pros
  • composting instead of recycling paper could completely eliminate the resources needed to break it down and manufacture it back into fresh paper.
  • no recycling bins, no trucks to carry it to the recycling plant, no machinery or sludge or chemical processing agents.  Just paper breaking down into its component parts and then fertilizing your garden next year, helping your tomatoes grow.
Cons
  • composting paper removes it from the paper production stream
  • on a large scale, composting paper rather than recycling it, may cause more harm than good.
Soiled paper

When paper is soiled in any way it cannot be recycled.  Examples of soiled paper include art project and pizza box. Including soiled paper may impact an entire batch of recycled paper. It is recommended to tear soiled paper in small pieces and to add it to compost pile.  

Make the Best Sugar Shack Feast

Sugar shack

You probably heard of sugar shacking, this mysterious springtime activity Canadians from Eastern provinces partake in every year. If you ever wondered what a Cabane à Sucre (sugar shack) is all about, what really happens at these festive gatherings, and how to experience it DIY, read on.

The romance and nostalgia of sugar shacks is unmistakable. Traditional feasts, wood fires, maple taffy on fresh snow, sleigh rides, and energetic folk music are woven into the fabric of a northeastern Canadian springtime.When the sugary sap begins to flow during le temps des sucres, friends and families head to their local sugar shack for a day of family-friendly activities and a feast of maple-soaked delicacies designed for sharing at long communal tables.

Did you know?

Cabane à sucre (sugar shack) is a small building built in a maple grove where maple products like maple syrup, maple butter and maple taffy are prepared.

Maple Taffy

Making your own maple taffy is super easy, fun and DELICIOUS!

What do I need?

  • maple syrup (about 1/2 cup for 4 people)
  • candy thermometer
  • metal spoon
  • pot
  • popscicle sticks
  • snow 

Preparation

  1. Place the maple syrup in a pot on medium heat. Stirting constently with a metal spoon, bring to 238F.
  2. As soon as the maple syrup reaches 238F, remove from the heat – the syrup will be bubbly. 
  3. Spoon the hot syrup in lines on the snow. Using a popscicle stick, turn the taffy on the stick.

An Indigenous tradition lives on

Settlers observed Indigenous making maple sugar every spring that would be used to get them through the tough winter months. The sugar was then broken down into slices or shaved directly over dishes.

The sugar shacks and maple syrup are of great importance in the cultural identity of Canadiams, it is to the Indigenous

An Iroquois legend describes the piercing of maple bark and the use of its sweet sap to cook game, which is said to be at the origin of the culinary tradition of cooking with maple. Maple syrup is so central to traditions,  the Ojibway also call the sugar season “maple moon” or “sugar month”, since it lasts 4 to 6 weeks, from March to April.

In the 17th century, the French, who began to have permanent installations in North America, in turn began to collect maple water. 

The romance and nostalgia of sugar shacks is unmistakable. Traditional feasts, wood fires, maple taffy on fresh snow, sleigh rides, and energetic folk music are woven into the fabric of a northeastern Canadian springtime.When the sugary sap begins to flow during le temps des sucres, friends and families head to their local sugar shack for a day of family-friendly activities and a feast of maple-soaked delicacies designed for sharing at long communal tables.

Bring the cabane à sucre home

Come on a journey with us as we bring the cabane à sucre home with rich, indulgent sugar shack feast recipes.

Did you know?

Canada accounts for 72% of the globe’s maple syrup output. Québec produces 91% of Canadian maple syrup.

The traditional cabane à sucre meal includes pea soup, thick-cut ham, sausage links, bacon, omelet, fried pork rinds called “oreilles de crisse,” roasted potatoes, pickles, pickled beets, baked beans, fresh-baked bread and, most importantly, lots of maple syrup. 

Maple syrup is central to sugar shack meals. It’s basically the law: Everything — we mean everything — on the table must be doused in sweet sticky maple syrup. That includes all the savoury items! Every dish either contains or is bathed in maple syrup: thick-cut ham, baked beans, sausages links, omelet, pancakes… Savoury dishes like: Pea soup and bacon rinds (colourfully known as oreilles de crisses) balance out this sweet extravagance. To cover your bases, you should probably stock up on a few bottles of maple syrup. Dessert is the pièce de résistance of this feast. Traditional desserts include maple sugar pie, pouding chômeur “poor man’s pudding” — a Depression-era sweet treat served warm and topped with vanilla ice cream. At the end of the meal, you always have a little room for maple taffy, poured warm on fresh snow.

Let’s break down the 3 main categories of food required for a truly traditional sugar shack meal.

Breakfast foods

Sugar shacks feature plates upon plates of everyone’s favourite breakfast foods.

Serve your guests the classics: 

Don’t forget to keep your guests happy with warm coffee and juices.

Salty foods

What goes better with sweet than salty? Nothing, that’s what! Supplement your breakfast spread with a few salty dishes. The traditional savoury dishes include:

The star of the show: Dessert

Sugar shack begins and ends with maple. Classic sugar shack desserts include:


La crème de la crème of any sugar shack experience is none-other than maple taffy “tire d’érable”. Kids and adults go crazy for the sticky, chilled delight that is maple taffy. No worries, it’s a lot easier to make than it looks!

What to do other than eating?

Other than eating, what creates a traditional sugar shack experience? That answer is simple… music! Nothing brings us to the romantic world of traditional shacks like folklore Quebec music. We created a spotify playlist to share with you the joyful soul of the Cabane à sucre tradition.

In Québec, many sugar shacks offer horse sleigh rides to visit the property, walk or hike in the woods, traditional music and dancing, petting zoos and snowshoeing. 

When we host our sugar shack meals we love to go for a walk around Wascana lake and dancing to traditional music.

Did you know?

Canada produced 13.2 million gallons of maple syrup in 2019 which contributes $750 million to Canada’s GDP

More Blogs
blog

Chocolate Fudge Sauce

blog

BBQ season

blog

Mother’s day brunch

blog

Soupe vide-frigo

blog

Reduce food cost & food waste with soup

7 Easy Ways to Reduce Food Expenses

Food Price Spike in 2020

Canada’s Food Price Report  predicts food price spike in 2020!

7 Easy Ways to Reduce your Food Costs
1. Less restaurants

Restaurant food often comes with extra calories, too much fat, salt, aditives as well as a deficience in fiber and vitamins. As if that wasn’t enough to encourage you to cook more at home, eating out is very expensive and is becoming more expensive.  Menu prices in Canada rose 4.2% last year and are anticipated to increase up to 4% in 2020! Spending at restaurants has increased by more than $670 per household between 2010 and 2017.

ZestyKits meal plans make it easy and convenient to cook at home as well as reduce your overall food cost.

2. Eat more plant based meals

The cost of meat products are anticipated to increase by up to 6% in 2020! Canadians spend nearly 20% of our food budget on red meat and chicken. Learning to prepare delicious plant based meals will significantly reduce your food costs.

A good plant based recipe has as much protein as a meal with meat and is filling! You won’t miss the meat and with delicious whole grains and legumes, you will feel full for hours. Some of our favourite plant-based meals include:

  • Ratatouille pasta: Chickpea pasta tossed in a rich tomato sauce and oven roasted eggplant, red bell peppers, black olives and fresh basil
  • Mexi bowls: Black beans, diced avocado, romaine lettuce, diced tomatoes, salsa, brown rice and shredded cheddar topped with fresh cilantro.

ZestyKits offers a Clean Food plan which includes 1 meal plant based to help you discover new delicious plant based recipe. If you are ready to eat fully plant-based we also offer a Plant-Based and Vegan plan.

3. Make a meal plan

Making a plan is very important when it comes to managing grocery costs. Going around the grocery aisles aimelessly often results in frustration and poor food choices. Without a plan, it is common to buy too much food that will end up rotting in your fridge.

We love to plan our weekly menu using ZestyKits’ weekly menu. We plan to prepare ZestyKits meal kits during our busiest days.

4. Eat home-made meals more often

Make more meals from scratch. Canada’s 2018 Dietary Guidelines recommend cooking more to support health. Not only does cooking provide a number of health benefits, it saves you a lot of money! Cooking from scratch requires a bit more time and the effort can be well woth it, both for your wallet and your waisline.

ZestyKits meal plans make it easy and convenient to cook at home and involve the kids in meal preparation, empowering you to easily make dinner time family time. 

5. Eat seasonal fruits & vegetables

Fruit and vegetables take up almost 24% of the average Canadian’s grocery list. To promote health, it is recommended to eat more vegetables. 

The secret to eating more vegetables and still manage cost is to buy more fruits and vegetables that are in season. Load up on local fruits and vegetables when they are in season and freeze them for later use. 

During the winter, fresh produces increase significantly in price. To reduce your grocery bill, load up on frozen produces, which have similar nutritional value and are alot more affordable. 

Not only does ZestyKits offer tons of seasonal products, we purchase ingredients grown or prepared right here… in the Canadian Prairies!

6. Reduce food waste

Purchase only what you need to decrease your food waste as well as your carbon footprint. Reducing food waste is easy when planning meals and using a locally sourced meal kit service like ZestyKits. 

7. Don't shop hungry

Hunger creates a desire to aquire. Research shows that shopping hungry results in spending increase of 64%. Shopping hungry increases spending even when not shopping for food. To reduce your risk of over spending, have a snack before shopping to stabilize your blood sugar.

Having 3 delicious ZestyKits meals delivered every week prevents last minute hungry grocery run – saving you time and money.

More Blogs
blog

Chocolate Fudge Sauce

blog

BBQ season

blog

Mother’s day brunch

blog

Soupe vide-frigo

blog

Reduce food cost & food waste with soup