Pesto

We love pesto! Pesto is a delicious, easy and healthy way to enjoy fresh herbs. Pesto ads tons of flavour to dishes takes just a few seconds to make.

Pesto can be made using a traditional mortar and pestle, food processor or an immersion blender.

In this blog you will learn how to make:

  • Traditional basil pesto
  • Sun dried tomato pesto
  • Walnut pesto
  • Prairie pesto

Traditional Basil Pesto

pesto

Traditional Basil Pesto

This tradtional basil pesto is ready in seconds and is a delicious way to add flavour to pasta, pizza, grilled fish or even serve with a cheese plater.

This recipe makes 1 cup of pesto.
  • Total Time 1 to 5 Minutes

Ingredients

  • 1/4 tsp coarse salt
  • 1/4 clove of garlic
  • 1/3 cup pinenuts
  • 1/2 cup olive oil
  • 2 cups fresh basil
  • 1/4 cup grated parmesan

Instructions

  1. In a mortar, add the garlic and salt. Cruch for a few seconds to form a paste.
  2. Add the pine nuts to the mortar with about half the oil. Crush into a paste.
  3. Add the parmesan and half the basil to the mortar and crush. Add the rest of the basil and olive oil. Crush in the mortar until the basil leaves are fully incorporated to the other ingredients.

Sundried Tomatoe Pesto

Sundried tomato pesto

Sundried Pesto

This sundried pesto is ready in seconds and is a delicious way to add flavour to pasta, pizza, grilled fish or even serve with a cheese plater.

This delicious pesto comes together in seconds with a food processor.

This recipe makes 1 cup of pesto.
  • Total Time 1 Minutes

Ingredients

  • 1/2 cup sun-dried tomatoes
  • 1 cup fresh basil
  • 1/4 clove of garlic
  • 1/3 cup pinenuts
  • 1/2 cup grated parmesan
  • 1/2 tsp salt
  • 1/2 cup olive oil

Instructions

  1. In a food processor, add all ingredients and pulse until a paste forms - about 30 seconds.

Walnut Pesto

Walnut pesto

Walnut pesto

This Tuscan walnut pesto is a nice twist on traditional basil pesto.

Tuscan walnut pesto is a white pesto filled with walnuts, parmesan, milk and toasted bread.

This recipe is delicious on pasta

Makes 1 1/2 cup.
  • Total Time 17 Minutes

Ingredients

  • 1 cup toasted or stale bread cubes
  • 1/2 cup milk
  • 1/2 cup walnuts
  • 1/4 cup grated parmesan
  • 1/2 clove garlic
  • 1/4 tsp coarse salt

Instructions

  1. In a small bowl, place the bread and milk and allow the bread to soak the milk for 15 minutes.
  2. In a mortar, place the garlic and salt. Crush into a paste.
  3. Add the walnuts in the mortar and crush into a paste.
  4. Remove extra milk from the bread and add with the parmesan to the garlic. Crush into a paste.

Notes

If you'd prefer to use a food processor, complete step 1 as describe. Drain the extra milk and add all the ingredients to the food processor until a paste forms. 

Prairie Pesto

Prairie pesto

Prairie Pesto

This prairie pesto is ready in seconds and is a delicious way to add prairie flavour to sandwishes, and pizza.

This recipe makes 1 cup of pesto.
  • Total Time 1 to 5 Minutes

Ingredients

  • 1/2 tsp salt
  • 1/2 clove of garlic
  • 1/2 cup ground flax seeds
  • 1/2 cup olive oil
  • 2 cup fresh basil
  • 1/3 cup water

Instructions

  1. In a food processor, add the basil, oil, salt and garlic. Blend until a paste forms.
  2. Add the flaxseeds and water. Blend into a paste.

Jam

JAM! What better way to bottle up the Summer’s rays of sunshine than with delicious jams? When the days get shorter, darker and we begin to miss the summer days, we reach in the pantry and take a jar of jam. It always brings us back to the joys of summer. 

Reduce food waste with jams. Yes, you read that right! Jams are a delicious way to use bruised fruits. Often fruits that are a little older are sweeter and actually make better jams. 

In this blog you will learn how to make:

  • Easiest Strawberry Jam
  • Plum Preserves
  • Apricot Preserves
  • Saskatoon and Blueberry Jam

Strawberry Jam

strawberryjam2

Easiest Strawberry Jam

This Strawberry jam is done in 30 minutes with 3 ingredients in 3 easy steps. It doesn’t get any better than this!

This recipe makes 3 cups of jam and can easily be multiplied. You can make this jam with ANY berry. As long as you respect the sugar to berry ratio, your jam will be perfect every time.
  • Total Time 30 Minutes

Ingredients

  • 2 cups sugar
  • 1 pound, 4 cups whole Strawberries (fresh or frozen)
  • 2 tbsp lemon juice

Instructions

  1. In a pan, combine the strawberries, sugar, lemon juice. Bring to a boil uncovered on medium heat. Place a plate in the freezer to test when the jam is ready (step 2).
  2. Let boil for 10 to 15 minutes. Test if the jam is ready by placing a few drops on jam on the cold plate and drawing your finger through it. If the jam stays parted it is ready. If you would like small pieces of fruit you can mash the fruit using a potato masher.
  3. Carefully place the jam in clean jars. The jam will keep in the fridge for a week.

Notes

OPTIONAL: If you would like to keep your jam at room temperature you will need to can it. To do so, ensure your jars and lids have been sterilized (you can wash them in the dishwasher on sterilize mode). Bring a large pot of water to a boil and ensure there would be at least 2 inches of water over the jars. Fill the sterilized jars up to 1 inch from the top. Carefully place the lid and thighten  loosely. Place a dish towel at the bottom of the pot to provide a cushion between to bottom of the pot and the glass jars. Place the jars in the boiling water for 5 minutes (1 cup jars). Place the jars of jam on the counter to let them cool. You will hear the lid sceal and they will make a "pop" sound. If after a few hours, you didnt hear the sound, lightly press on the button on top of the lid, if it stays down the jars are scealed. 

Plum Jam

plum jam

Plum Preserve

Let’s take jam up a notch and move from the breakfast comfort of Strawberry jam to the dinner party. This plum preserve is lightly spiced with star anise. Plum preserve is amazing to serve with a cheese board. We love eating it with French bread, brie, and pear slices.

This recipe makes 4 cups of jam and can easily be multiplied.
  • Total Time 80 Minutes

Ingredients

  • 1 1/3 cups sugar
  • 2 pounds, 5 cups diced plums
  • 3 star anise

Instructions

  1. In a pan, combine the plums, sugar and star anise. Let sit for an hour or until the fruit becomes syrupy with the sugar. Bring to a boil uncovered on medium heat. Place a plate in the freezer to test when the preserve is ready (step 2).
  2. Let boil for 10 to 15 minutes. Test if the preserve is ready by placing a few drops on jam on the cold plate and drawing your finger through it. If the preserves stays parted it is ready.
  3. Carefully place the preserve in clean jars. The preserve will keep in the fridge for a week.

Notes

OPTIONAL: If you would like to keep your preserves at room temperature you will need to can it. To do so, ensure your jars and lids have been sterilized (you can wash them in the dishwasher on sterilize mode). Bring a large pot of water to a boil and ensure there would be at least 2 inches of water over the jars. Fill the sterilized jars up to 1 inch from the top. Carefully place the lid and thighten  loosely. Place a dish towel at the bottom of the pot to provide a cushion between to bottom of the pot and the glass jars. Place the jars in the boiling water for 5 minutes (1 cup jars). Place the jars of preserve on the counter to let them cool. You will hear the lid sceal and they will make a "pop" sound. If after a few hours, you didnt hear the sound, lightly press on the button on top of the lid, if it stays down the jars are scealed. 

Apricot Preserves

Apricot jam

Apricot Preserves

This apricot preserves is based on an old French recipes and represents the best of French country cuisine – delicious and simple.

Makes 3 cups. This recipe can easily be multiplied to make a larger quantity.
  • Total Time 60 Minutes

Ingredients

  • 1 cup sugar OR honey
  • 1/2 cup water
  • 1 1/2 pound, 3 cups diced apricot (save 1 pit)
  • 1 1/2 tbsp lemon juice
  • 2 tbsp almonds

Instructions

  1. Open 1 apricot pit and remove the almond like nut in it. Chop it coarsly. Chop coarsly the almonds. In a pan, combine the strawberries, sugar, lemon juice. Bring to a boil uncovered on medium heat. Place a plate in the freezer to test when the jam is ready (step 3).
  2. In a pot, add the sugar OR honey and water. bring to a boil uncovered on medium heat. Add the apricots, lemon juice, choped apricot pit and almonds.
  3. Let boil for about 30 minutes. Test if the preserve is ready by placing a few drops on jam on the cold plate and drawing your finger through it. If the jam stays parted it is ready.
  4. Carefully place the preserve in clean jars. The jam will keep in the fridge for a week.

Notes

OPTIONAL: If you would like to keep your preserves at room temperature you will need to can it. To do so, ensure your jars and lids have been sterilized (you can wash them in the dishwasher on sterilize mode). Bring a large pot of water to a boil and ensure there would be at least 2 inches of water over the jars. Fill the sterilized jars up to 1 inch from the top. Carefully place the lid and thighten  loosely. Place a dish towel at the bottom of the pot to provide a cushion between to bottom of the pot and the glass jars. Place the jars in the boiling water for 5 minutes (1 cup jars). Place the jars of preserves on the counter to let them cool. You will hear the lid sceal and they will make a "pop" sound. If after a few hours, you didnt hear the sound, lightly press on the button on top of the lid, if it stays down the jars are scealed. 

Saskatoon and Blueberry Jam

blueberry jam

Saskatoon and Blueberry Jam

This Saskatoon and Blueberry jam is done in 30 minutes with 3 ingredients in 3 easy steps. It doesn’t get any better than this! This recipe makes 3 cups of jam and can easily be multiplied. You can make this jam with ANY berry. As long as you respect the sugar to berry ratio, your jam will be perfect every time.
  • Total Time 30 Minutes

Ingredients

  • 2 cups sugar
  • 1/2 pound, 2 cups Saskatoon berries (fresh or frozen)
  • 1/2 pound, 2 cups blueberries (fresh or frozen)
  • 2 tbsp lemon juice

Instructions

  1. In a pan, combine the berries, sugar, lemon juice. Bring to a boil uncovered on medium heat. Place a plate in the freezer to test when the jam is ready (step 2).
  2. Let boil for 10 to 15 minutes. Test if the jam is ready by placing a few drops on jam on the cold plate and drawing your finger through it. If the jam stays parted it is ready. If you would like small pieces of fruit you can mash the fruit using a potato masher.
  3. Carefully place the jam in clean jars. The jam will keep in the fridge for a week.

Notes

OPTIONAL: If you would like to keep your jam at room temperature you will need to can it. To do so, ensure your jars and lids have been sterilized (you can wash them in the dishwasher on sterilize mode). Bring a large pot of water to a boil and ensure there would be at least 2 inches of water over the jars. Fill the sterilized jars up to 1 inch from the top. Carefully place the lid and thighten  loosely. Place a dish towel at the bottom of the pot to provide a cushion between to bottom of the pot and the glass jars. Place the jars in the boiling water for 5 minutes (1 cup jars). Place the jars of jam on the counter to let them cool. You will hear the lid sceal and they will make a "pop" sound. If after a few hours, you didnt hear the sound, lightly press on the button on top of the lid, if it stays down the jars are scealed. 

Make the Best Sugar Shack Feast

Sugar shack

You probably heard of sugar shacking, this mysterious springtime activity Canadians from Eastern provinces partake in every year. If you ever wondered what a Cabane à Sucre (sugar shack) is all about, what really happens at these festive gatherings, and how to experience it DIY, read on.

The romance and nostalgia of sugar shacks is unmistakable. Traditional feasts, wood fires, maple taffy on fresh snow, sleigh rides, and energetic folk music are woven into the fabric of a northeastern Canadian springtime.When the sugary sap begins to flow during le temps des sucres, friends and families head to their local sugar shack for a day of family-friendly activities and a feast of maple-soaked delicacies designed for sharing at long communal tables.

Did you know?

Cabane à sucre (sugar shack) is a small building built in a maple grove where maple products like maple syrup, maple butter and maple taffy are prepared.

Maple Taffy

Making your own maple taffy is super easy, fun and DELICIOUS!

What do I need?

  • maple syrup (about 1/2 cup for 4 people)
  • candy thermometer
  • metal spoon
  • pot
  • popscicle sticks
  • snow 

Preparation

  1. Place the maple syrup in a pot on medium heat. Stirting constently with a metal spoon, bring to 238F.
  2. As soon as the maple syrup reaches 238F, remove from the heat – the syrup will be bubbly. 
  3. Spoon the hot syrup in lines on the snow. Using a popscicle stick, turn the taffy on the stick.

An Indigenous tradition lives on

Settlers observed Indigenous making maple sugar every spring that would be used to get them through the tough winter months. The sugar was then broken down into slices or shaved directly over dishes.

The sugar shacks and maple syrup are of great importance in the cultural identity of Canadiams, it is to the Indigenous

An Iroquois legend describes the piercing of maple bark and the use of its sweet sap to cook game, which is said to be at the origin of the culinary tradition of cooking with maple. Maple syrup is so central to traditions,  the Ojibway also call the sugar season “maple moon” or “sugar month”, since it lasts 4 to 6 weeks, from March to April.

In the 17th century, the French, who began to have permanent installations in North America, in turn began to collect maple water. 

The romance and nostalgia of sugar shacks is unmistakable. Traditional feasts, wood fires, maple taffy on fresh snow, sleigh rides, and energetic folk music are woven into the fabric of a northeastern Canadian springtime.When the sugary sap begins to flow during le temps des sucres, friends and families head to their local sugar shack for a day of family-friendly activities and a feast of maple-soaked delicacies designed for sharing at long communal tables.

Bring the cabane à sucre home

Come on a journey with us as we bring the cabane à sucre home with rich, indulgent sugar shack feast recipes.

Did you know?

Canada accounts for 72% of the globe’s maple syrup output. Québec produces 91% of Canadian maple syrup.

The traditional cabane à sucre meal includes pea soup, thick-cut ham, sausage links, bacon, omelet, fried pork rinds called “oreilles de crisse,” roasted potatoes, pickles, pickled beets, baked beans, fresh-baked bread and, most importantly, lots of maple syrup. 

Maple syrup is central to sugar shack meals. It’s basically the law: Everything — we mean everything — on the table must be doused in sweet sticky maple syrup. That includes all the savoury items! Every dish either contains or is bathed in maple syrup: thick-cut ham, baked beans, sausages links, omelet, pancakes… Savoury dishes like: Pea soup and bacon rinds (colourfully known as oreilles de crisses) balance out this sweet extravagance. To cover your bases, you should probably stock up on a few bottles of maple syrup. Dessert is the pièce de résistance of this feast. Traditional desserts include maple sugar pie, pouding chômeur “poor man’s pudding” — a Depression-era sweet treat served warm and topped with vanilla ice cream. At the end of the meal, you always have a little room for maple taffy, poured warm on fresh snow.

Let’s break down the 3 main categories of food required for a truly traditional sugar shack meal.

Breakfast foods

Sugar shacks feature plates upon plates of everyone’s favourite breakfast foods.

Serve your guests the classics: 

Don’t forget to keep your guests happy with warm coffee and juices.

Salty foods

What goes better with sweet than salty? Nothing, that’s what! Supplement your breakfast spread with a few salty dishes. The traditional savoury dishes include:

The star of the show: Dessert

Sugar shack begins and ends with maple. Classic sugar shack desserts include:


La crème de la crème of any sugar shack experience is none-other than maple taffy “tire d’érable”. Kids and adults go crazy for the sticky, chilled delight that is maple taffy. No worries, it’s a lot easier to make than it looks!

What to do other than eating?

Other than eating, what creates a traditional sugar shack experience? That answer is simple… music! Nothing brings us to the romantic world of traditional shacks like folklore Quebec music. We created a spotify playlist to share with you the joyful soul of the Cabane à sucre tradition.

In Québec, many sugar shacks offer horse sleigh rides to visit the property, walk or hike in the woods, traditional music and dancing, petting zoos and snowshoeing. 

When we host our sugar shack meals we love to go for a walk around Wascana lake and dancing to traditional music.

Did you know?

Canada produced 13.2 million gallons of maple syrup in 2019 which contributes $750 million to Canada’s GDP

More Blogs
blog

Cabane à sucre maison

blog

Make the Best Sugar Shack Feast

blog

Butter

blog

Beurre

blog

Truffles

6 unexpected reasons you should eat breakfast

Breakfast is the meal most often skipped by Canadians. In a cross Canada study, the most common reason to skip it is the lack of time. 

Many under-estimate the value of a balanced breakfast. With the rapid rythm of life and the growing popularity of intermittent fasting, breakfast is often not given the attention it deserves or is completely skipped.

Most health professionals agree: Breakfast is foundational to a healthy lifestyle. 

Whole grains, protein, fruits and vegetables, and good fats are all components of a balanced breakfast. No one should face the day without a good balanced breakfast! Here are six reasons to fully enjoy breakfast every morning.

Breakfast is an easy meal that can be prepared and eaten in a few minutes and provide many hours of productivity.

6 unexpected reasons you should eat breakfast
1. Support brain health

Carbohydrates are essential for healthy brain functioning. A number of studies show kids who eat breakfast tend to have improved cognitive skills and perform better at school. Eating a balanced high-fiber breakfast, promotes memory and concentration levels, as well as improve mood and lower stress. Who doesn’t want that? There is no better time than breakfast time to replenish our carbohydrates. High-fiber carbohydrates are found in oats, whole grain bread and fruits.   

2. Support Healthy Weight

Sometimes we may be tempted to skip breakfast to avoid extra calories. Skipping breakfast to lose a few pounds is a bad idea. Eating breakfast tells our body that we are not in starvation mode and will eat again during the day. Breakfast gets our metabolism started and helps us burn more calories throughout the day.

Studies have shown that eating a high-fiber, nutrient-sense breakfast greatly decreases hunger and cravings throughout the day.There is a correlation between skipping breakfast and having difficulty maintaining a healthy weight Studies even show this correlation with children. Children who skip breakfast tend to have a higher body Mass Index (BMI) and are up to 200% more likely to be overweight than children who eat breakfast regularly.  Eating three balanced meals a day contributes to maintaining a healthy weight.  

3. Family time

We often discuss the importance of eating dinner as a family. Breakfast is also a wonderful opportunity to connect as a family around the table. Are you ready for your volley ball game? What are you excited for today? We can enjoy the early morning hours to connect and spend quality time with our family.  

Are you thinking you won’t have time? No excuses! Let’s set the alarm a few minutes early and create beautiful memories with our loved ones. 

4. Skip that 2 pm feeling

Skipping breakfast has significant impact on the quality of our day. Are you familiar with that 2 pm feeling? There a good chance you can notice a correlation between skipping or eating an unbalanced breakfast and the 2 pm feeling. 

Balanced breakfast are filled with fibers which contribute to stabilize blood sugar. Sugar drops cause a number of symptoms: difficulty concentrating, head aches, sugar cravings, and low patience.  Test it out! Tomorrow morning, treat yourself to a balanced breakfast and see how you feel throughout the day. 

5. Reduce snacking

The 2pm feeling is often associated with cravings. The lack of nutrient provided by a balanced breakfast always catches up with us.  By skipping breakfast, it is highly likely that you will have cravings for chips or cake during the afternoon or evening.

To prevent these cravings, ensure to have a balanced breakfast high in fiber and proteins. When you have a hectic morning, plan a super quick breakfast you can eat on your way to work or at your desk. An example of super quick breakfast is overnight oats. You make them a few days ahead to just grab it and go in the morning. You will find a FREE breakfast recipe pdf at the bottom of this blog which includes a number of overnight oat recipes. 

6. Develop healthy habits

Most health professional recommend to eat more fruits and vegetables. Breakfast is a good opportunity to add fruits and vegetables to our diet and to support a healthy life style.

When we have time to treat ourselves with a nice breakfast we can spend time with our loved ones preparing a more elaborated breakfast filled with vegetables and fruits. Some examples include: Omelettes, frittatas, blueberry pancakes, and breakfast burritos. 

FREE breakfast recipe book

Are you sick and tired of the 2pm feeling?

Do you want to optimize your productivity throughout the day?

We got your back! Here are super easy and quick breakfasts that can be assembled a few days ahead. These breakfasts are so easy and delicious you won’t even want to skip breakfast again. Download this FREE pdf to learn how easy your next breakfast can be. 

Happy breakfast!

More Blogs
blog

Cabane à sucre maison

blog

Make the Best Sugar Shack Feast

blog

Butter

blog

Beurre

blog

Truffles

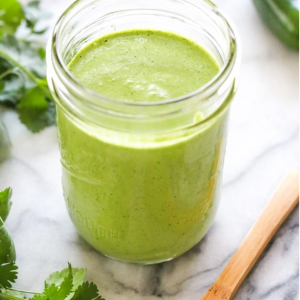
Green Curry Coconut Sauce

This amazing creamy, zesty and fresh sauce is amazing on our signature Green Curry Coconut Bowl. This sauce is perfect as dressing on salads, tacos, bowls and poke bowls. The spicy and zesty flavours complements  Thai, Hawaiian, Caribbean, and Mexican flavours. This sauce is filled with flavours that marry beautifully together to easily create dishes the whole family will love.

greensauce

Green Curry Coconut Sauce

This creamy, zesty, and fresh sauce is perfect as a salad dressing and on a bowl.
  • Prep Time 5 Minutes
  • Total Time 5 Minutes
  • Serves 2 People
  • Calories 145 kcal

Ingredients

  • 2 tbsp lime juice
  • Zest from 1/2 lime
  • 1/2 cup coconut milk
  • 1/2 tsp green curry
  • 1 tbsp fresh cilantro
  • 1 small garlic clove
  • 1 tsp agave or honey
  • 1/2 tsp salt

Instructions

  1. In a highspeed blended add all ingredients and combine until the sauce is smooth. Taste and adjust seasoning as needed.

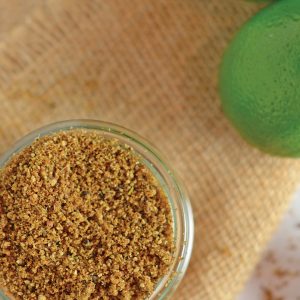
Coconut Thai spice blend

Coconut Thai Spice blend is a delicious fresh, zesty and spicy blend that is featured in our signature Curry Coconut Bowl.

This spice blend is delicious on chicken, fish, chickpeas. It complements very well Thai, Hawaiian, Mexican and Caribbean dishes. 

Thai-Seasoning-FB

Coconut thai spice blend

This tangy, fresh and spicy spice blend is amazing on chicken, fish, chickpeas, and vegetables.
  • Prep Time 5 Minutes
  • Total Time 5 Minutes
  • Serves 8 People
  • Calories 89 kcal

Ingredients

  • 1/2 cup shredded unsweetened coconut
  • zest of 1 lime
  • 1 tsp chili flakes
  • 1 tsp ground coriander
  • 1/2 tsp granualted garlic
  • 1/2 tsp salt

Instructions

  1. Combine all ingredients and store in an air tight container in the refregirator up to 1 week.

Green Curry Coconut Bowl

Green Curry Coconut Bowls with Chicken is an easy flavorful dinner that follows the new Canada Food Guide guidelines! This dish is gluten-free, dairy-free and, with easy modifications, can be plant-based.

The majority of the ingredients in this refreshing dish can be sourced from Saskatchewan producers.

With the changes announced to the Canada Food Guide in January, we are happy to show you this easy and delicious way to follow the new guidelines.

We often crave the freshness and comfort of Thai foods. The beauty of Thai food is the abundance of spices and this dish is no exception! The meal is also amazing as left overs for lunch so feel free to double or triple the recipe. We could eat this Green Curry Coconut Bowl for lunch every day!

ZestyKits easily introduces a lot of fresh and bright flavours through spices, sauces and fresh herbs. This dish combines all three to create an explosion of flavour the whole family will love.

We made this recipe on Global News and are happy to share the full recipe with you! 🙂

IMG_3927

Green Curry Coconut Bowl

We often crave the freshness and comfort of Thai foods. The beauty of Thai food is the abundance of spices and this dish is no exception! This easy delicious meal follows the new Canada Food Guide recommendations. This recipes makes 2 extra large servings with 36gr of protein and 46% recommended daily fiber.
  • Prep Time 15 Minutes
  • Cook Time 15 Minutes
  • Total Time 30 Minutes
  • Serves 2 People
  • Calories 644 kcal

Ingredients

  • 3/4 cup quinoa
  • 1 1/2 cups water
  • 200 grams chicken breast slices
  • 3 tsp Coconut Thai Spice Blend (see recipe below)
  • 2 cups broccoli
  • 1 red Thai pepper
  • 1 lime
  • 1 cup shredded carrots (about 2 carrots)
  • 1 cup shredded red cabbage
  • 1 tbsp unsweetened shredded coconut
  • 2 tbsp fresh cilantro
  • 2/3 cup Green Curry Coconut sauce (see recipe below)

Instructions

  1. Cook the quinoa
    Turn on the oven to 375F for the chicken. Place the quinoa in a strainer and rinse well. Add the quinoa, water and 1/4 tsp salt to a pot. Stir to combine. Bring the water to a boil on medium/high heat. Reduce the heat to low, cover and let simmer 15 minutes, or until the water is absorbed. Remove the pot from heat and fluff the quinoa with a fork.
  2. Slice the chicken
    in about 1 cm thick slices. Coat the chicken with about 1/2 tsp oil and 3 tsp coconut spice blend. Place the Spiced chicken on the baking sheet, salt as desired and bake until the chicken is fully cooked – about 15 minutes. Note: Ensure the chicken is cooked to at least 165F.
  3. Prepare the vegetables
    Cut the lime in segments. Cut the broccoli in small fleurets. Steam in the microwave for about 1 minute to 90 seconds. Thinly slice the red thai pepper. We recommend wearing a glove to not burn your hands.
  4. Prepare the spice blend and sauce
    See recipes below to prepare the Coconut Thai Spice blend and the Green Curry Coconut Sauce
  5. Assemble
    In two large serving bowls, place half the quinoa (about 1 1/4 cup). Place about 1/3 cup green curry sauce on each bowl. Arrange the steamed broccoli, shredded carrot, shredded cabbage. Garnish with red Thai pepper slices, unsweetned shredded coconut, lime wedge and fresh cilantro.

Bon Appetit!

Plant-based Modifications

Plant-based modifications: To build a plant based version of this dish, replace the chicken by 1 1/2 cup cooked chickpeas. Coat the chickpeas with 1 tsp oil and 3 tsp coconut Thai spice blend. Place on a baking sheet and bake at 350F for 10 minutes.

greensauce

Green Curry Coconut Sauce

This creamy, zesty, and fresh sauce is perfect as a salad dressing and on a bowl.
  • Prep Time 5 Minutes
  • Total Time 5 Minutes
  • Serves 2 People
  • Calories 145 kcal

Ingredients

  • 2 tbsp lime juice
  • Zest from 1/2 lime
  • 1/2 cup coconut milk
  • 1/2 tsp green curry
  • 1 tbsp fresh cilantro
  • 1 small garlic clove
  • 1 small garlic clove
  • 1 tsp agave or honey
  • 1/2 tsp salt

Instructions

  1. In a highspeed blended add all ingredients and combine until the sauce is smooth. Taste and adjust seasoning as needed.
Thai-Seasoning-FB

Coconut thai spice blend

This tangy, fresh and spicy spice blend is amazing on chicken, fish, chickpeas, and vegetables.
  • Prep Time 5 Minutes
  • Total Time 5 Minutes
  • Serves 8 People
  • Calories 89 kcal

Ingredients

  • 1/2 cup shredded unsweetened coconut
  • zest of 1 lime
  • 1 tsp chili flakes
  • 1 tsp ground coriander
  • 1/2 tsp granualted garlic
  • 1/2 tsp salt

Instructions

  1. Combine all ingredients and store in an air tight container in the refregirator up to 1 week.

Nutritional Value