Pesto

We love pesto! Pesto is a delicious, easy and healthy way to enjoy fresh herbs. Pesto ads tons of flavour to dishes takes just a few seconds to make.

Pesto can be made using a traditional mortar and pestle, food processor or an immersion blender.

In this blog you will learn how to make:

  • Traditional basil pesto
  • Sun dried tomato pesto
  • Walnut pesto
  • Prairie pesto

Traditional Basil Pesto

pesto

Traditional Basil Pesto

This tradtional basil pesto is ready in seconds and is a delicious way to add flavour to pasta, pizza, grilled fish or even serve with a cheese plater.

This recipe makes 1 cup of pesto.
  • Total Time 1 to 5 Minutes

Ingredients

  • 1/4 tsp coarse salt
  • 1/4 clove of garlic
  • 1/3 cup pinenuts
  • 1/2 cup olive oil
  • 2 cups fresh basil
  • 1/4 cup grated parmesan

Instructions

  1. In a mortar, add the garlic and salt. Cruch for a few seconds to form a paste.
  2. Add the pine nuts to the mortar with about half the oil. Crush into a paste.
  3. Add the parmesan and half the basil to the mortar and crush. Add the rest of the basil and olive oil. Crush in the mortar until the basil leaves are fully incorporated to the other ingredients.

Sundried Tomatoe Pesto

Sundried tomato pesto

Sundried Pesto

This sundried pesto is ready in seconds and is a delicious way to add flavour to pasta, pizza, grilled fish or even serve with a cheese plater.

This delicious pesto comes together in seconds with a food processor.

This recipe makes 1 cup of pesto.
  • Total Time 1 Minutes

Ingredients

  • 1/2 cup sun-dried tomatoes
  • 1 cup fresh basil
  • 1/4 clove of garlic
  • 1/3 cup pinenuts
  • 1/2 cup grated parmesan
  • 1/2 tsp salt
  • 1/2 cup olive oil

Instructions

  1. In a food processor, add all ingredients and pulse until a paste forms - about 30 seconds.

Walnut Pesto

Walnut pesto

Walnut pesto

This Tuscan walnut pesto is a nice twist on traditional basil pesto.

Tuscan walnut pesto is a white pesto filled with walnuts, parmesan, milk and toasted bread.

This recipe is delicious on pasta

Makes 1 1/2 cup.
  • Total Time 17 Minutes

Ingredients

  • 1 cup toasted or stale bread cubes
  • 1/2 cup milk
  • 1/2 cup walnuts
  • 1/4 cup grated parmesan
  • 1/2 clove garlic
  • 1/4 tsp coarse salt

Instructions

  1. In a small bowl, place the bread and milk and allow the bread to soak the milk for 15 minutes.
  2. In a mortar, place the garlic and salt. Crush into a paste.
  3. Add the walnuts in the mortar and crush into a paste.
  4. Remove extra milk from the bread and add with the parmesan to the garlic. Crush into a paste.

Notes

If you'd prefer to use a food processor, complete step 1 as describe. Drain the extra milk and add all the ingredients to the food processor until a paste forms. 

Prairie Pesto

Prairie pesto

Prairie Pesto

This prairie pesto is ready in seconds and is a delicious way to add prairie flavour to sandwishes, and pizza.

This recipe makes 1 cup of pesto.
  • Total Time 1 to 5 Minutes

Ingredients

  • 1/2 tsp salt
  • 1/2 clove of garlic
  • 1/2 cup ground flax seeds
  • 1/2 cup olive oil
  • 2 cup fresh basil
  • 1/3 cup water

Instructions

  1. In a food processor, add the basil, oil, salt and garlic. Blend until a paste forms.
  2. Add the flaxseeds and water. Blend into a paste.

Jam

JAM! What better way to bottle up the Summer’s rays of sunshine than with delicious jams? When the days get shorter, darker and we begin to miss the summer days, we reach in the pantry and take a jar of jam. It always brings us back to the joys of summer. 

Reduce food waste with jams. Yes, you read that right! Jams are a delicious way to use bruised fruits. Often fruits that are a little older are sweeter and actually make better jams. 

In this blog you will learn how to make:

  • Easiest Strawberry Jam
  • Plum Preserves
  • Apricot Preserves
  • Saskatoon and Blueberry Jam

Strawberry Jam

strawberryjam2

Easiest Strawberry Jam

This Strawberry jam is done in 30 minutes with 3 ingredients in 3 easy steps. It doesn’t get any better than this!

This recipe makes 3 cups of jam and can easily be multiplied. You can make this jam with ANY berry. As long as you respect the sugar to berry ratio, your jam will be perfect every time.
  • Total Time 30 Minutes

Ingredients

  • 2 cups sugar
  • 1 pound, 4 cups whole Strawberries (fresh or frozen)
  • 2 tbsp lemon juice

Instructions

  1. In a pan, combine the strawberries, sugar, lemon juice. Bring to a boil uncovered on medium heat. Place a plate in the freezer to test when the jam is ready (step 2).
  2. Let boil for 10 to 15 minutes. Test if the jam is ready by placing a few drops on jam on the cold plate and drawing your finger through it. If the jam stays parted it is ready. If you would like small pieces of fruit you can mash the fruit using a potato masher.
  3. Carefully place the jam in clean jars. The jam will keep in the fridge for a week.

Notes

OPTIONAL: If you would like to keep your jam at room temperature you will need to can it. To do so, ensure your jars and lids have been sterilized (you can wash them in the dishwasher on sterilize mode). Bring a large pot of water to a boil and ensure there would be at least 2 inches of water over the jars. Fill the sterilized jars up to 1 inch from the top. Carefully place the lid and thighten  loosely. Place a dish towel at the bottom of the pot to provide a cushion between to bottom of the pot and the glass jars. Place the jars in the boiling water for 5 minutes (1 cup jars). Place the jars of jam on the counter to let them cool. You will hear the lid sceal and they will make a "pop" sound. If after a few hours, you didnt hear the sound, lightly press on the button on top of the lid, if it stays down the jars are scealed. 

Plum Jam

plum jam

Plum Preserve

Let’s take jam up a notch and move from the breakfast comfort of Strawberry jam to the dinner party. This plum preserve is lightly spiced with star anise. Plum preserve is amazing to serve with a cheese board. We love eating it with French bread, brie, and pear slices.

This recipe makes 4 cups of jam and can easily be multiplied.
  • Total Time 80 Minutes

Ingredients

  • 1 1/3 cups sugar
  • 2 pounds, 5 cups diced plums
  • 3 star anise

Instructions

  1. In a pan, combine the plums, sugar and star anise. Let sit for an hour or until the fruit becomes syrupy with the sugar. Bring to a boil uncovered on medium heat. Place a plate in the freezer to test when the preserve is ready (step 2).
  2. Let boil for 10 to 15 minutes. Test if the preserve is ready by placing a few drops on jam on the cold plate and drawing your finger through it. If the preserves stays parted it is ready.
  3. Carefully place the preserve in clean jars. The preserve will keep in the fridge for a week.

Notes

OPTIONAL: If you would like to keep your preserves at room temperature you will need to can it. To do so, ensure your jars and lids have been sterilized (you can wash them in the dishwasher on sterilize mode). Bring a large pot of water to a boil and ensure there would be at least 2 inches of water over the jars. Fill the sterilized jars up to 1 inch from the top. Carefully place the lid and thighten  loosely. Place a dish towel at the bottom of the pot to provide a cushion between to bottom of the pot and the glass jars. Place the jars in the boiling water for 5 minutes (1 cup jars). Place the jars of preserve on the counter to let them cool. You will hear the lid sceal and they will make a "pop" sound. If after a few hours, you didnt hear the sound, lightly press on the button on top of the lid, if it stays down the jars are scealed. 

Apricot Preserves

Apricot jam

Apricot Preserves

This apricot preserves is based on an old French recipes and represents the best of French country cuisine – delicious and simple.

Makes 3 cups. This recipe can easily be multiplied to make a larger quantity.
  • Total Time 60 Minutes

Ingredients

  • 1 cup sugar OR honey
  • 1/2 cup water
  • 1 1/2 pound, 3 cups diced apricot (save 1 pit)
  • 1 1/2 tbsp lemon juice
  • 2 tbsp almonds

Instructions

  1. Open 1 apricot pit and remove the almond like nut in it. Chop it coarsly. Chop coarsly the almonds. In a pan, combine the strawberries, sugar, lemon juice. Bring to a boil uncovered on medium heat. Place a plate in the freezer to test when the jam is ready (step 3).
  2. In a pot, add the sugar OR honey and water. bring to a boil uncovered on medium heat. Add the apricots, lemon juice, choped apricot pit and almonds.
  3. Let boil for about 30 minutes. Test if the preserve is ready by placing a few drops on jam on the cold plate and drawing your finger through it. If the jam stays parted it is ready.
  4. Carefully place the preserve in clean jars. The jam will keep in the fridge for a week.

Notes

OPTIONAL: If you would like to keep your preserves at room temperature you will need to can it. To do so, ensure your jars and lids have been sterilized (you can wash them in the dishwasher on sterilize mode). Bring a large pot of water to a boil and ensure there would be at least 2 inches of water over the jars. Fill the sterilized jars up to 1 inch from the top. Carefully place the lid and thighten  loosely. Place a dish towel at the bottom of the pot to provide a cushion between to bottom of the pot and the glass jars. Place the jars in the boiling water for 5 minutes (1 cup jars). Place the jars of preserves on the counter to let them cool. You will hear the lid sceal and they will make a "pop" sound. If after a few hours, you didnt hear the sound, lightly press on the button on top of the lid, if it stays down the jars are scealed. 

Saskatoon and Blueberry Jam

blueberry jam

Saskatoon and Blueberry Jam

This Saskatoon and Blueberry jam is done in 30 minutes with 3 ingredients in 3 easy steps. It doesn’t get any better than this! This recipe makes 3 cups of jam and can easily be multiplied. You can make this jam with ANY berry. As long as you respect the sugar to berry ratio, your jam will be perfect every time.
  • Total Time 30 Minutes

Ingredients

  • 2 cups sugar
  • 1/2 pound, 2 cups Saskatoon berries (fresh or frozen)
  • 1/2 pound, 2 cups blueberries (fresh or frozen)
  • 2 tbsp lemon juice

Instructions

  1. In a pan, combine the berries, sugar, lemon juice. Bring to a boil uncovered on medium heat. Place a plate in the freezer to test when the jam is ready (step 2).
  2. Let boil for 10 to 15 minutes. Test if the jam is ready by placing a few drops on jam on the cold plate and drawing your finger through it. If the jam stays parted it is ready. If you would like small pieces of fruit you can mash the fruit using a potato masher.
  3. Carefully place the jam in clean jars. The jam will keep in the fridge for a week.

Notes

OPTIONAL: If you would like to keep your jam at room temperature you will need to can it. To do so, ensure your jars and lids have been sterilized (you can wash them in the dishwasher on sterilize mode). Bring a large pot of water to a boil and ensure there would be at least 2 inches of water over the jars. Fill the sterilized jars up to 1 inch from the top. Carefully place the lid and thighten  loosely. Place a dish towel at the bottom of the pot to provide a cushion between to bottom of the pot and the glass jars. Place the jars in the boiling water for 5 minutes (1 cup jars). Place the jars of jam on the counter to let them cool. You will hear the lid sceal and they will make a "pop" sound. If after a few hours, you didnt hear the sound, lightly press on the button on top of the lid, if it stays down the jars are scealed. 

Perfect Pies

PIES! Pies are filled with memories and comfort. They remind us of holidays, spending quality time with our grand-mothers and mother. 

Reduce food waste with pies. Yes, you read that right! Pies are a delicious way to use bruised fruits and vegetables. Often fruits and vegetables that are a little older are sweeter and actually make better pies. 

In this blog you will learn how to make:

  • Perfect pie crust
  • Saskatoon apple pie
  • Tomato tart

Perfect Pie Crust

crust ingredients

Perfect Pie Crust

This is our mother’s fail prof pie recipe! We cherish it and are excited to share it with you. We use this pie crust recipe to make all kinds of pies. From tourtieres to saskatoon berry pies you will get the perfect buttery puffed layered crust. This recipe makes three 8 inch pies (top and bottom).
  • Total Time 75 Minutes

Ingredients

  • 3 cups all purpose flour
  • 1 cup cold unsalted butter
  • 1 egg
  • 1/2 tbsp apple cider vinegar
  • 1/2 tsp salt
  • 3/4 cup cold water

Instructions

  1. In a medium bowl, add the flour. Cube the cold water. Using a pastry blender (or 2 butter knifes) cut the butter in the flour until the pieces of butter are about the size of rolled oats.
  2. In a small bowl, add and combine the egg, apple cider vinegar, salt and cold water.
  3. Add the liquid ingredient to the flour and butter. Combine until there is no more dry flour and ensuring not to overmix the dough.
  4. Cover the dough with plastic wrap and chill in the fridge for about 1 hour.
  5. Turn on the oven to 425F. Divide the chilled dough in 6 even segment. Each segment will become an 8" crust. Spread flour on the counter and on a rolling pin. Roll the dough starting from the middle out to form a circle. If you notice to dough starts to stick, add a bit of flour on the counter and on the dough to ensure it does not stick. Roll the dough to about 1/4 cm thickness.
  6. Place the dough in an 8" pie mold and cut the excess dough. Fill the pie and cover with another pie crust. Cut the top crust about 1 cm larger than the pie mold. Fold the top pie crust under the bottom pie crust and press the edge with a fork. Bake at 425F for 15 minutes. Reduce the heat to 350F and bake for an additional 30 minutes.

Notes

Freezing: This crust can easily be frozen for up to 4 months. After combining the dough (step 3), divide the dough in 6 and wrap each ball of dough in plastic wrap before freezing. Blind baking pies: To bake only the bottom of a pie crust, make wholes in the crust with a fork and place foil on top of the crust and fill with pie weights or dry beans. This will ensure the pie keeps its shape while it bakes. Bake at 400F for about 10-15 minutes if the pie will bake again (e.g. quiche) if the crust needs to be fully cooked (e.g. banana cream pie) bake until the bottom crust is golden brown - about 20 minutes.

Saskatoon Apple Pie

filling ingredients

Saskatoon Apple Pie

Saskatoon apple pie is not only an amazing flavour combination; it also holds a special meaning for us. We grew up in Quebec beside an apple orchard. The delicious combination of Saskatoon berries and apples represent our 2 homes. This recipe makes an 8 inch pie and easily serves 6.
  • Prep Time 5 Minutes
  • Cook Time 45 Minutes
  • Total Time 50 Minutes
  • Serves 6 People

Ingredients

  • 2 pie crust (1/3 of the above recipe)
  • 3 tbsp all purpose flour
  • 3 tbsp Saskatoon berry jelly
  • juice and zest of 1/2 lemon
  • 2/3 cup sugar
  • 3 cups Saskatoon berries
  • 2 peeled and diced apples

Instructions

  1. Turn on the oven to 425F. In a bowl, add and combine all filling ingredients.
  2. Divide the chilled dough in 6 even segment. Each segment will become an 8" crust. Spread flour on the counter and on a rolling pin. Roll the dough starting from the middle out to form a circle. If you notice to dough starts to stick, add a bit of flour on the counter and on the dough to ensure it does not stick. Roll the dough to about 1/4 cm thickness.
  3. Place the dough in an 8" pie mold and cut the excess dough. Fill the pie and cover with another pie crust. Cut the top crust about 1 cm larger than the pie mold. Fold the top pie crust under the bottom pie crust and press the edge with a fork. Bake at 425F for 15 minutes. Reduce the heat to 350F and bake for an additional 30 minutes.

Notes

Freeze: You can freeze the pie before baking for up to 3 months. Bake at 400F for 30 minutes. 

Tomato Tart

tomato tart

Tomato Tart

This tart is a beautiful ways to use the abundance of garden tomatoes this summer. It is filled with layers of fresh tomatoes, cheeses and fresh herbs. We love serving it with a large green salad dressed with lemon juice and olive oil.
  • Prep Time 10 Minutes
  • Cook Time 60 Minutes
  • Total Time 70 Minutes
  • Serves 4 People

Ingredients

  • 1 1/2 lb tomatoes
  • 1 tsp salt
  • 2 tsp french style mustard
  • 1/3 cup goat cheese
  • 1/3 cup fetta cheese
  • 1/3 cup mozarella
  • 1/2 cup fresh herbs (basil, chilves, teragon)

Instructions

  1. Cut the tomatoes into 1/2 cm. Place the tomatoes in a strainer and sprinkle with salt. Let the tomatoes drain for about 15 minutes.
  2. While the tomatoes are draining, spread flour on the counter and on a rolling pin. Roll the dough starting from the middle out to form a circle. If you notice to dough starts to stick, add a bit of flour on the counter and on the dough to ensure it does not stick. Roll the dough to about 1/4 cm thickness. Place the crust at the bottom of an 8 inch pie mold. (You can also use a rectangular pie mold, just ensure to roll the dough in a rectangular shape)
  3. Use a fork to make wholes in the pie crust and place foil on top of the crust and fill with pie weights or dry beans. This will ensure the pie keeps its shape while it bakes. Bake at 400F for 10 - 15 minutes.
  4. Evenly spread the mustard on the bottom of the tart. Place 1/2 of each cheeses on top of the mustard add a layer of tomatoes and 1/2 of the fresh herbs. Place the rest of the cheese, herbs and garnish with an other layer of tomatoes.
  5. Bake at 350F for 25 to 30 minutes until the cheese is melted. Let cool about 10 minutes and serve with a green salad.

The Art of Making Bread – Overnight

We are taking you on a journey to discover Saskatchewan through your kitchen. The art of making bread has been passed from generation to generation in our family and we are proud to share this beautiful satisfying art with you.

Rosemary olive bread - baked

Olive Rosemary Bread

Olive and rosemary are a delicious pairing of flavours. This bread can be made with ingredients sourced from farmers and producers of Saskatchewan. This recipe is a delicious side for the Minestrone Soup on the ZestyKits menu next week.
  • Prep Time 5 Minutes
  • Cook Time 45-50 Minutes

Ingredients

  • 3 1/2 cup flour
  • 1 1/2 tsp salt
  • 1/2 tsp liquid honey
  • 1/2 tsp instant yeast
  • 1 1/2 tsp fresh or dry rosemary
  • 3/4 cup pitted black olives
  • 1 3/4 cup water

Instructions

  1. Disolve the honey into the water.
  2. Combine all ingredients (water last) in a large bowl. We love using a wooden spoon. Ensure there is no dry flour left. Cover with a tea towel and let rise from 8 to 18 hours.
  3. Once you are ready to bake the bread, turn on the oven to 450F. Place a 3 qt or larger dutch oven in the oven to heat up. While the oven is heating, place the risen dough on floured parchment paper and shape the dough into a ball. Garnish the top of the bread as desired. We used rosemary and finishing salt.
  4. Carefully remove the hot dutch oven from the oven. Lift the bread with the parchment paper and place the dough and parchment paper in the dutch oven. Cover and bake 30 minutes covered. Remove the lid and continue to bake for approximately 15 minutes.
  5. Bon appetit!

Notes

It is very important to heat up the dutch oven before adding the bread. This will create a contrast in temperature that will make your crust crispy. You can make this recipe using ingredients sourced from Saskatchewan farmers and producers. We used flour from R&J milling, rosemary from splendor garden, yeast from Local & Fresh, local honey and  black olives from the Italian Star Deli.

Perfect baked fries – 5 ways

Canada’s potato industry is struggling due to the COVID-19 pandemic. The demand for potatoes has plummeted with the closure of restaurants. It is estimates that over 200 million pounds of potatoes are in limbo. Canadian potato farmers are asking for your help. By eating locally grown potatoes we are supporting our local farmers and economy.

BBQ season is here! Fries are one of our favourite BBQ side. How about a healthier alternative to the traditional fried fries? How about the PERFECT baked fries?!

We are offering baked fries recipes because they are just as delicious and crispy as fried but without the extra calories.  In this blog we teaching you how to make the perfect baked fries. As you learn the basic techniques, we teach you new techniques to elevate your baked fries to poutine and truffle parmesan lemon garlic fries – perfect for date night. 

In this blog you will learn 5 delicious ways to use and modify your baked fries:

  1. Perfect baked fries
  2. Greek baked fries with lemon garlic aioli 
  3. Cajun baked fries with Cajun Remoulade
  4. Poutine
  5. Truffle parmesan garlic lemon baked fries
oven baked friesResized

Perfect Baked Fries

Many baked fries recipe make soggy fries. This recipe makes perfect crispy oven baked fries that are as tasty as restaurant fries. An added bonus of baked fries is they are the healthiest fries! Baking fries not only saves you money and extra calories but also lets you easily use locally sourced ingredients. Note that the baking time depnds on how thick your fries are.
  • Prep Time 10 + 10 Minutes
  • Cook Time 35 Minutes
  • Total Time 55 Minutes
  • Serves 4 to 6 People

Ingredients

  • 1500 gr (about 6) yukon gold potatoes
  • 1/4 cup vegetable oil - we use camelina oil
  • 1/2 tsp granulated garlic
  • 1/2 tsp onion powder
  • 1 tsp salt
  • 1/4 tsp black pepper

Instructions

  1. Preheat oven to 450 F. Place a cooling rack on a baking sheet.
  2. Place the potatoes in a large bowl, then pour very hot tap water over the top so that it covers the potatoes by at least 1 inch. Let sit 10 minutes.
  3. Drain the potatoes, then transfer them to a clean towel and dry as completely as you can. Note: you may need to use 2 towels.
  4. Return the potato sticks to the bowl. Add the vegetable oil, granulated garlic, onion powder, salt, and black pepper and combine to evenly coat to potatoes. On the cooling rack, spread the potato sticks in a single layer, leaving space around each potato.
  5. Bake in the preheated oven for 30 to 35 minutes - or until desired crisp.

Notes

Baked fries are best the day they are made. If you need to reheat them, you can make them crispy again by heating them in a 400F oven for about 5 to 6 minutes.If you don't have a cooling rack, you can line a baking sheet with parchment paper and bake the fries directly on the parchment paper. You will need to turn the fries are 15-20 minutes to ensure they are baked evenly. 
garlic friesResized

Greek baked fries with lemon garlic aioli 

These fries with a greek salad are our favourite sides for Greek chicken souvlaki. The baked fries are filled with greek flavours which is enhanced by the lemon garlic aioli. The aioli can also be used as a dipping sauce for your souvlakis.
  • Prep Time 10 + 10 Minutes
  • Cook Time 35 Minutes
  • Total Time 55 Minutes
  • Serves 4 to 6 People

Ingredients

  • 1500 gr (about 6) yukon gold potatoes
  • 1/4 cup vegetable oil - we use camelina oil
  • 2 tbsp greek spice blend - we use Splendor garden
  • 1 tsp salt
  • 1/4 tsp black pepper
  • 3/4 cup mayonaise
  • 2 to 3 medium clove garlic - minced
  • 1/2 tsp salt
  • 1/2 tsp lemon zest
  • 2 1/2 tbsp lemon juice

Instructions

  1. Preheat oven to 450 F. Place a cooling rack on a baking sheet.
  2. Place the potatoes in a large bowl, then pour very hot tap water over the top so that it covers the potatoes by at least 1 inch. Let sit 10 minutes.
  3. Drain the potatoes, then transfer them to a clean towel and dry as completely as you can. Note: you may need to use 2 towels.
  4. Return the potato sticks to the bowl. Add the vegetable oil, Greek spice blend, salt, and black pepper and combine to evenly coat to potatoes. On the cooling rack, spread the potato sticks in a single layer, leaving space around each potato.
  5. Bake in the preheated oven for 30 to 35 minutes - or until desired crisp.
  6. While the fries are cooking, make the aioli by adding in a small bowl: mayonaise, minced garlic, salt, lemon zest and lemon juice. Combine.

Notes

Baked fries are best the day they are made. If you need to reheat them, you can make them crispy again by heating them in a 400F oven for about 5 to 6 minutes.If you don't have a cooling rack, you can line a baking sheet with parchment paper and bake the fries directly on the parchment paper. You will need to turn the fries are 15-20 minutes to ensure they are baked evenly.  Whats an aioli?Aioli is an emulsified sauce made of oil and garlic.  Garlic infused mayonnaise is the most basic aioli.  Many restaurants will start with mayonnaise as the base of their aiolis.
cajun friesResized

Cajun fries with cajun remoulade sauce

These cajun fries with cajun green breans are our favourite sides with a BBQ cajun steak, tofu steak of chicken breast. The cajun remoulade features beautiful Saskatchewan ingredients and is filled with layers of flavour.
  • Prep Time 10 + 10 Minutes
  • Cook Time 35 Minutes
  • Total Time 55 Minutes
  • Serves 4 to 6 People

Ingredients

  • 1500 gr (about 6) yukon gold potatoes
  • 1/4 cup vegetable oil - we use camelina oil
  • 2 tbsp greek spice blend - we use Splendor garden
  • 1 tsp salt
  • 1/4 tsp black pepper
  • 3/4 cup mayonaise
  • 1 medium clove garlic - minced
  • 2 tsp cajun blacking spice - we use Splendor Gardens
  • 2 tbsp cajun mustard - we use Gravelbourg mustard
  • 2 tbsp horseradish
  • 1 tbsp worcestershire sauce
  • 1 tsp lemon juice
  • 1/4 cup parsley minced

Instructions

  1. Preheat oven to 450 F. Place a cooling rack on a baking sheet.
  2. Place the potatoes in a large bowl, then pour very hot tap water over the top so that it covers the potatoes by at least 1 inch. Let sit 10 minutes.
  3. Drain the potatoes, then transfer them to a clean towel and dry as completely as you can. Note: you may need to use 2 towels.
  4. Return the potato sticks to the bowl. Add the vegetable oil, salt, and black pepper and combine to evenly coat to potatoes. On the cooling rack, spread the potato sticks in a single layer, leaving space around each potato.
  5. Bake in the preheated oven for 30 to 35 minutes - or until desired crisp.
  6. While the fries are cooking, make the aioli by adding in a small bowl: mayonaise, minced garlic, cajun blackning spice, cajun mustard, horseradish, worcestershire sauce, lemon juice and parsley. Combine.

Notes

Baked fries are best the day they are made. If you need to reheat them, you can make them crispy again by heating them in a 400F oven for about 5 to 6 minutes.What is a remoulade? Remoulade is an aioli served chilled with a variety of herbs and spices.  The traditional French remoulade is made with mayonaise, mustard, capers, anchovies, and pickles.  In this cajun inspired remoulade we used creamed horseradish to bring the pickled element (replacing the capers and pickles) and worcestershire sauce to bring the umami (replacing the anchovies).Cooling rack note: If you don't have a cooling rack, you can line a baking sheet with parchment paper and bake the fries directly on the parchment paper. You will need to turn the fries are 15-20 minutes to ensure they are baked evenly. 
truffle friesResized

Truffle parmesan garlic lemon baked fries

These truffle fries can proudly be served for a date night or at a dinner party. They are simple but are filled with layers of flavour you will be proud of! We love serving these fries with white wine garlic mussels to create the iconing “moules frites”.
  • Prep Time 10 + 10 Minutes
  • Cook Time 35 Minutes
  • Total Time 55 Minutes
  • Serves 4 to 6 People

Ingredients

  • 1500 gr (about 6) yukon gold potatoes
  • 1/4 cup vegetable oil - we use camelina oil
  • 2 tbsp greek spice blend - we use Splendor garden
  • 1 tsp salt
  • 1/4 tsp black pepper
  • 2 medium clove garlic - minced
  • 1 tsp lemon zest
  • 2 tbsp gratted parmesan
  • 1/4 cup parsley
  • 1 tbsp truffle oil - we get ours at Italian Star Deli or Oliv Tasting Room

Instructions

  1. Preheat oven to 450 F. Place a cooling rack on a baking sheet.
  2. Place the potatoes in a large bowl, then pour very hot tap water over the top so that it covers the potatoes by at least 1 inch. Let sit 10 minutes.
  3. Drain the potatoes, then transfer them to a clean towel and dry as completely as you can. Note: you may need to use 2 towels.
  4. Return the potato sticks to the bowl. Add the vegetable oil, salt, and black pepper and combine to evenly coat to potatoes. On the cooling rack, spread the potato sticks in a single layer, leaving space around each potato.
  5. Bake in the preheated oven for 25 to 30 minutes - or until almost desired crisp. Add the minced garlic on the fries and return to the oven for about 5 minutes
  6. Garnish the fries with lemon zest, parmesan, parsley and truffle oil.

Notes

Baked fries are best the day they are made. If you need to reheat them, you can make them crispy again by heating them in a 400F oven for about 5 to 6 minutes.Cooling rack note: If you don't have a cooling rack, you can line a baking sheet with parchment paper and bake the fries directly on the parchment paper. You will need to turn the fries are 15-20 minutes to ensure they are baked evenly. 
poutine

Poutine

Now we are talking! Having mastered the technique of oven baked fries let’s make the ultimate French Canadian savoury delight – Poutine! This poutine offers the authentic taste of Quebec’s iconic poutine: crispy fries, cheese curds and tons of poutine gravy.
  • Prep Time 10 + 10 Minutes
  • Cook Time 35 Minutes
  • Total Time 55 Minutes
  • Serves 4 to 6 People

Ingredients

  • 1500 gr (about 6) yukon gold potatoes
  • 1/4 cup vegetable oil - we use camelina oil
  • 2 tbsp greek spice blend - we use Splendor garden
  • 1 tsp salt
  • 1/4 tsp black pepper
  • 480 gr cheese curds - we use Bothwell “Squeak’rs”
  • 2 cloves garlic - minced
  • 3 tbsp cornstarch
  • 2 tbsp water
  • 1/3 cup unslated butter
  • 1/4 cup all purpose flour
  • 1 tbsp worcestershire sauce
  • 1 tbsp balsamic vinegar
  • 1 tsp onion powder
  • 2 tbsp ketchup
  • 2 cup beef broth - we use pine view farms
  • 1 cup chicken broth - we use pine view farms
  • 3/4 cup stout beer - there are so many good local options: District, Rebellion, Pile of Bones...
  • 1/2 tsp pepper + 1/2 tsp salt

Instructions

  1. Preheat oven to 450 F. Place a cooling rack on a baking sheet.
  2. Place the potatoes in a large bowl, then pour very hot tap water over the top so that it covers the potatoes by at least 1 inch. Let sit 10 minutes.
  3. Drain the potatoes, then transfer them to a clean towel and dry as completely as you can. Note: you may need to use 2 towels.
  4. Return the potato sticks to the bowl. Add the vegetable oil, salt, and black pepper and combine to evenly coat to potatoes. On the cooling rack, spread the potato sticks in a single layer, leaving space around each potato.
  5. Bake in the preheated oven for 30 to 35 minutes. Because in Saskatchewan it's difficult to get fresh cheese curd we recommend spreading the cheese curds on the fries evenly and leaving them in the oven for an additional 30 seconds to enhance the "squeek".
  6. While the fries are baking, make the poutine gravey. In a small bowl add the cornstarch and water. Combine and set aside. In a pot, melt the butter. Add the flour and cook for 5 minutes, stirring regularly - until it turns a light golden. Add the minced garlic and cook an additional 30 seconds - stirring regularly to prevent the garlic from burning.
  7. Add the worcestershire sauce, balsamic vinegar, onion powder, ketchup, beef and chicken broth and beer. Bring to a boil whisking regularly. Add about half the cornstarch mixture let simmer, whisking regularly. If you would like your gravey thicker add the rest of the cornstarch mixture. Season with salt and pepper. Taste and adjust seasoning.
  8. Serve the fries and cheese by topping them with a generous amount of poutine gravey.

Notes

Baked fries are best the day they are made. If you need to reheat them, you can make them crispy again by heating them in a 400F oven for about 5 to 6 minutes.Cooling rack note: If you don't have a cooling rack, you can line a baking sheet with parchment paper and bake the fries directly on the parchment paper. You will need to turn the fries are 15-20 minutes to ensure they are baked evenly. You can replace the beer by beef or chicken stock. 

6 Comforting Pantry Recipes

Catherine Beaudoin
Co-founder ZestyKits

During difficult times, I turn to comforting dishes from my childhood. These classic dishes fill the house with nostalgic smells that bring me back in time, and for a moment, I feel the joy and peace of childhood. 

Growing up, my sisters and I spent countless hours in the apple orchard behind our house. I remember coming back home on cold spring afternoons after spending hours with my sisters in the apple orchard. As soon as we walked in, the smell of these dishes welcomed us home, as if to say – you are safe, you are loved.

These recipes use pantry ingredients and are easy to prepare. To learn how to fully stock your pantry check out the Ultimate Guide to Pantry Essentials.  These easy and comforting pantry recipes will help you get a delicious dinner on the table quickly using everyday pantry ingredients. I hope these classic recipes bring joy into your home as they do in mine.

Crusty White Bread

Raising time: 12 hours
Makes: 1 loaf
  • Prep Time 20 Minutes
  • Cook Time 60 Minutes

Ingredients

  • 3 ½ cups all-purpose flour
  • 1 ½ tsp. salt
  • ½ tsp. dry yeast
  • 1 ¾ cups cold water
  • ¼ cup whole-wheat flour

Instructions

  1. In a large pot, combine the flour, salt and yeast. Add the water. With a fork, stir until the flour is completely moistened, but not necessarily smooth. Cover and let rise at room temperature for 8 to 12 hours, or overnight.
  2. In a large bowl, place the whole wheat flour. Set aside.
  3. With your hands, directly in the pot, fold the risen dough onto itself until smooth (about 6 times).
  4. Transfer the dough into the bowl with the whole wheat flour and turn to coat the entire surface of the dough. Cover and let rise for 45 minutes at room temperature or until it has doubled in volume.
  5. Meanwhile, with the rack in the middle position, preheat the oven to 450°F. Place a 3 litre Dutch oven or ovenproof pot with its lid (not glass) in the oven, and heat for about 30 minutes.
  6. Drop the floured bread dough in the centre of the hot pot. Cover and bake for 30 minutes. Remove the lid and continue baking for 30 minutes.
  7. Let the bread cool on a wire rack or in the pot.

Tomato Soup

Serve with: Grilled cheese
  • Prep Time 15 Minutes
  • Cook Time 35 Minutes
  • Total Time 50 Minutes
  • Serves 6 People

Ingredients

  • 2 onions - diced
  • 2 cloves garlic - thinly sliced
  • 2 tbsp olive oil
  • 2 cans (28oz, 796ml) whole tomatoes
  • 4 cups chicken or vegetable broth
  • 1 tbsp. brown sugar
  • 1 tsp. dried oregano
  • 1 tsp. Salt
  • ¼ tsp. pepper
  • Sliced chorizo - optional
  • pesto - optional

Instructions

  1. In a large saucepan over medium-high heat, soften the onions and garlic in the oil.
  2. Add the tomatoes, broth, brown sugar and oregano. Bring to a boil. Let simmer for 30 minutes. Season with salt and pepper
  3. With an immersion blender, purée until smooth. Garnish and serve with grilled cheese

Meatloaf

Serve with: Mashed potatoes, green peas, salad
  • Prep Time 10 Minutes
  • Cook Time 90 Minutes
  • Total Time 100 Minutes
  • Serves 6 People

Ingredients

  • 1 egg
  • 1 onion - finely diced
  • 1 tbsp. relish
  • 1 tbsp. ketchup
  • 1 tsp. dry parsley
  • 1 ½ tsp. salt
  • ¼ tsp. pepper
  • 2 lbs ground beef
  • ½ cup quick oats
  • ¼ cup ketchup
  • 1 tbsp. brown sugar
  • ¼ tsp. dry mustard

Instructions

  1. Turn on the oven to 350F. In a large bowl, combine the egg, diced onion, relish, ketchup, parsley, salt and pepper. Add the ground beef and oats. Using your hands or a wooden spoon, combine.
  2. Place the meat in a loaf pan 23cm x 13cm x 6cm (9” x 5” x 3”).
  3. Combine all the topping ingredients in a small bowl. Place the topping evenly on top of the loaf.
  4. Bake about 1 hour 30 minutes or until fully cooked.

Beef Stew

Serve with: Bread
  • Prep Time 15 Minutes
  • Cook Time 120 Minutes
  • Total Time 135 Minutes
  • Serves 6 People

Ingredients

  • 2 lbs beef cubes
  • ⅓ cups flour
  • 2 tbsp. oil
  • 2 tsp. salt
  • ¼ tsp. pepper
  • 2 tbsp dried parsley
  • ¼ tsp. dried thyme
  • 4 cups tomato juice
  • 3 carrots - in 1 cm slices
  • 1 cup - rutabaga - dices
  • 2 cups - potatoes - diced
  • 12 oz - frozen peas
  • Fresh parsley

Instructions

  1. Coat the beef cubes with flour.
  2. Add the oil to a large pot on medium-high heat. Roast the beef cubes about 4 minutes per side until browned. Do not over crowd the pot - ensure there is space between each cube to promote browning.
  3. Add the salt, pepper, parsley, thyme and tomato juice. Bring to a boil, cover, lower the heat to low and let simmer for 1 hour. Stir a few times while cooking.
  4. Add the carrots, rutabaga and potatoes. Cover and let simmer an additional 50 minutes.
  5. Add the frozen peas and cook for an additional 10 minutes. Garnish with fresh parsley. Serve with bread.

Sweet and Sour Pork

Serve with: Rice
  • Prep Time 20 Minutes
  • Cook Time 60 Minutes
  • Total Time 80 Minutes
  • Serves 6 People

Ingredients

  • 1 tbsp. oil
  • 2 tbsp. cornstarch
  • ½ cup sugar
  • ½ cup vinegar
  • 2 tbsp soy sauce
  • 1 green pepper diced
  • 1 red pepper diced
  • 1 540 ml can pineapple - dice the pineapple
  • 1 large onion diced
  • 2 lbs pork tenderloin

Instructions

  1. Turn on the oven to 350F. Cut the pork into bite size pieces.
  2. In a large pot that goes in the oven, add 1 tbsp. oil and pork. Cook about 4 minutes on each side to brown the meat. Add the diced onion.
  3. Combine the cornstarch, sugar, vinegar, soy sauce, in a small pot. Cook on medium heat, until the sauce is transparent. Add the sauce to the pork.
  4. Add the soy sauce, green pepper, pineapple and juice to the pork.
  5. Cover and bake at 350F for 1 hour or until the meat is tender. Serve with rice.

Slow-Cooker Chicken-Tortilla Soup

Cook 4 hours on high OR 8 hours on low
  • Prep Time 20 Minutes
  • Serves 8 People

Ingredients

  • 2 lb. skinless, boneless chicken thighs
  • 1 large onion - diced
  • 2 red bell pepper - diced
  • 4 garlic clove - minced
  • 4 cups chicken stock
  • 1 can (28oz, 796ml) diced tomatoes
  • 2 cans (8 oz.) tomato sauce
  • 1 tsp. chili powder
  • 1 tbsp. paprika
  • 1 tbsp. brown sugar
  • 2 tsp. dried oregano
  • 1 1/2 tsp. ground cumin
  • 1 tsp. Sea salt
  • 1/4 tsp. black pepper
  • 3 zucchini, halved and sliced
  • 200 gr green beans, halved
  • 2 tbsp. fresh lime juice
  • fresh cilantro - optional
  • sliced jalapenos - optional
  • sour cream - optional
  • tortilla chips - optional

Instructions

  1. Combine chicken, onion, bell pepper, garlic, stock, diced tomatoes, tomato sauce, chiles, chili powder, brown sugar, oregano, and cumin in the slow cooker. Season with salt and pepper.
  2. Cook, covered, until chicken is cooked through on low 8 hours or on high 4 hours. Add zucchini and green beans and cook, covered, for 30 minutes. Remove chicken, shred meat; return to slow cooker. Stir in lime juice.
  3. Serve and garnish with cilantro, jalapeños, and sour cream, with tortilla chips.

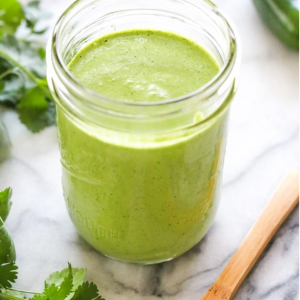
Green Curry Coconut Sauce

This amazing creamy, zesty and fresh sauce is amazing on our signature Green Curry Coconut Bowl. This sauce is perfect as dressing on salads, tacos, bowls and poke bowls. The spicy and zesty flavours complements  Thai, Hawaiian, Caribbean, and Mexican flavours. This sauce is filled with flavours that marry beautifully together to easily create dishes the whole family will love.

greensauce

Green Curry Coconut Sauce

This creamy, zesty, and fresh sauce is perfect as a salad dressing and on a bowl.
  • Prep Time 5 Minutes
  • Total Time 5 Minutes
  • Serves 2 People
  • Calories 145 kcal

Ingredients

  • 2 tbsp lime juice
  • Zest from 1/2 lime
  • 1/2 cup coconut milk
  • 1/2 tsp green curry
  • 1 tbsp fresh cilantro
  • 1 small garlic clove
  • 1 tsp agave or honey
  • 1/2 tsp salt

Instructions

  1. In a highspeed blended add all ingredients and combine until the sauce is smooth. Taste and adjust seasoning as needed.

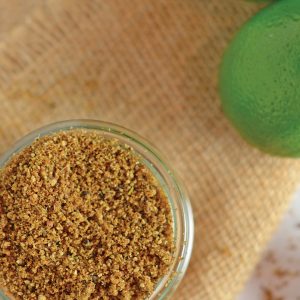
Coconut Thai spice blend

Coconut Thai Spice blend is a delicious fresh, zesty and spicy blend that is featured in our signature Curry Coconut Bowl.

This spice blend is delicious on chicken, fish, chickpeas. It complements very well Thai, Hawaiian, Mexican and Caribbean dishes. 

Thai-Seasoning-FB

Coconut thai spice blend

This tangy, fresh and spicy spice blend is amazing on chicken, fish, chickpeas, and vegetables.
  • Prep Time 5 Minutes
  • Total Time 5 Minutes
  • Serves 8 People
  • Calories 89 kcal

Ingredients

  • 1/2 cup shredded unsweetened coconut
  • zest of 1 lime
  • 1 tsp chili flakes
  • 1 tsp ground coriander
  • 1/2 tsp granualted garlic
  • 1/2 tsp salt

Instructions

  1. Combine all ingredients and store in an air tight container in the refregirator up to 1 week.

Green Curry Coconut Bowl

Green Curry Coconut Bowls with Chicken is an easy flavorful dinner that follows the new Canada Food Guide guidelines! This dish is gluten-free, dairy-free and, with easy modifications, can be plant-based.

The majority of the ingredients in this refreshing dish can be sourced from Saskatchewan producers.

With the changes announced to the Canada Food Guide in January, we are happy to show you this easy and delicious way to follow the new guidelines.

We often crave the freshness and comfort of Thai foods. The beauty of Thai food is the abundance of spices and this dish is no exception! The meal is also amazing as left overs for lunch so feel free to double or triple the recipe. We could eat this Green Curry Coconut Bowl for lunch every day!

ZestyKits easily introduces a lot of fresh and bright flavours through spices, sauces and fresh herbs. This dish combines all three to create an explosion of flavour the whole family will love.

We made this recipe on Global News and are happy to share the full recipe with you! 🙂

IMG_3927

Green Curry Coconut Bowl

We often crave the freshness and comfort of Thai foods. The beauty of Thai food is the abundance of spices and this dish is no exception! This easy delicious meal follows the new Canada Food Guide recommendations. This recipes makes 2 extra large servings with 36gr of protein and 46% recommended daily fiber.
  • Prep Time 15 Minutes
  • Cook Time 15 Minutes
  • Total Time 30 Minutes
  • Serves 2 People
  • Calories 644 kcal

Ingredients

  • 3/4 cup quinoa
  • 1 1/2 cups water
  • 200 grams chicken breast slices
  • 3 tsp Coconut Thai Spice Blend (see recipe below)
  • 2 cups broccoli
  • 1 red Thai pepper
  • 1 lime
  • 1 cup shredded carrots (about 2 carrots)
  • 1 cup shredded red cabbage
  • 1 tbsp unsweetened shredded coconut
  • 2 tbsp fresh cilantro
  • 2/3 cup Green Curry Coconut sauce (see recipe below)

Instructions

  1. Cook the quinoa
    Turn on the oven to 375F for the chicken. Place the quinoa in a strainer and rinse well. Add the quinoa, water and 1/4 tsp salt to a pot. Stir to combine. Bring the water to a boil on medium/high heat. Reduce the heat to low, cover and let simmer 15 minutes, or until the water is absorbed. Remove the pot from heat and fluff the quinoa with a fork.
  2. Slice the chicken
    in about 1 cm thick slices. Coat the chicken with about 1/2 tsp oil and 3 tsp coconut spice blend. Place the Spiced chicken on the baking sheet, salt as desired and bake until the chicken is fully cooked – about 15 minutes. Note: Ensure the chicken is cooked to at least 165F.
  3. Prepare the vegetables
    Cut the lime in segments. Cut the broccoli in small fleurets. Steam in the microwave for about 1 minute to 90 seconds. Thinly slice the red thai pepper. We recommend wearing a glove to not burn your hands.
  4. Prepare the spice blend and sauce
    See recipes below to prepare the Coconut Thai Spice blend and the Green Curry Coconut Sauce
  5. Assemble
    In two large serving bowls, place half the quinoa (about 1 1/4 cup). Place about 1/3 cup green curry sauce on each bowl. Arrange the steamed broccoli, shredded carrot, shredded cabbage. Garnish with red Thai pepper slices, unsweetned shredded coconut, lime wedge and fresh cilantro.

Bon Appetit!

Plant-based Modifications

Plant-based modifications: To build a plant based version of this dish, replace the chicken by 1 1/2 cup cooked chickpeas. Coat the chickpeas with 1 tsp oil and 3 tsp coconut Thai spice blend. Place on a baking sheet and bake at 350F for 10 minutes.

greensauce

Green Curry Coconut Sauce

This creamy, zesty, and fresh sauce is perfect as a salad dressing and on a bowl.
  • Prep Time 5 Minutes
  • Total Time 5 Minutes
  • Serves 2 People
  • Calories 145 kcal

Ingredients

  • 2 tbsp lime juice
  • Zest from 1/2 lime
  • 1/2 cup coconut milk
  • 1/2 tsp green curry
  • 1 tbsp fresh cilantro
  • 1 small garlic clove
  • 1 small garlic clove
  • 1 tsp agave or honey
  • 1/2 tsp salt

Instructions

  1. In a highspeed blended add all ingredients and combine until the sauce is smooth. Taste and adjust seasoning as needed.
Thai-Seasoning-FB

Coconut thai spice blend

This tangy, fresh and spicy spice blend is amazing on chicken, fish, chickpeas, and vegetables.
  • Prep Time 5 Minutes
  • Total Time 5 Minutes
  • Serves 8 People
  • Calories 89 kcal

Ingredients

  • 1/2 cup shredded unsweetened coconut
  • zest of 1 lime
  • 1 tsp chili flakes
  • 1 tsp ground coriander
  • 1/2 tsp granualted garlic
  • 1/2 tsp salt

Instructions

  1. Combine all ingredients and store in an air tight container in the refregirator up to 1 week.

Nutritional Value